Are you an After Effects user new to Resolve 15? The Fusion Page in Resolve uses nodes instead of layers which takes some adjusting to. Let’s look at the evolution of Resolve and then 5 tips.
Fusion interface: 2 Viewers, Node Editor, Inspector
One of the biggest news at NAB 2018 was DaVinci Resolve 15 and the integration of Fusion, a node based compositing app. (Previously we wrote about Resolve 15’s NAB announcement here). Da Vinci Systems announced Resolve in 2004, a high end, expensive 2K color grading system. Blackmagic Design bought the assets of Da Vinci Systems in 2009, Eyeon Software Inc’s Fusion in 2014, and the DAW Fairlight in 2016. Resolve 15 has 6 pages that you perform specific tasks in. The Media Page is like a project, The Edit for editorial, Fusion for motion graphics/composting/vfx, Color for color grading, Fairlight for audio, and Deliver is where you output your files.

you do specific tasks in separate Pages and work left to right
Previously Resolve 14 and Fusion 9 were separate apps, but Resolve could send a timeline to Fusion via the “New Fusion Connect Clip” command. With Fusion now being in Resolve 15, you can work quicker and make changes easier. Hence being able to do everything in one app will appeal to a lot of creative professionals. With DaVinci Resolve 15 offering a free version and a studio version for $300 (you own it), many editors and motion artists will try it out.
1. You create Fusion Titles from the Edit Page
A common motion graphics task is to create a title or lower third. Resolve 15 adds 3D Fusion titles to the Effects Library, similar to what is available in After Effects. Find a Fusion Title you like and drag the title to the timeline. You then make changes to the title from the Inspector panel (similar to the Effects Controls panel in AE). An icon (3 stars) on the Fusion Title in the timeline indicates it is a Fusion clip.
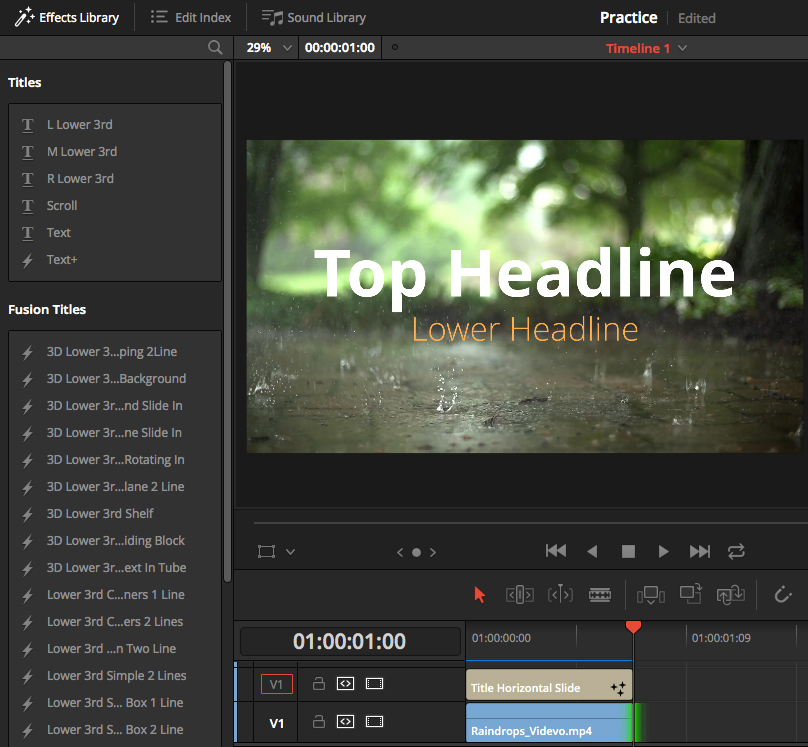
adding a Fusion Title from the Effects Library
2. Using the Fusion Page
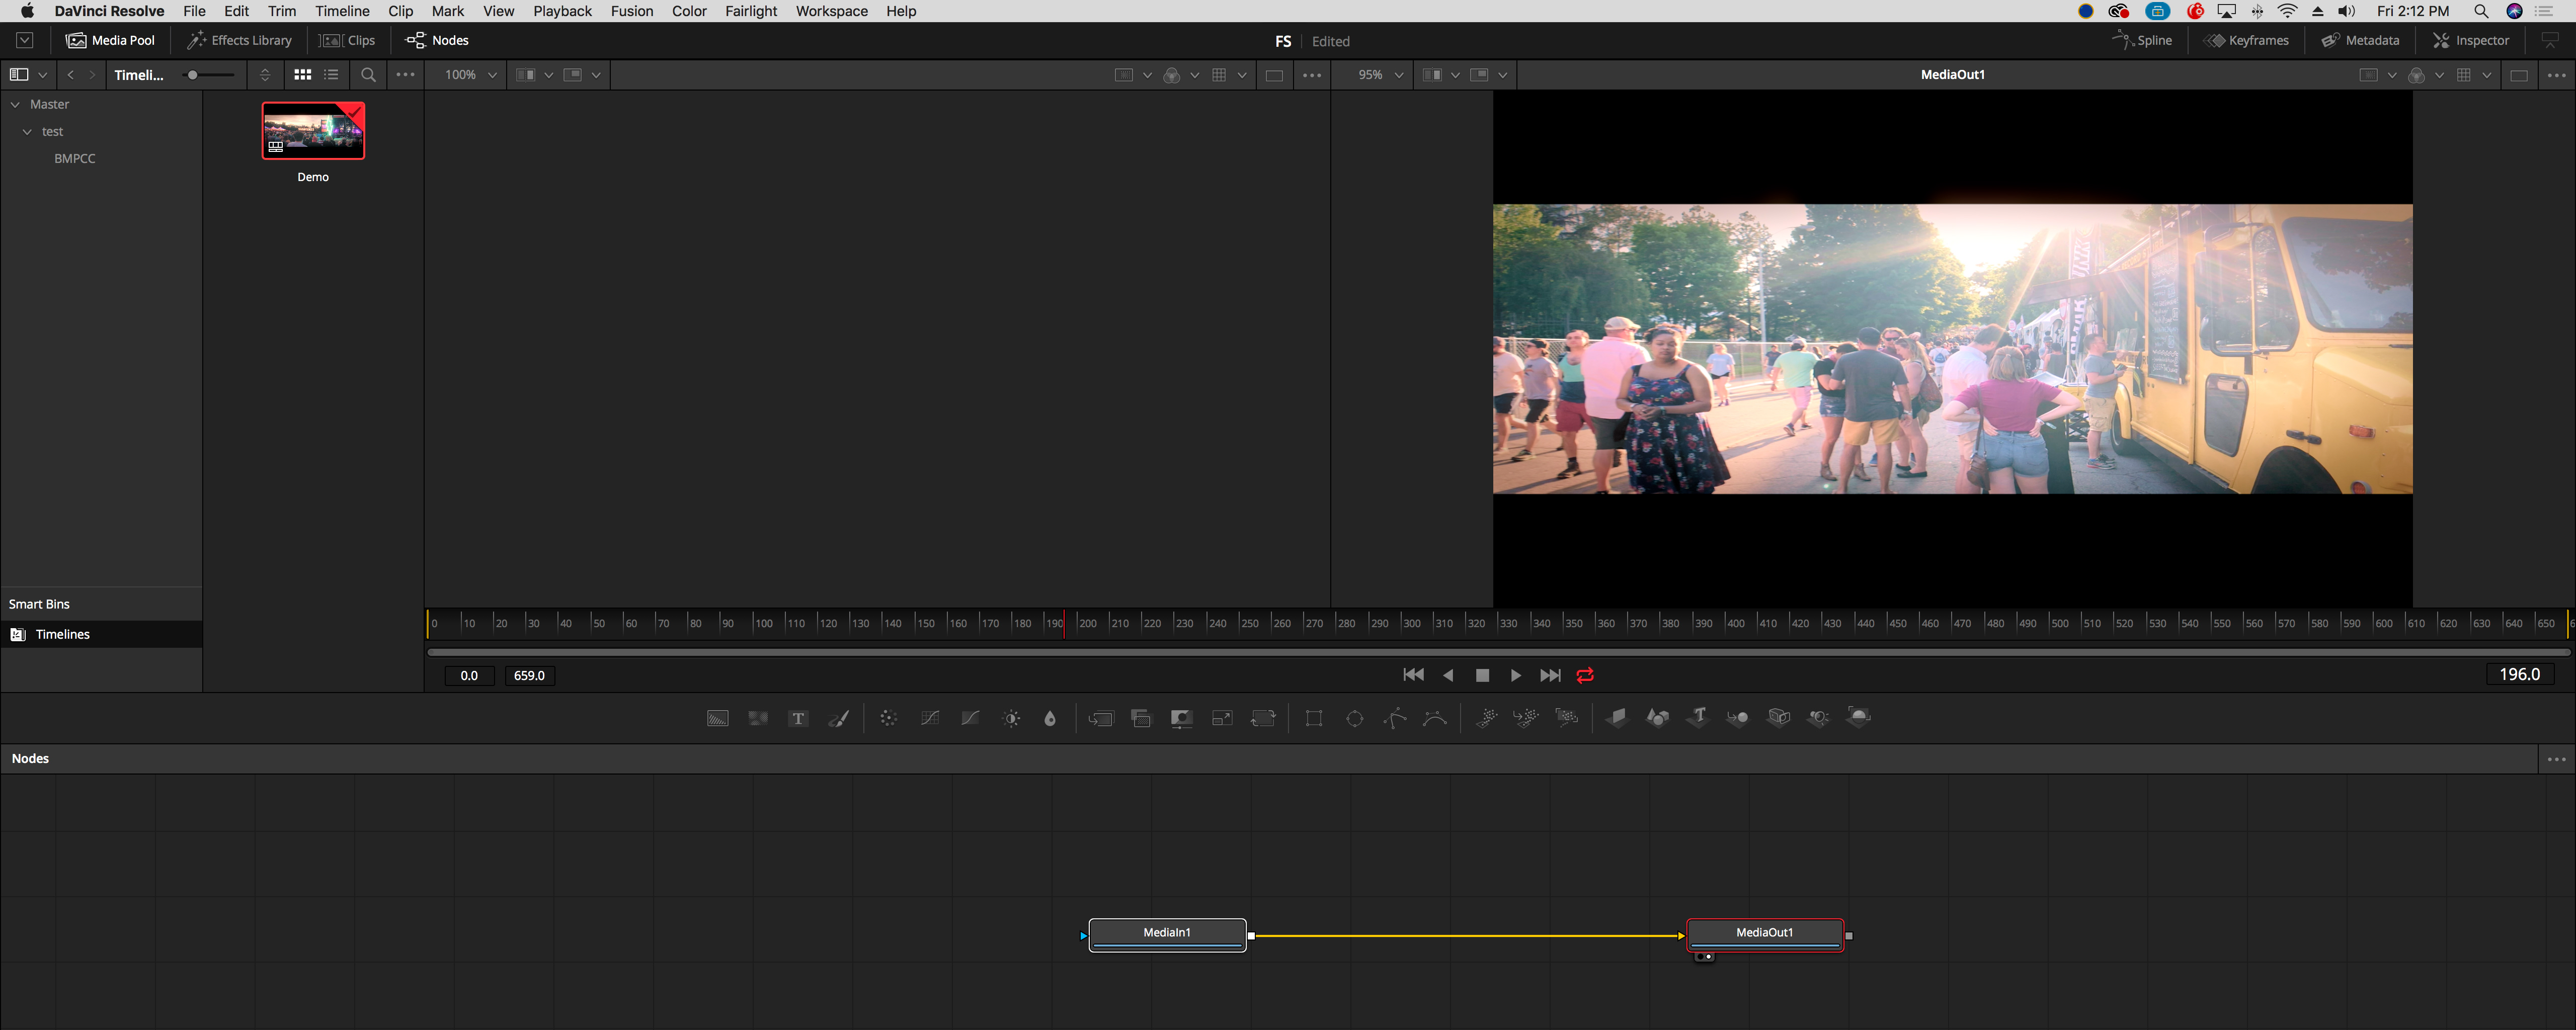
Put your playhead over a clip in the timeline in the Edit Page. When you click on the Fusion Page you see a MediaIn node and a MediaOut node. The MediaIn is the clip from the Edit Page, and the MediaOut is the output of the Fusion Page.

Putting your playhead over a clip in the timeline results in MediaIn and MediaOut Nodes in the Fusion Page
Resolve 15 has an integrated timeline, so whatever you do in Fusion is available in the Edit, Color, Fairlight and Delivery Pages. What is important in Fusion is that you are connected to the MediaOut Node, or you will not see anything in any of the Pages.
mediaOut1 disconnected: We don’t see anything
3. The Fusion Page Interface and the logic of nodes
Where as AE works by compositing layers on top of each other, Fusion connects nodes together in a flow chart or flow. Just like AE, you can key footage, track and stabilize footage, use expressions, and create motion graphics. Some advantages of Resolve are Vector Paint, true 3D compositing and particle systems.
The Fusion Page has 4 sections, with the Media Pool and Effects Library on the left, 2 viewers at the top, the Work Area on the bottom, and the Inspector on the right. You create your node trees in the Node Editor, which along with the Spline and Keyframe Editors make up the Work Area. By default you see the Node Editor at the bottom, and the Spline and Keyframe Editors are closed.
Fusion Page Interface
There are 2 viewers which you can load a selected node in. (you can also change to a one viewer layout). Load a node into a viewer by selecting it and pressing 1 (left viewer) or 2 (right viewer).

Viewing the MediaOut node in the right viewer
4 . The Toolbar lets you quickly add often used nodes
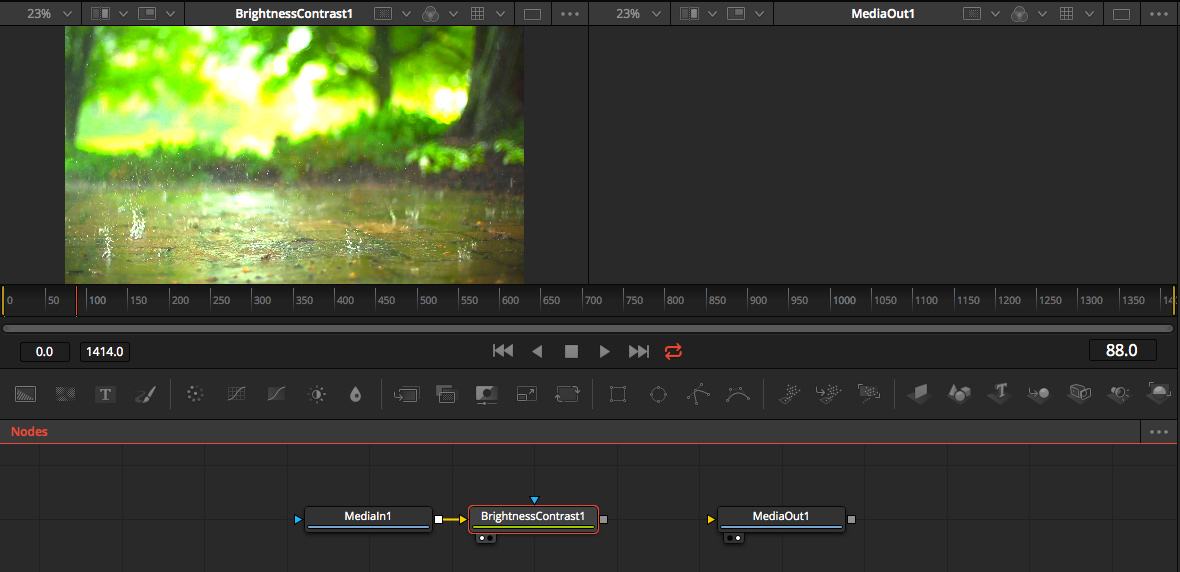
The Toolbar above the Node Editor lets you add often used nodes like text and masks. Resolve calls these nodes Tools, and even more tools can be found in the Effects Library. Let’s add a Color Corrector to see how this works. Make sure MediaIn1 is selected, and click the Color Corrector icon in the Toolbar. Color Correction1 now appears between the 2 media nodes. You can now modify the color correction settings in the Inspector.
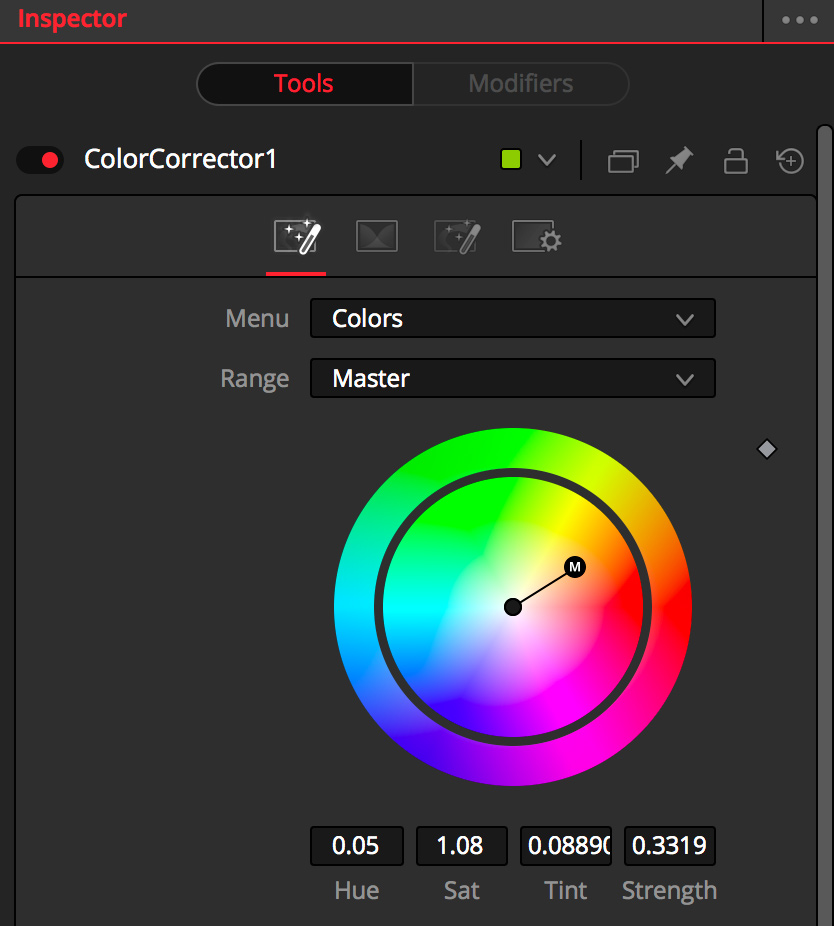
Color Corrector Inspector Tools
5. Basics of working with Nodes
What would be a transform (scale, rotation, etc) or an effect in AE (color correction, blur, etc.) is called a Tool in Fusion. You create separate nodes for each Tool you want to add. So if you wanted to add a Color Corrector, a Transform (to resize)and a Blur Tool, you would add 3 nodes.

a basic node tree with 3 Tools
We have to use Merge Nodes to connect 2 clips together or connect a clip to text. To see how this works lets add text to a clip. Select the MediaIn1 node, and click the Text icon from the shortcut menu. The 2 clips are automatically connected with a Merge 1 Node, with the Text being the foreground (top) and MediaIn1 the background (bottom). If you want to connect another clip, that requires another Merge Node, as Merge Nodes have only 3 inputs (Foreground, Background, and Effect Mask).
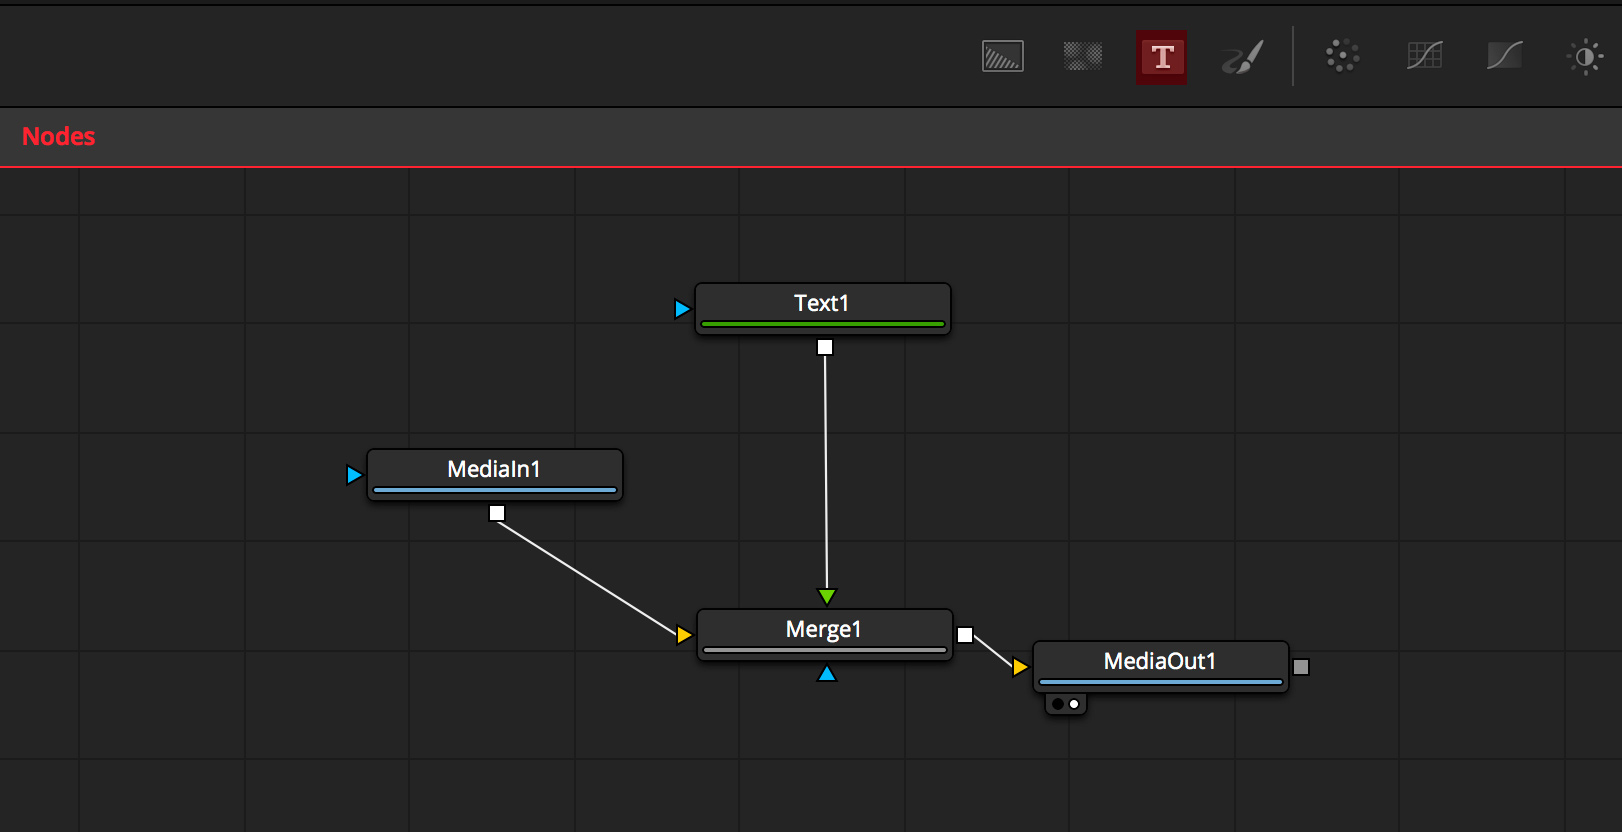
Merge Node – Text+ Tool highlighted in Red
To keep the node tree from getting confusing, rename a node by selecting it and pressing F2. This is particularly important with complex node trees so you know what each node is doing.
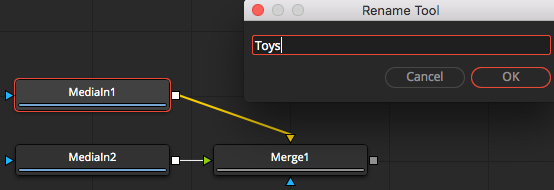
Rename node with F2 shortcut
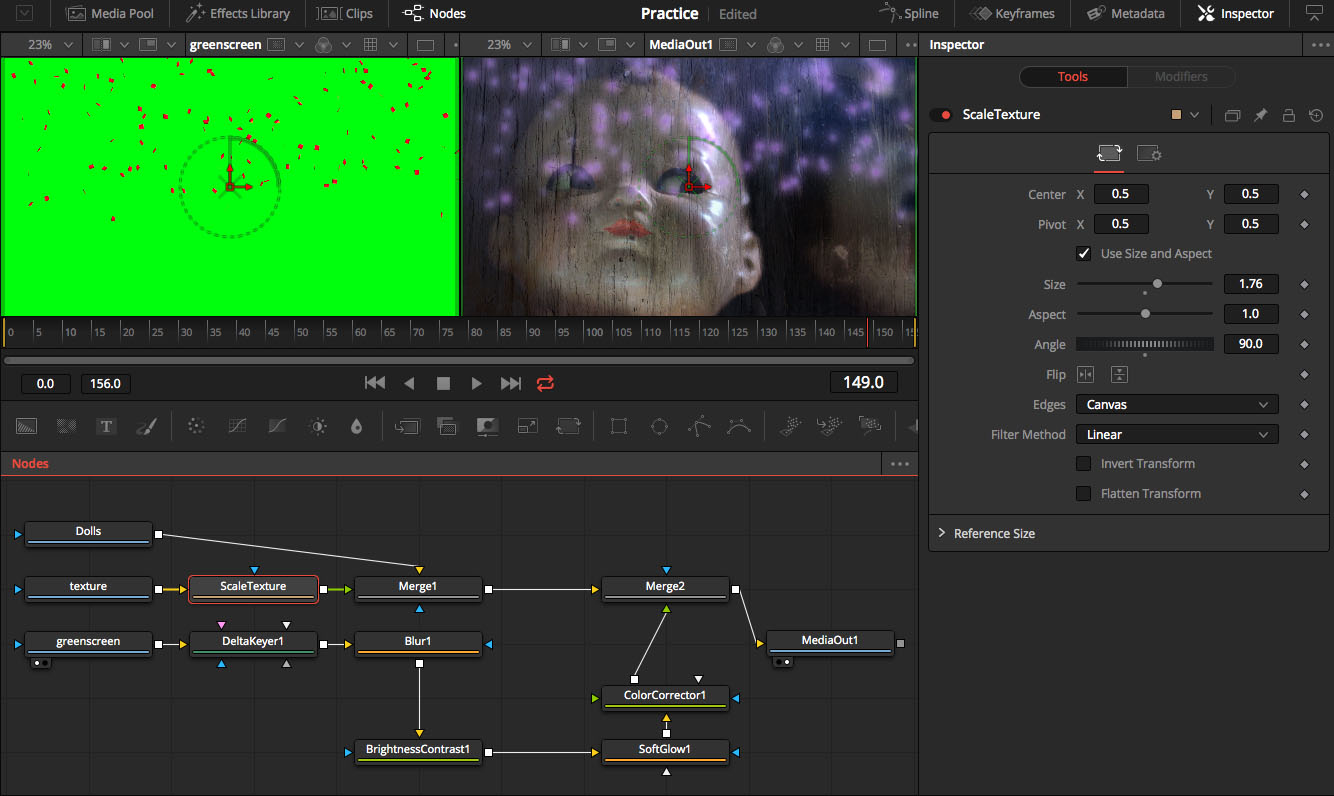
Extra Tip: Creating a Fusion Clip in the Edit Page
When you need to create more complex composites, creating a Fusion Clip from the Edit Page is a quick way to work. From the Edit Page, select multiple clips in the timeline, right click and select “New Fusion Clip. In my example I have 3 clips, so Fusion automatically connects the 3 clips with 2 Merge Nodes. I then changed the Composite Mode for each Merge Node and added a soft mask to the texture.
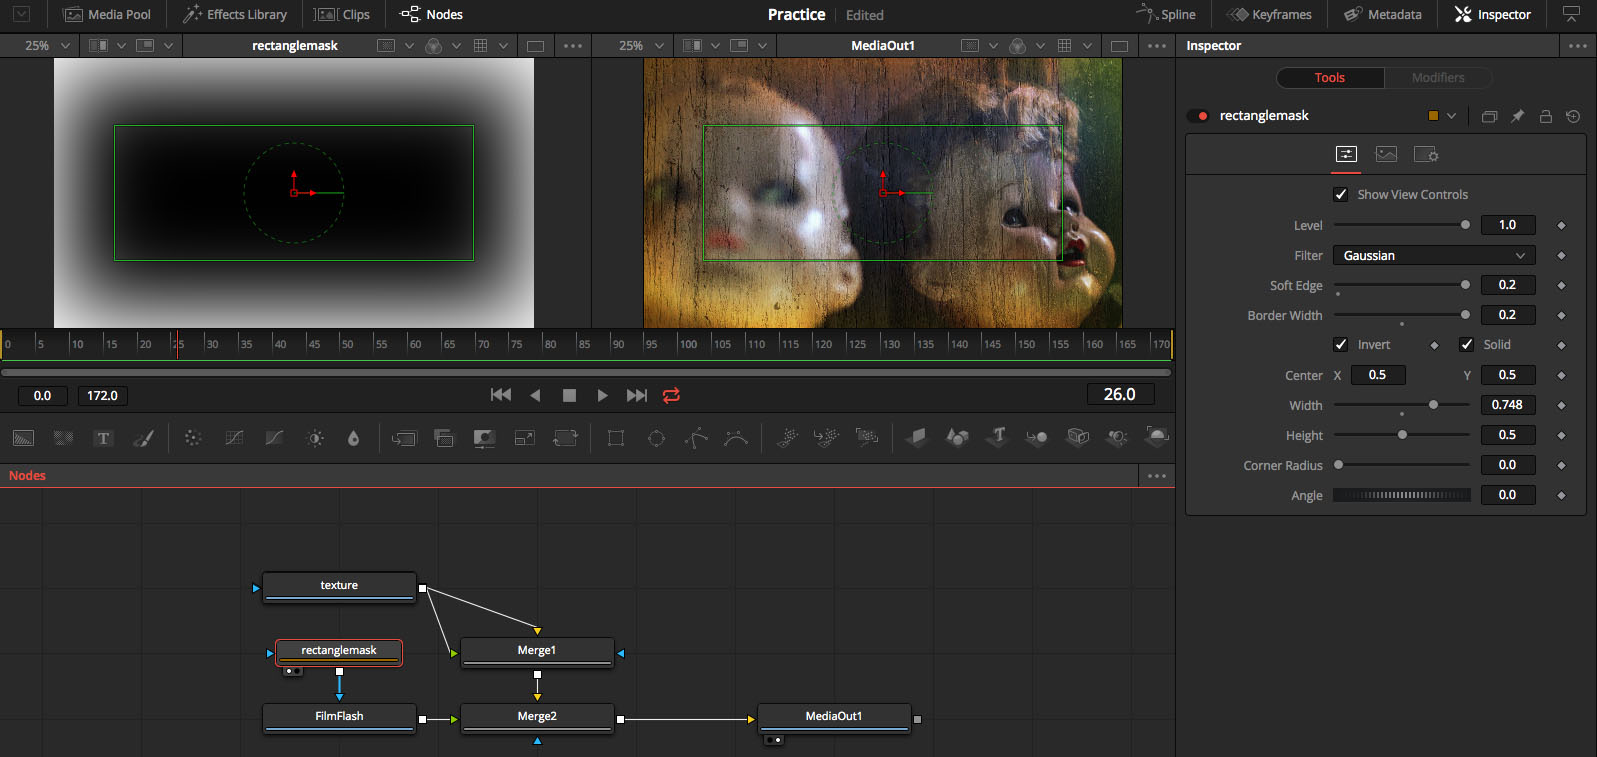
New Fusion Clip with Merge Nodes automatically connected
So that’s a quick look at working with nodes in Resolve 15. Hopefully these tips help you get comfortable with Fusion in Resolve 15. For a deeper dive into Resolve 15, download the New Features and the Configuration Guides available at the BlackMagic Design Resolve Center webpage.
Are you a Resolve 15/Fusion user? Do you have additional tips to share with us? Let us know in the comments below!