We all love to joke that we’ll fix it in post, but it doesn’t have to be that way. It does require a coherent thread of understanding from set lighting and perfect exposure, all the way to color correction. In this article we will take a close look at each step to remind us how to create a perfect picture and have less to worry about afterwards.
We will have to nerd it up a bit, but just think – you won’t have to fix it in post anymore. The science will help set your creativity free. Just because you mostly work with the creative side of your brain does not mean you can leave the science and math alone. One cannot exist without the other.
It’s about taking control of each step, but before you can have any kind of control – you need to understand what’s going on.
1. Light
What is light?
Well, of course we know light in terms of luminance and color information and that’s where all this will end up in a color-grading suite. However, we need to start at the very beginning.
We first need to capture an image with a camera. So I want to start with light in its fundamental form. Visible light is energy in the form of electromagnetic radiation.
Electromagnetic radiation is a fundamental phenomenon of electromagnetism, behaving as waves and also as particles called photons.
A photon is massless and has no electrical charge. However, it exhibits what is called a photoelectric effect. For example, a photon travelling from a light source and landing on an electric plate will eject an electron.
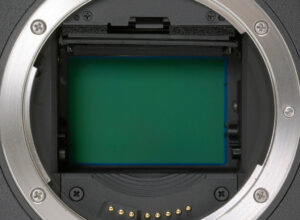
An electron does have a charge, and is therefore measurable. This is exactly what an image sensor does. It is effectively a high-resolution photon counter. The sensor is a vast array of microscopic photosites, and each photosite can be thought of as a well with depth and surface area. The deeper the well and the larger the surface area, the more photons a single photosite can capture.
Lets imagine a 4K Bayer image sensor has 4096 x 2160 resolution, that means it has 8,847,360 active photosites. It actually has more, but let’s simplify.
2. The Inverse Square Law
At this point I want to introduce a critical concept to know and understand as it affects everything downstream from set lighting and exposure all the way into post-production – the Inverse Square Law.
The image sensor is effectively measuring light intensity. All of the light in a given scene has a source and light intensity follows the inverse square law. This means light intensity is inversely proportional to the square of the distance from the source of light.
Light intensity does not fall off in a linear fashion. An object at twice the distance from a light source will receive only a quarter the intensity of light.
3. The Stop
The word stop has a number of meanings and can be confusing. An aperture stop is a measure of input pupil or iris size in a lens limiting the amount of light passing through the lens and exposing the sensor. This is a ratio of lens focal length to iris diameter. For example, if a lens has a focal length of 50 mm and its iris diameter is 25 mm, the f-number is 2 and the aperture diameter is f/2.
Lenses use a standard f-stop scale, which is a sequence of numbers corresponding to the sequence of the powers of the square root of 2: f/1, f/1.4, f/2, f/2.8, f/4, f/5.6, f/8, f/11, f/16, f/22 etc. These result in a logarithmic scale of light intensity.
A stop is also used to quantify ratios of light, with every incremental stop meaning an increase by a factor of two, and every subtracted stop meaning a decrease by a factor of one-half. A stop is also known as one unit in exposure value or EV.
In the sense of ratios of light intensity or exposure an increase or decrease by a stop has the same effect whether it is the iris of a lens or measurements of light intensity with a light meter.
4. Dynamic Range
If you understand everything so far then you’ll be able to grasp the concept of dynamic range. Every camera manufacturer quotes the dynamic range of its sensor. This is because it’s a hugely important indicator of imaging performance.
Dynamic range is simply the maximum possible range of exposure (in stops or EV) that an image sensor is capable of capturing. Remember that a one stop increase represents a doubling of light intensity.
So a sensor capable of capturing a 12 stop dynamic range means that it will resolve pure white in highlights that are 4096 times as bright or intense as the light intensity at its black level. That is a maximum contrast ratio of 4096:1. A 13 stop dynamic range doubles this to 8192:1, and 14 stop range doubles it again to capture pure white at light levels 16,384 times as intense as it’s black point.
7 stops DR – 128:1
8 stops DR – 256:1
9 stops DR – 512:1
10 stops DR – 1024:1
11 stops DR – 2048:1
12 stops DR – 4096:1
13 stops DR – 8192:1
14 stops DR – 16,384:1
Anything less than the minimum light level will always be recorded as black (and as we know there’s also a certain amount of noise down there too) and any light that is more intense than the maximum level the sensor is capable of reading will just become pure white in terms of recorded image data. No image detail can be recorded beyond this maximum level even if it does exist in the scene.
5. Log Gamma
Human vision perceives more detail and contrast with differences of luminance at the low and mid end of the scale than in extreme highlights. Our perception of brightness is not linear. There is also a limitation in the scale of data values that can be assigned to luminance in terms of the bit depth of our files. We want to make sure we record more useable luminance information toward the low and mid tones without sacrificing highlight detail.
An image sensor has a linear response to changes in brightness. Therefore a function must exist between input luminance and the values we record. This function is a curve.
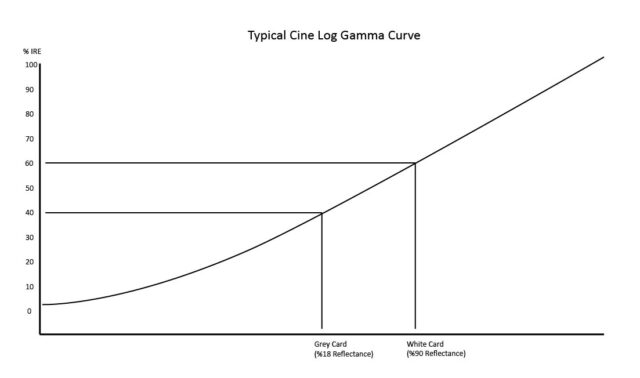
A gamma curve is simply a function between linear changes in input luminance from the camera sensor, and corresponding levels of output luminance that are actually recorded.
A roughly logarithmic gamma curve allows us to record increased or expanded luminance information in lows and mids where they are important, and less information in the highlights where we don’t perceive so much difference. Below are some example frames comparing log cameras files before and after correction.
Below are some shots from the Blackmagic URSA in Film mode, RAW CinemaDNG.
Some Arri Alexa shots, these were captured in Prores.
Finally some Red R3D.
An uncorrected image captured with a log gamma curve looks flat and washed out. Each camera has a slightly different look, naturally as each sensor is different. It won’t look natural before color correction, but your colorist will be able to work magic with all the extra information contained in the lows and mid tones.
6. Exposure
Each frame of video we capture and record is a still image created by counting how many photons hit each photosite on the sensor in a fixed period of time. This is our exposure, and as far as the sensor is concerned it’s measured in eV or electron volts as an electrical charge at each photosite. eV (electron volts) is not to be confused with EV (exposure value).
Image sensors respond to light linearly, so as light intensity increases, eV (electron volt) charge at the photosite increases linearly. EV (exposure value) however is logarithmic representing a doubling of light intensity for every increase in EV unit.
Exposure time of course is determined by frame rate and shutter angle (or shutter speed).
For example, if our frame rate is set to 24 frames per second, we have a maximum of 1/24th sec exposure possible for each frame. Furthermore, lets take a typical shutter angle of 180 degrees; this is exactly half of a full 360 degrees, meaning our exposure time is actually half of 1/24th sec, or 1/48th sec.
Now, something incredibly important here needs to be said about ISO. An imaging sensor has what is known as a “native” or “base” ISO. This is its natural un-amplified level of sensitivity.
It’s actually its only level of sensitivity.
When you increase ISO setting in camera, all you are doing is under-exposing the sensor and amplifying its output signal. This increases noise substantially.
A correct exposure is of course somewhat subjective and dependent on what you are shooting. Generally it can be considered that the brightest highlights of your scene do not over-saturate the photosites on the image sensor (unless the sun, or other bright light source is in frame), and the darkest areas of your scene (the lowest light level that you still want perceivable detail) is sufficiently above the noise floor of the sensor.
But those are the limits at the extreme. Normally the range is somewhere in between. For instance if you are shooting outside on an overcast day, the total range may be far less than the maximum dynamic range of your sensor. So what about the middle? This is where having a middle grey card and white card on set with you becomes very useful. If you can pin down a middle grey and a white card correctly, the rest of your exposure should be in a good place.
Every camera’s log color space has a slightly different gamma curve so I am going to give the average values here. A middle grey card has 18% reflectance, and on a waveform monitor should sit at about 40% IRE. If you don’t have a waveform monitor you can use the zebras. Just set zebras to 40% and your grey card will be at 40% when it starts to show the zebras. A white card has 90% reflectance and should be at about 60% IRE. A waveform or light meter are the best ways to set these values but zebra can be used if that’s all you’ve got at your disposal.
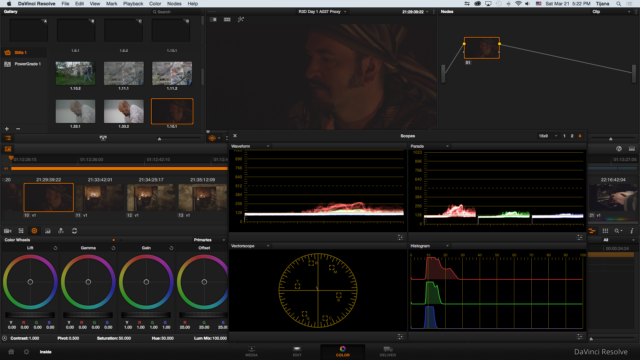
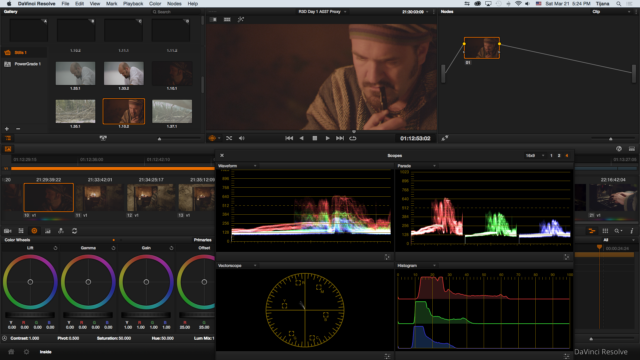
In the shot above, I was clearly struggling with exposure. This was shot at night in the shell of an abandoned stone house in the woods (very cool location). The only light I had was from a fire in a fireplace nearby and an oil lamp which was meant to just be a practical light. Skin tones want to be exposed similarly to a middle grey card, and you can see from the histogram in Resolve it was way under. If I had just gone ahead thinking it could be pushed sufficiently in the grade I’d be dealing with all kinds of nasty noise resulting in unusable shots.
The lens aperture was already opened up pretty much all the way and I didn’t want to push up ISO. So there was only one thing for it, and that was to increase ambient light to a level where my skin tones were pushed to between 40-50% IRE. Looking at the histogram these levels are much better. Because the total luminance range in this shot is quite limited, there actually isn’t much that is brighter than the skin tones.
If you don’t like noisy images it’s always better to give your sensor more light so I recommend slightly overexposing. If you are working with any high dynamic range sensor you’ll have more or less 6 stops above middle grey, so you can bring down exposure in post to bring back highlights and you’ll have less noise in the blacks too. This is sometimes referred to as ETTR (Expose to the Right) and looking at a histogram you are shifting everything slightly toward to right side. Just how slight depends on your sensor so it’s important to know how many stops you have above and below middle grey at your sensor’s base ISO.
You don’t have any control over the maximum limit of dynamic range for your camera sensor, but ideally you have control over the overall level of light illuminating your scene, and you can then also control the ratio of light between shadows and highlights. This is contrast.
If you really want to take your lighting and cinematography to the next level, I would highly recommend you look at adding a light meter to your toolset and learning to use it.
Controlled lighting is the key that unlocks the most beautiful cinematography.
This is something, I fear, that is being lost and forgotten with the widespread trend of shooting under only existing light, which is all too often too little to get the best possible performance from our sensors.
The desire and demand for ultra high ISO is killing the power and magic of purposeful and creative lighting.
7. Lighting Ratio
 Lighting ratio is most often considered the ratio between key light (creating your highlights) and fill light (filling in the shadows). This ratio is important when lighting subjects within your scene, however there is also an overall ratio in your scene that exists between extremes of shadow and highlight.
What is important is an understanding of the concept that a ratio exists between shadow and highlight, and that this ratio (which can be calculated manually from incident light meter readings) ideally should not exceed the maximum contrast ratio dictated by the dynamic range of your camera sensor.
 As for lighting subjects within your scene, the style you are aiming to achieve plays an important role. This is where low-key and high-key lighting comes in; this is contrast within your image. Do you want extreme contrast between objects that are lit and shadows or should it be more naturally balanced?
Often the ratio of fill to key on a subject can be controlled with a simple reflector as is the case pictured here from one of my short films.
It’s also important to take into consideration what you plan to do with the captured image in post. A colorist can only work with the image they are given, and that is all decided by what happens on location or on set.
8. Lift Gamma Gain
Finally we come to the end, as I promised where all of this ends with digital files full of luminance and color information.
What you will have captured if you’ve lit with your lighting ratios and sensor dynamic range in mind, and exposed properly is all the right information from your scene at the right levels in your image files. This means zero to fix in post.
You will be able to easily balance, color correct and make tweaks to your image if your shadow details, mid tones and highlights all sit where they should be.
But where exactly should they be in your final color corrected image?
This is where balancing the luminance levels comes in, and it’s one of the first steps in color correction.
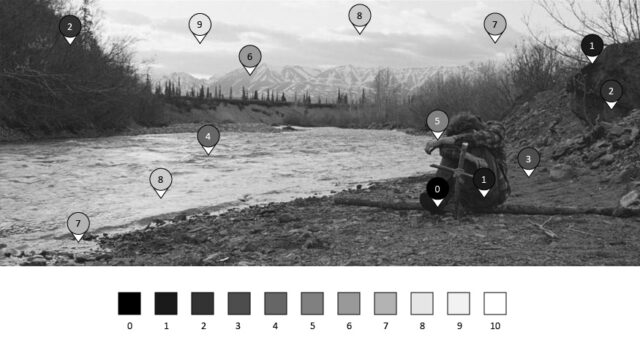
One reference that I always use is the tried and true 10 zone Ansel Adams exposure system that has existed in the world of print photography for a long time. It’s not rocket science to use either. Based on the sensitometry research of Ferdinand Hurter and Vero Charles Driffield, the system provides a reference for achieving a correctly visualized film print from a correctly exposed film negative. The system has been applied to all forms of photography including digital.
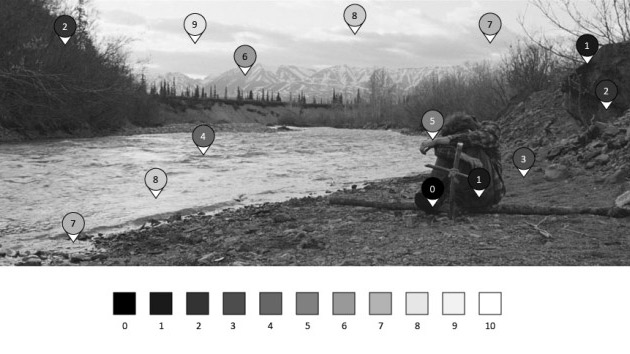
The system divides exposure into 10 zones from black to white and is used as a reference for what image elements at their respective levels of luminance should fall into each of these zones. The below frame grab (from Into The Wild) has been marked up to illustrate the zones. Color information is not needed so we’re looking at luminance only.
0 – Pure black
1 – Near black, slight tonality, no detail
2 – Dark black, slight detail in shadows
3 – Very dark grey, distinct shadow texture is visible
4 – Medium dark grey, slightly darker black skin, dark foliage, landscape shadows
5 – Middle grey, 18% grey, darker tan white skin, lighter black skin, light foliage, dark blue sky
6 – Middle light grey, average white skin, light stone, shadow areas on snow
7 – Light grey, pale white skin, concrete or grey asphalt in sunlight
8 – Grey white, pale detail in highlights, white wall in sunlight, bright surfaces
9 – Bright white, slight detail in highlights, white paper, snow, white water
10 – Pure white, no detail, light sources, specular highlights
Bottom line. Color correction and grading is the last part of the thread that I hope I have tied through all of this. Your goal is a beautiful, rich, styled and clean color graded picture. In order to achieve this, the required image information must be in your files, and therefore must have been captured with a properly exposed camera sensor and a properly lit scene.
Light is your best friend. When it comes to crafting beautiful images less is not more.

