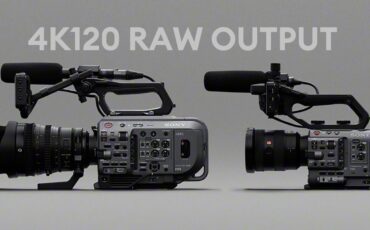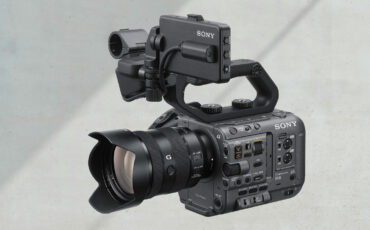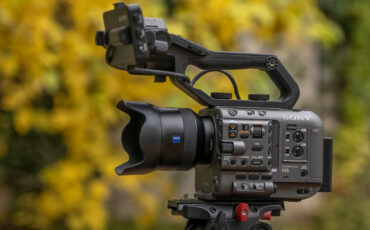
Now that most of the recent full frame cameras have the capability to shoot ProRes RAW via external recording, we are able to get a glimpse how the untouched “raw” images compare to the signal processed internally recorded images. Hence, I was quite curious to see how the new Sony FX6 is set up and how it compares to its smaller brother, the Sony a7S III – after all, they seem to share the same sensor but the Sony FX6 belongs to the “Cinema Line”. Hence, signal processing may be different. Curious to hear the results? Then read on …
If you haven’t read our Sony FX6 review, please have a look here. Our Sony a7S III lab test can be found here. As a quick reminder, the Sony a7S III was hampered in our lab test by the heavy noise reduction which led to ugly, large blotches of chroma noise. So will the Sony FX6 be different? Spoiler alert – yes!
But one thing after the other. Lets have a look at rolling shutter results first.
Quick side note: 12 bit 4K ProRes RAW files on a 4K timeline in Premiere Pro pose no problem whatsoever for our NVIDIA GeForce RTX3090 graphics card – they run buttery smooth with about 8% load using 5.8GB memory of the GPU. This card is on loan from NVIDIA – thank you!
Sony FX6 – Rolling Shutter
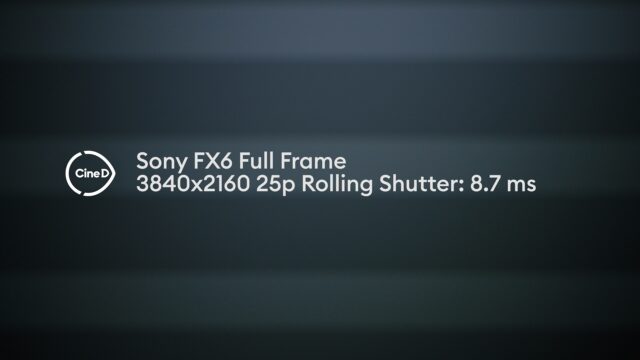
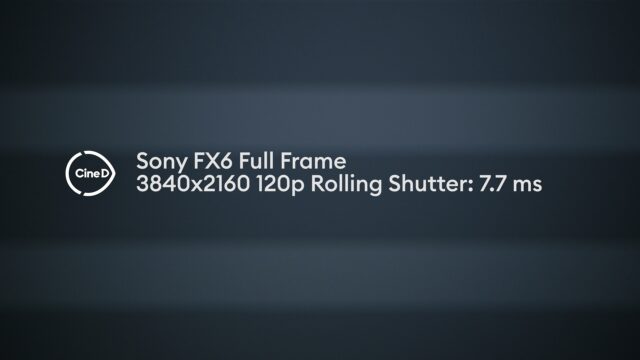
Using our 300Hz strobe light, it was easy to see that both the Sony a7S III and the Sony FX6 share the same results. The Sony FX6 shows a superb rolling shutter result of 8.7ms in full frame, UHD recording from 24 – 100 frames per second (yes, also 100fps are without crop – only at 120 fps a slight crop is applied).
Sony FX6 Dynamic Range recording at ISO 800
ProRes RAW HQ:
For ProRes RAW recording we used the Atomos Shogun 7. The files were developed in the latest Adobe Premiere Pro Version 15.2, using SGamut3.Cine/SLOG3. Please head over here to see how we test dynamic range. Internal noise reduction was set to “OFF” for all recordings. Strangely, the ProRes RAW files recorded with the Shogun 7 have a resolution of 4128×2192 (as opposed to the claimed 4K DCI 4096×2160 resolution from the Atomos website).
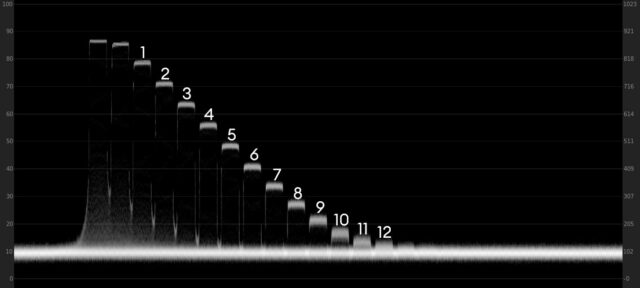
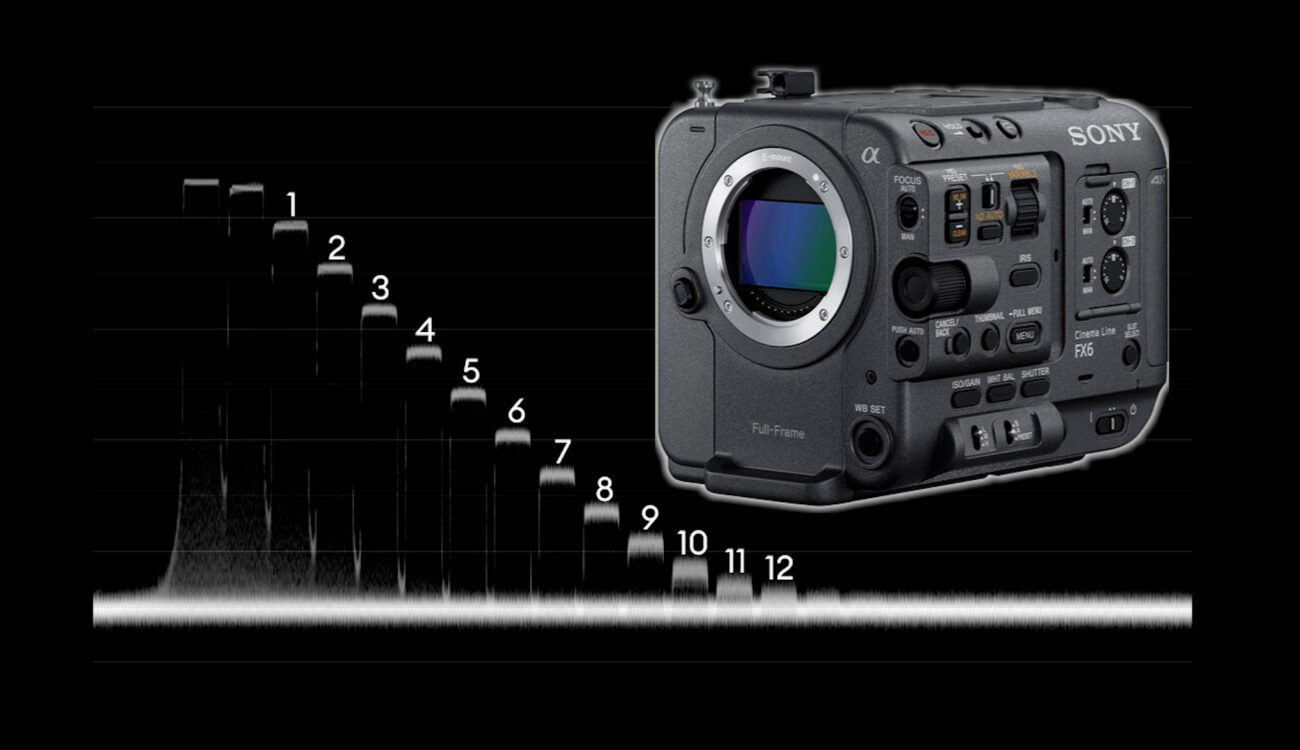
So let’s have a look first at the ProRes RAW waveform plot. About 12 stops can be identified above the noise floor, and a 13th can be seen inside the noise floor:
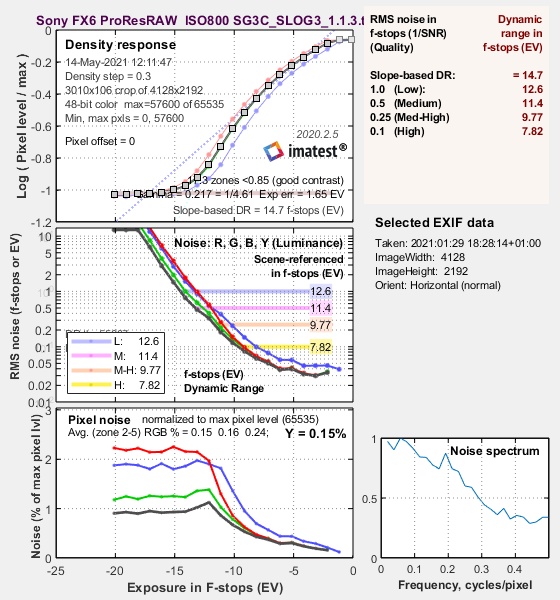
IMATEST calculates 11.4 stops at a signal to noise ratio of 2 (SNR = 2), and 12.6 stops at SNR = 1.
The Sony FX6 shows a very nice organic noise floor, and IMATEST identifies about 3 further stops within the noise floor (above blue SNR = 1 line in the middle graph below):
Now, comparing that to the Sony a7S III (at ISO 640) using again external ProRes RAW recording (this time via HDMI on the Atomos NINJA V) we get a rather similar result of 11.6 stops at SNR = 2 and 12.8 stops at SNR = 1 (more details to that in a future post). As a side note, what I found interesting is that the Sony a7S III ProRes RAW recordings show a resolution of 4264×2408 (as correctly mentioned on the Atomos webpage here) versus the 4128×2192 ProRes RAW on the FX6 with the Shogun 7 – so is it really exactly the same sensor?
Internal XAVC-Intra 4:2:2 SGamut3.Cine/SLOG3:
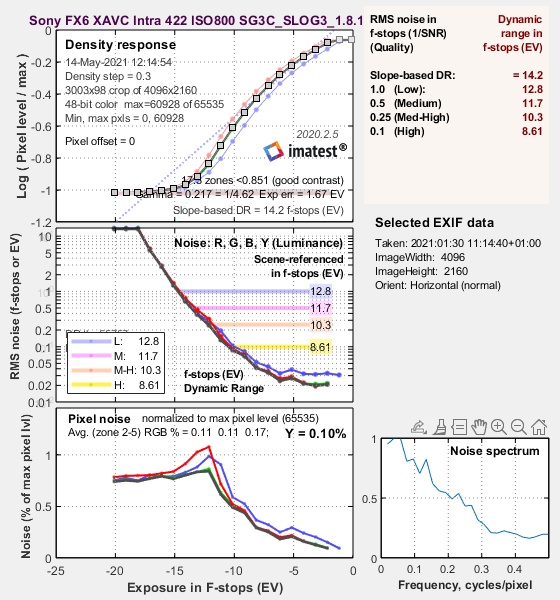
At ISO 800, IMATEST calculates 11.7 stops for SNR=2 and 12.8 stops at SNR =1. Comparing that to the ProRes RAW recording, it becomes abvious that just a little image processing / noise filtering is happening for the internal recording. That is a very good thing!
The Sony a7S III dynamic range in IMATEST shows 12.4 stops at SNR = 2 and 13.6 stops at SNR = 1 using the internal XAVC S-Intra 4:2:2 codec. Here you can see the quite significant internal noise processing of the a7S III (compared to external ProRes RAW) pushing SNR = 2 and 1 values up – which unfortunately cannot be turned off. I personally very much prefer the Sony FX6 internal recorded images with noise reduction “off”. It has that nice, organic feel to it.
Sony FX6 Dynamic Range recording at “high” ISO value, 12800
ProRes RAW:
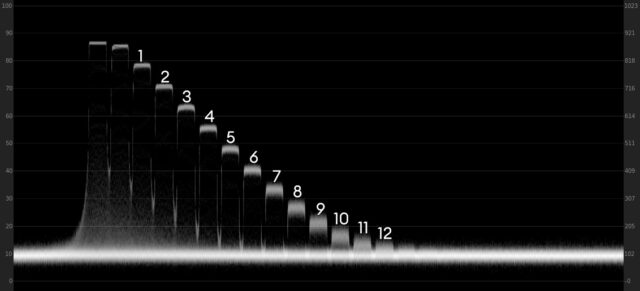
The Sony FX6 ProRes RAW waveform plot becomes much noisier, nevertheless about 12 stops can be identified above the noise floor:
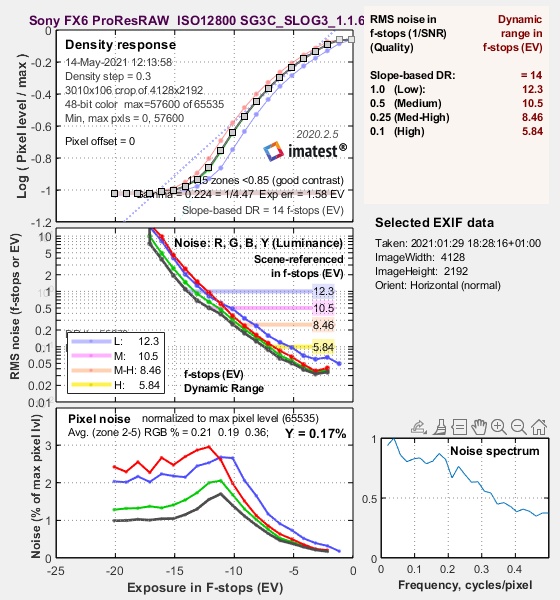
IMATEST calculates 10.5 stops at SNR = 2 and 12.3 stops at SNR = 1. In a similar fashion like mentioned above at ISO 800, about 3 additional stops are identified within the noise floor which can be carved out with advanced noise processing techniques in post.
Again for comparison, the Sony a7S III ProRes RAW recorded image at ISO 12800 shows 10.2 stops at SNR = 2 and 12.1 stops at SNR = 1. Here the FX6 takes the leading position now by a small margin.
Internal XAVC-Intra 4:2:2 recording:
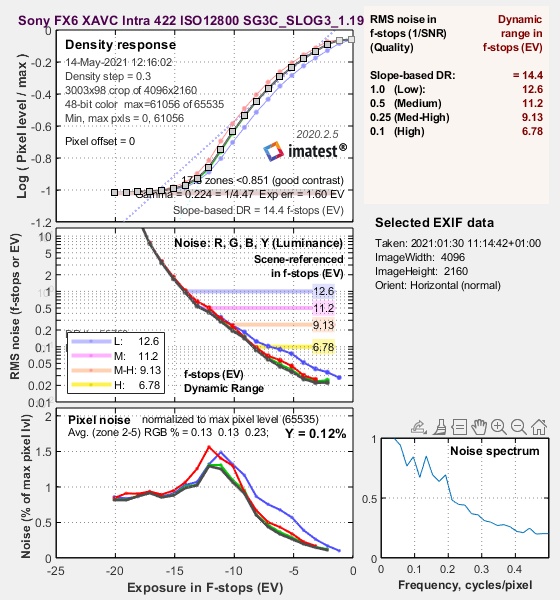
For internal recording at ISO 12800 using SGamut3.Cine / SLOG3 IMATEST calculates 11.2 stops at SNR = 2 and 12.6 stops at SNR = 1. All in all, about 0.5 stops less than for ISO 800, and compared to ProRes RAW a bit of internal noise filtering seems to happen at this ISO which cannot be turned off. As can be seen later in the latitude test, this internal noise filtering has an advantage over post – production techniques, probably because it is fine tuned to the specific sensor.
For comparison again, the Sony a7S III internal recorded XAVC S – I 422 Intra at ISO 12800 shows 12.1 stops at SNR = 2 and 13.3 stops at SNR = 1. Again a result of the heavy noise reduction that cannot be turned off with the Sony a7S III – especially at higher ISO’s. This heavy noise reduction leads to larger blotches of chroma noise that make shadow recovery difficult.
Dynamic Range Conclusion:
All in all, the ProRes RAW results are good for a full frame sensor and in-line with most other cameras that use consumer 12bit A/D sensors. The differences that we see to the internal recorded images are related to how the image is setup in terms of noise processing (and other factors of course).
And clearly, I am in favour of the way the Sony FX6 handles the internally recorded images when compared to the Sony a7S III.
When it comes to internal signal processing, the Panasonic S1H (and S1 / S5) using internal codecs show about 1 stop more dynamic range at SNR = 2 compared to the FX6 – see our article here – with a rather pleasing way to filter the noise – whereas in ProRes RAW the S1H exhibits very similar results to the FX6 (this will be subject of a future lab test article). So it’s all about internal signal processing!
And, although a bit unfair, just to refresh your memory with the current ARRI ALEXA Mini LF that we tested recently in our lab shows 13.5 stops at SNR = 2 (in ARRIRAW), hence 2 stops more.
Sony FX6 Lab Test – Latitude Test
As mentioned in previous lab tests, latitude is the capability of a camera to retain colors and detail when over- or underexposed and brought back (in post) to base exposure.
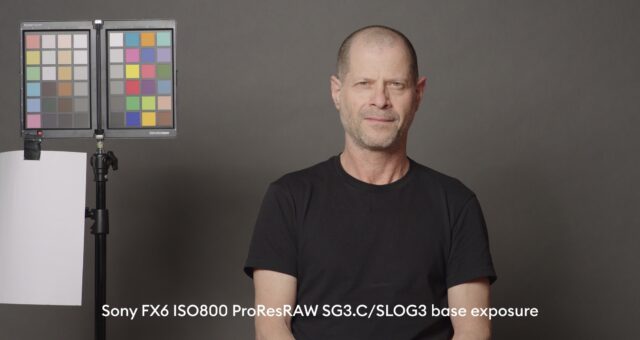
So as usual, we have our (arbitrarily) choosen CineD base exposure of the studio scene at max. 60% luma value of our subjects forehead, in this case my dear colleague Johnnie.
As mentioned earlier, all the ProRes RAW shots were developed in Premiere Pro, using SGamut3.Cine / SLOG3 as the gamma curve, and using an additional SG3.C/SLOG3 to REC709A LUT. In Premiere Pro, there is only the option to choose exposure and gamma, nothing more (no white balance, no tint, etc…). But the exposure correction works fine.
Those shots were then exported using ProRes 4444XQ (12bit) and brought into DaVinci Resolve 17.1 for further analysis.
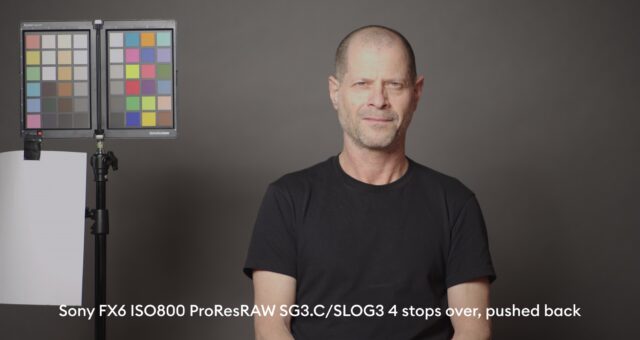
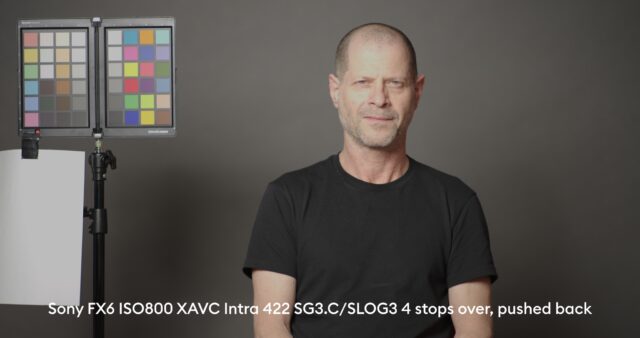
From this base exposure, we open up the iris of the lens until the forehead starts to clip, which happens at 4 stops above our base exposure scene:
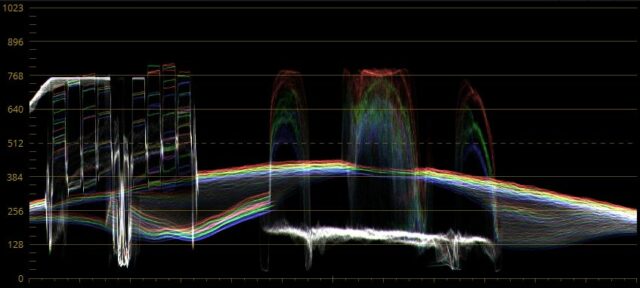
As can be seen, the red channel is clipping on Johnnies’ forehead (see also the RGB waveform above) – hence we went too far and cannot count this result. Unfortunately, there is no highlight recovery option for ProRes RAW which could potentially reconstruct clipped color channels (e.g. Blackmagic RAW offers this option) – otherwise this shot could have been rescued potentially.
By the way, the very same can be seen for internal XAVC-Intra 4:2:2:
Now, we successively start to close the iris of the lens and from F8 onwards reduce the shutter angle to 180°, 90°, 45°, 22.5°.
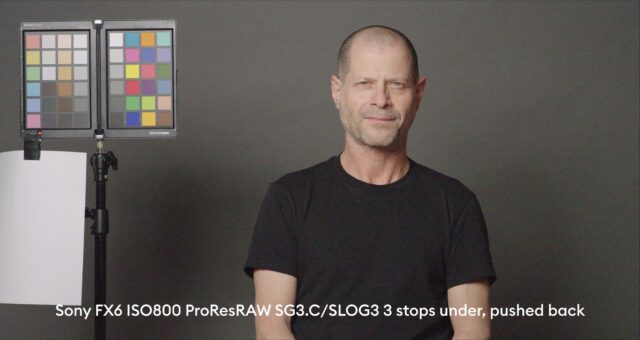
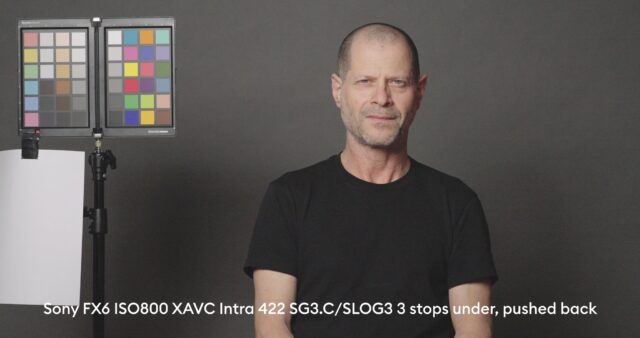
At 3 stops below our base exposure, pushed back, noise starts to appear in the image:
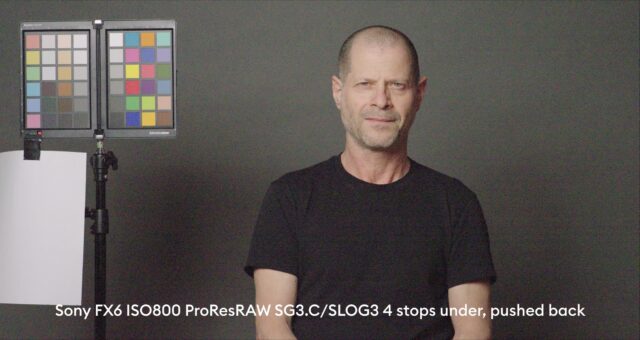
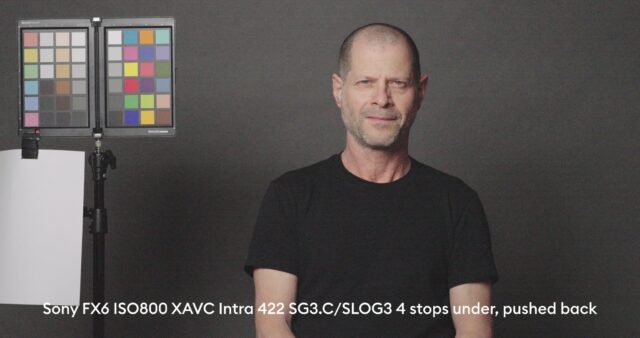
Both the ProRes RAW and the internally recorded XAVC-Intra samples look very similar at this stage (but colors get muted somewhat on the internally recorded images), but things change as we go for 4 stops under, pushed back:
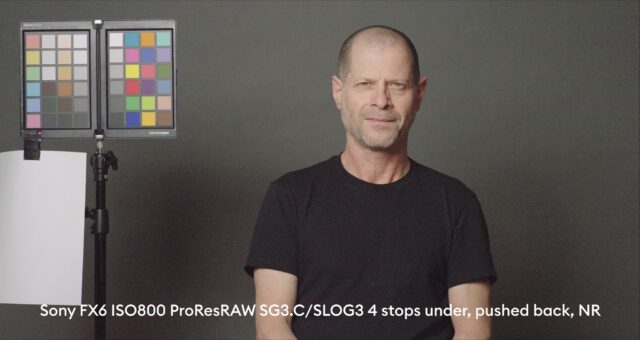
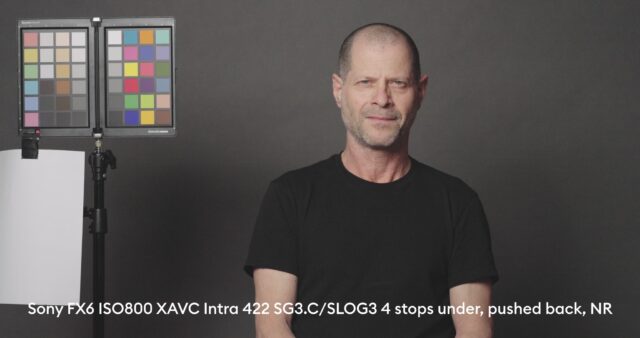
Noise is heavily impacting the images, more so in ProRes RAW – where horizontal stripes start to appear in the images. Noise reduction helps in both cases, and both images can be cleaned up:
What can be noticed so far, the ProRes RAW files are quite a bit noisier than the internal XAVC-I files – and I found it hard to reduce the noise in DaVinci Resolve without impacting the image too much.
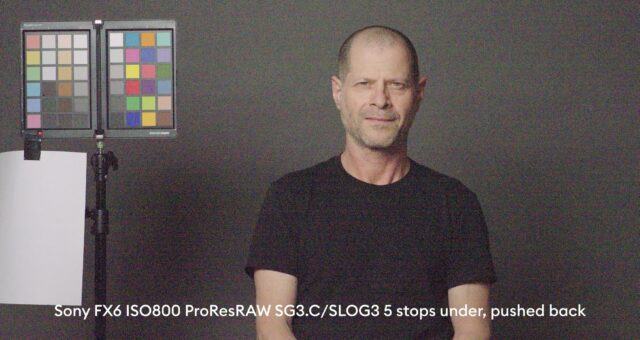
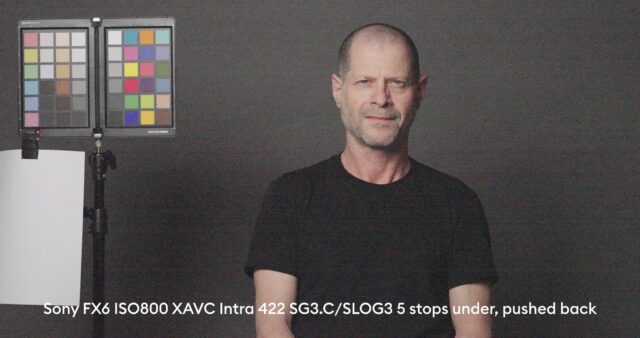
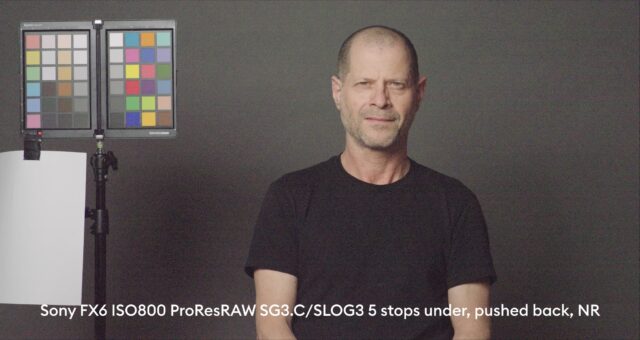
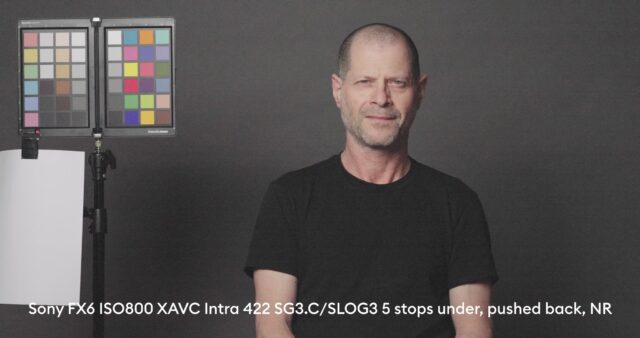
At 5 stops underexposed, pushed back this difference becomes very obvious – to an extend that I found no way to bring the ProRes RAW file back using noise reduction without braking it. But let’s have a look first:
The heavy noise in the 5 stops under ProRes RAW file is corrupting the image to such an extend, that it cannot be saved. Whereas the 5 stops under XAVC-I file can still be saved.
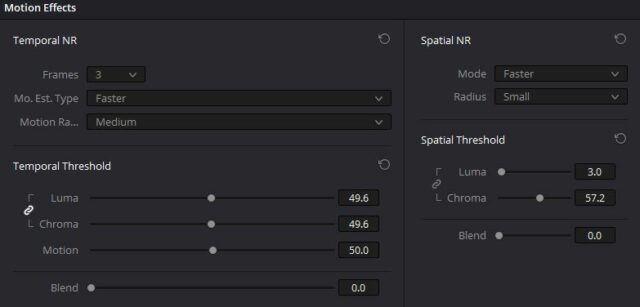
As can be seen, heavy noise reduction in DaVinci Resolve does not help – the point of no return has been reached. The image is totally corrupted by noise, and also horizontal stripes become more apparent.
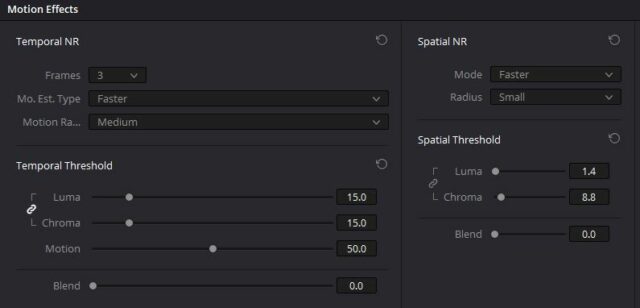
The internal XAVC-I 5 stops under file can be saved by noise reduction (by much less of it in terms of temporal and spatial threshold). But it is also at the point of breaking up, and horizontal stripes appear as well across the image.
What needs to be mentioned though, the 12bit ProRes RAW files do retain colors in a much nicer way, despite the noise.
Hence, we can conclude the following:
- From the results we can conclude about 8 stops of exposure latitude
- The externally recorded ProRes RAW HQ files show more noise than the internally recorded XAVC-I files
- Strange, but true the ProRes RAW HQ files do break up at the 5 stops underexposed, pushed back mark. Although those are 12bit – in theory pushing up shadows with a 12bit codec should yield better results. Not so because of the noise
- The internally recorded XAVC-I 4:2:2 10bit files at 5 stops of underexposure and pushed back to base can still be saved by noise reduction. They are at the cusp of breaking but still OK
Summary
All in all, the Sony FX6 is a solid performer in our lab test – superb rolling shutter values, and good dynamic range values are offered. The exposure latitude is about 8 stops (3 over, 5 under) – but more for the internal XAVC-I codec, not quite for ProRes RAW.
Sorry to say so, but from these lab results I do not see the point of ProRes RAW HQ. It is not supported by DaVinci Resolve, you only have rudimentary controls (exposure & gamma curve, no white balance, no tint, etc….) in Premiere Pro and the files are noisier – to an extend, that even advanced noise reduction in DaVinci Resolve cannot save them. In addition, no highlight recovery options are available – one of the benefits that other RAW codecs (like BRAW for example) are offering.
But I like the way the internally recorded image of the FX6 is set up – very organic and minimal (but effective) noise filtering, very “Cinema Line”. Quite different from the Sony a7s III – which looks over-processed to my eyes, too strongly noise filtered, thus affecting the skin tones.
Have you worked with the Sony FX6 ? What is your experience? Please share your thoughts with us in the comments section below.
