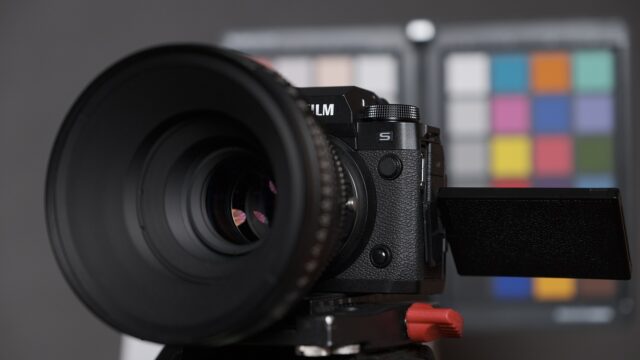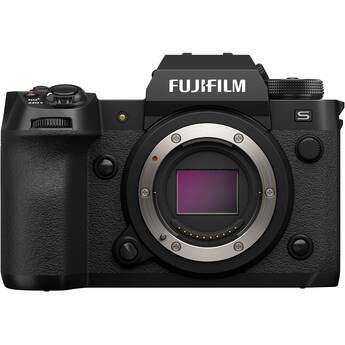
Listening to Victor Ha from FUJIFILM in our interview recorded here, there was something mentioned that really struck me – there is this new sensor and image processor in the X-H2S that allows reading the sensor data at 14-bit for up to 30 frames per second. A new F-Log2 profile is added to accommodate the new sensor capabilities. This is a unique feature for a consumer camera that would really allow much higher dynamic range values. Hence, I was quite curious to run the new FUJIFILM X-H2S through our lab test procedures. Curious too? Then read on…
So far, all the consumer camera sensors that I am aware of allow the higher frame rate recordings required for moving images only at 12 bit sensor readout modes. 14 bit sensor readout modes were reserved for high-end cinema cameras like the ARRI ALEXA, for example. Now, FUJIFILM brings this feature into a consumer hybrid stills / video camera, the X-H2S. Plus, internal 10 bit 4:2:2 ProRes HQ recording. Wow.
And, FUJIFILM claim up to 4x higher sensor readout speeds. Time to torture test this new camera in our lab!
Rolling Shutter
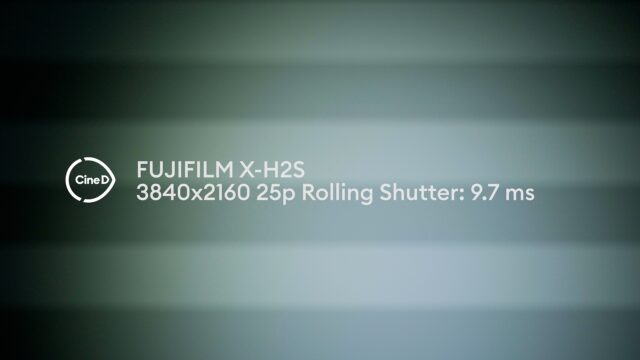
Using our strobe light, which creates the sequence of black and white bars (related to the readout nature of CMOS sensors), we are getting the first result in UHD 25 frames per second: 9.7ms (less is better).
This is a good result, considering the 14-bit readout of the sensor! For 3:2 6.2K open gate mode, we are getting 11.5ms. Quite interestingly, and consistent with FUJIFILM’s statements that for higher frames per second the sensor readout mode changes to 12bit, we are getting 5.3ms at UHD 60fps. In UHD 120fps, the readout mode changes again, a slight crop is applied (1.29x) and we get 3.9ms.
Dynamic Range
Now it gets interesting. If you are not aware of how we test the dynamic range, please have a look here.
Let me quickly summarize why we have 3 ways to judge the dynamic range of a camera:
- The waveform plot of the Xyla 21 chart at native sensor resolution on a timeline with that resolution: this gives a visual indication of how many stops can be identified above the noise floor. Also, it shows the code value distribution of the stops. Very often, the lower stops are very close together in terms of code value, hence if you underexpose and raise the shadows later in post (i.e. expanding the shadow stops), you will not have enough code values between the stops and the result is ugly banding (loss of fine color transitions between the stops).
- IMATEST: IMATEST will calculate the signal to noise ratio for each stop. That is a purely mathematical calculation and comes in handy to identify, how “clean” each of the stops is. Cameras that use a lot of internal noise reduction naturally fare better than others with less noise reduction. There is no way to account for that in a meaningful way, as the noise footprint of every camera / sensor is different. Hence, there is also no “standard” noise reduction that you can apply in post to compare cameras. That’s why we at CineD always turn off the noise reduction – as recommended by IMATEST.
- Latitude: exposure latitude is the capability of a camera to retain colors and detail when over- or underexposed. Our CineD studio scene is the real world test (in a controlled environment) of how far a camera can be pushed. The beauty of this test is that it clearly reveals how many stops are usable in our carefully composed standard scene, as the playfield gets equalized – and, it is revealed if a camera is “cheating” by using excessive internal noise reduction. Just to mention it: any other real world scene with a different distribution of lights and shadows would show a different result. No matter how much internal / or post noise reduction is used, cameras that show a solid 12 stops at a signal-to-noise ratio of 2 typically have 8 stops of latitude in our scene. Cameras, like the ARRI ALEXA, that show 2 stops more at SNR = 2 also have two stops more latitude. Cameras that try to achieve something close to 12 stops at SNR = 2 by using heavy internal noise reduction only show 7 stops of latitude.
So, this trinity of tests is very revealing and helps to identify if the combination of sensor readout, signal processing, and codec allows to push exposure around over a large range.
FUJIFILM X-H2S at ISO1250:
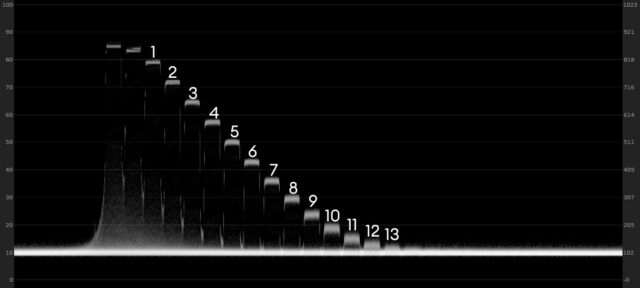
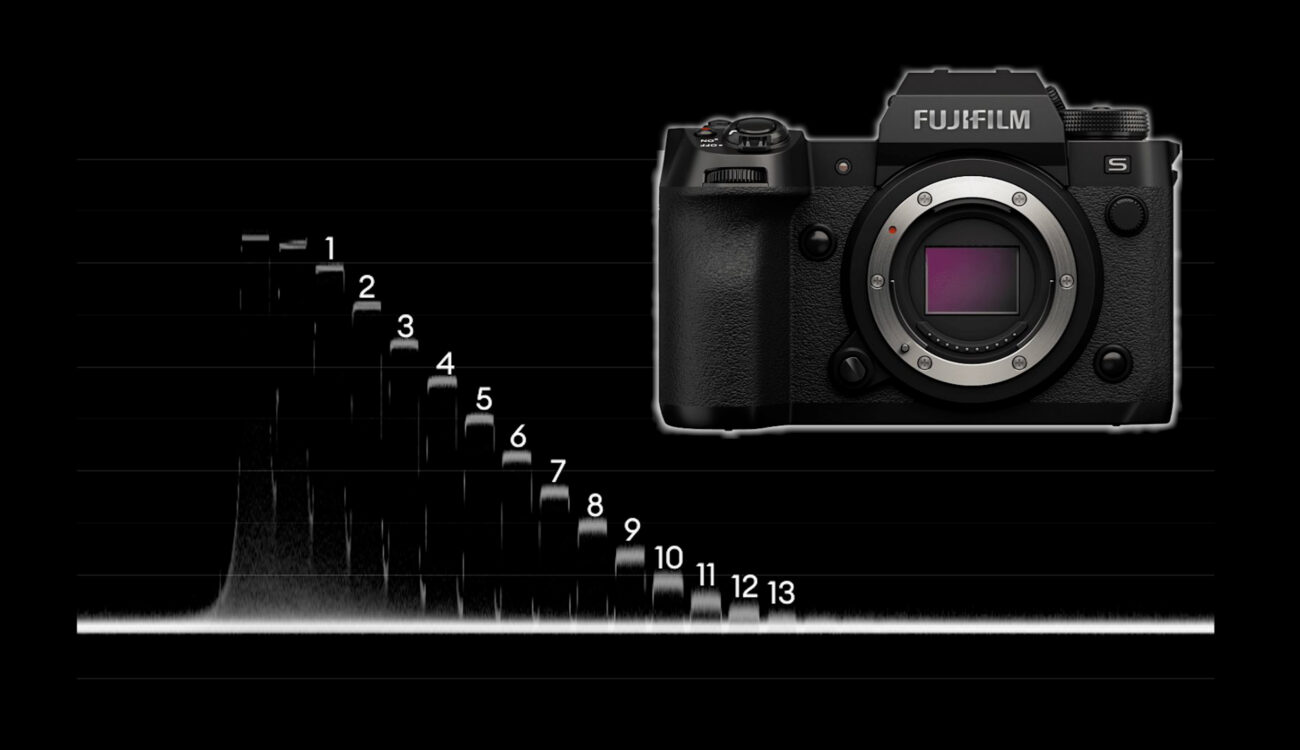
Using ProRes HQ, the new F-Log2 profile with a native ISO of 1250 and the native sensor resolution of 6240×4160 open gate 3:2 mode, turning “noise reduction” to -4 and interframe NR “OFF”, we get the following waveform plot:
13 stops can be identified above the noise floor. The noise floor looks rather clean, which hints at additional in-camera noise reduction despite the fact that we tried to turn it down as far as possible.
There is a solid code value difference between the 11th and 12th stop, as well as from the 12th to the 13th stop in F-Log2. This means: if you underexpose your shots and you need to push up those lower stops (and effectively expand them), you are less likely to run in to problems like banding and loss of color transitions.
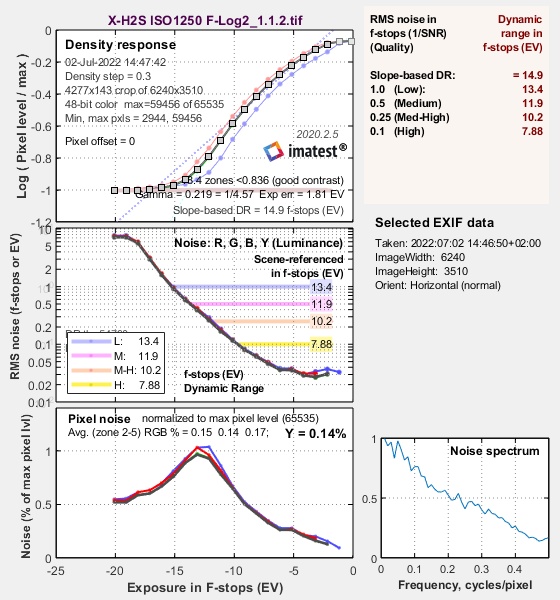
IMATEST calculates the following:
IMATEST shows 11.9 stops at a signal-to-noise ratio (SNR) of 2 and 13.4 stops at SNR = 1 (on a 6.2K timeline). That is a very good result for a consumer APS-C sensor (The ARRI ALEXA classic showed 13.8 at SNR = 2 and 14.8 at SNR =1, to give you our current benchmark)!
Also, if you look at the middle graph above the blue “13.4” line, there are still about 2 more stops identified. That is actually a bit better than the BMPCC 6K, not so much for SNR = 2, but the SNR = 1 value is half a stop better (also measured in 6K, test here). Compared to that, the Canon C70 (lab test here) trumps both with 12.8 stops at SNR = 2 and 14.2 stops at SNR = 1 for XF-AVC Intra C-Log2 (12.3 at SNR = 2 and 14 at SNR = 1 for CRAW).
Just to give you this additional data point: scaled to 3840×2160 UHD, I get 12.2 stops at SNR = 2 and 13.6 stops at SNR = 1.
Latitude
As described earlier, latitude is the capability of a camera to retain colors and details when over / underexposed and pushed back to a base reference level.
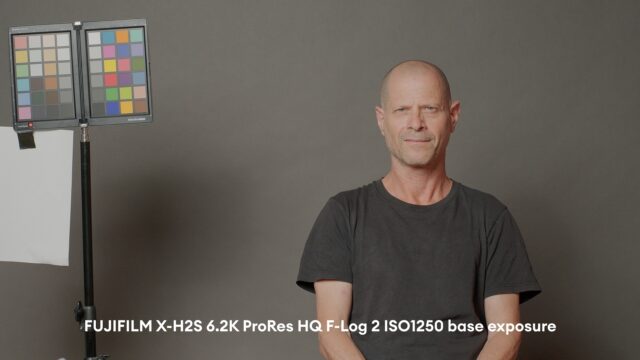
For our CineD studio tests, the base exposure level refers to a waveform value of around 60% on the forehead of my dear colleague Johnnie. The camera was again in 6.2K ProRes HQ F-Log2 open gate mode at ISO1250 (noise reduction at -4 and interframe NR “OFF”):
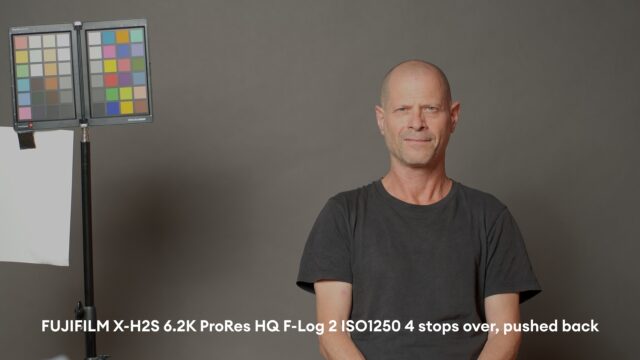
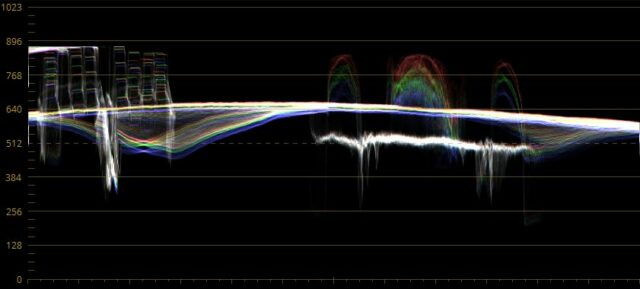
For base exposure, we exposed a bit below 60% to allow for 4 stops of overexposure without clipping the red channel on Johnnie’s forehead, then brought back to base exposure:
Now, let’s successively underexpose the scene by closing the iris of the lens to T8.0, and then halfen the shutter value.
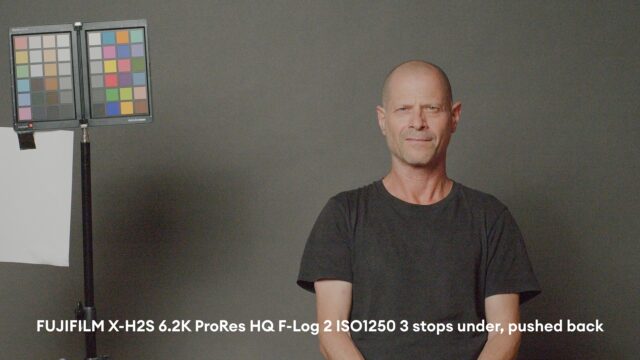
At 3 stops under base exposure, pushed-back noise starts to kick in:
The noise is very fine, very organic looking. No need for noise reduction, in my opinion. Remember, we are already at 7 stops of exposure latitude. Other cameras survive this point only by applying noise reduction in post.
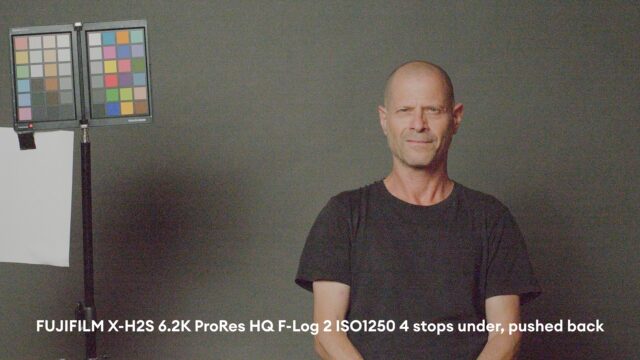
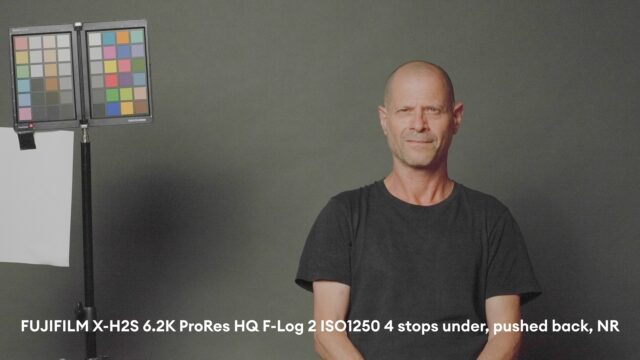
The 4 stops underexposed, pushed back image looks like this:
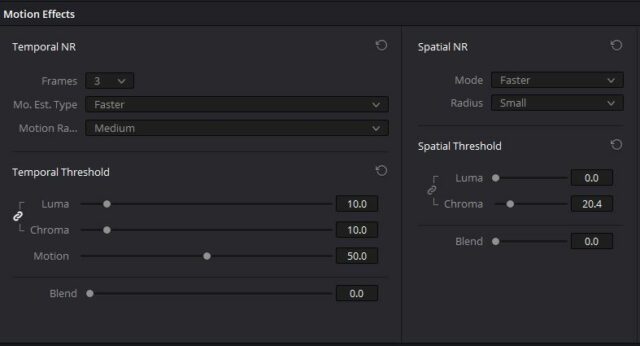
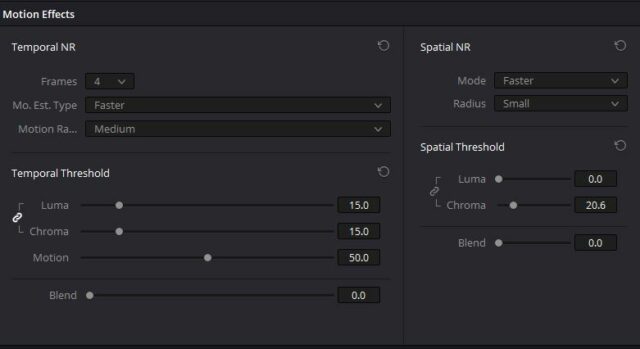
Noise is now very dominant within the image, but still very fine, organic looking. We are at 8 stops of exposure latitude! Noise reduction in DaVinci Resolve easily removes any excessive noise:
We are already at 8 stops of exposure latitude. Now, the big question is, can we push it one stop more, to 9 stops of exposure latitude?
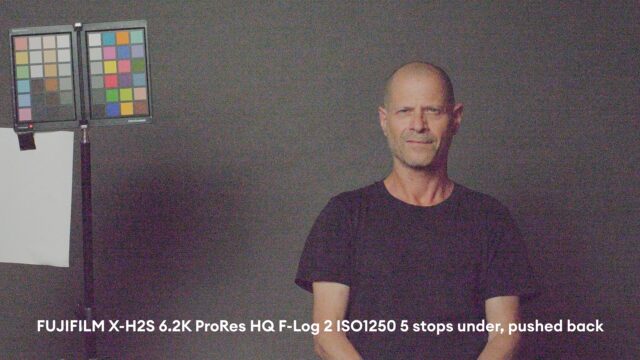
Let’s have a look:
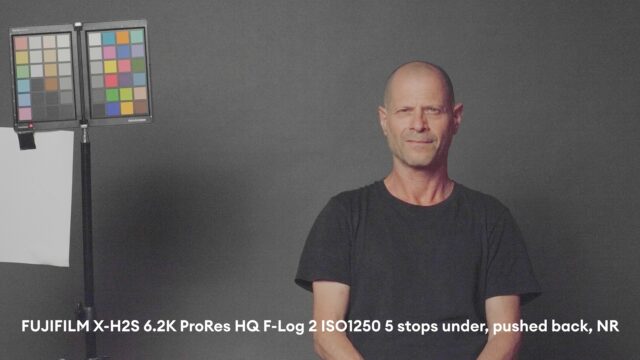
Heavy chroma and luma noise is now present in the image, not so fine any more. When using noise reduction in DaVinci Resolve, we get this:
This still looks surprisingly good, actually! However, the background color changed to grey instead of olive, and the shadow side of Johnnie’s face is rendered pinkish instead of orange – which I do not like. But, there are no large blotches of chroma noise or horizontal or vertical lines. Even the moving image still looks quite okay.
Judge for yourself, but this is close to acceptable, and we are at 9 stops of exposure latitude. Please have a look at other cameras like the Canon C70 (test here), full-frame cameras like the Sony A1 (test here), or the recent Sony VENICE 2 (test here) – the FUJIFILM X-H2S definitely trumps the C70 and even the Sony A1, while the 5 stops underexposed image looks almost as good as with the VENICE 2 in 4K ProRes HQ – and we are talking about a full-size cinema camera here.
If we compare the 5 stops underexposed image with the leader of the pack, the ARRI ALEXA Mini LF (lab test here) it becomes clear, however, that it cannot compete – the 5 stops under image of the Mini LF definitely looks much better, actually even the 6 stops underexposed image does. And, the Mini LF has one stop more in the highlights as well, leading to 10 stops of exposure latitude.
So, a solid 8 stops with additional wiggle room towards 9 stops – that’s quite impressive and is actually better than most of the recent full frame consumer cameras. Good job, FUJIFILM!
Summary
The FUJIFILM X-H2S fares really well for a consumer camera in our lab test, especially when considering that it is an APS-C camera, not full frame. The rolling shutter performance is very good, the dynamic range results are impressive, as is the latitude test. It becomes clear from these results that the 14-bit sensor readout definitely is part of this good performance.
So, you could actually say it is a BMPCC 6K on steroids with a ton of additional features like IBIS and all of the other advantages of a true hybrid camera, including a smaller form factor.
Link: FUJIFILM
Have you used the FUJIFILM X-H2S yet? Please let us know what you think in the comments below
