Color Grading Basics – Blackmagic Design DaVinci Resolve 16 Workshop with Simon Hall
Senior Blackmagic Design trainer Simon Hall presents a short workshop covering basics of color grading in DaVinci Resolve 16. He shows all parts of the Color page in Resolve and explains how they should be used. Simon also shows a few practical examples of primary and secondary color correction.
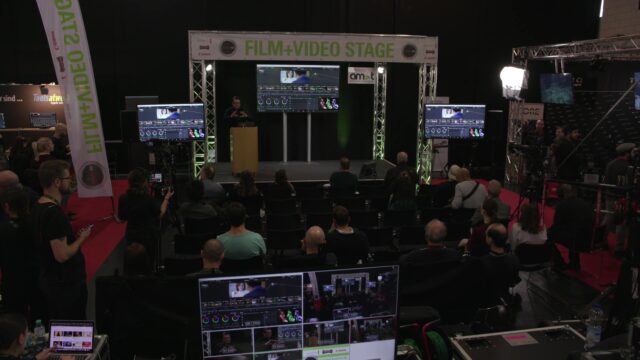
During this year’s Photo & Adventure trade show in Vienna, Austria, the cinema5D team was in charge of the “Cine & Video stage” program at this show. We invited many interesting guests to talk about various topics. You can see the initial post here. We decided to publish the most interesting topics again in separate articles. You can await these to be published in the next weeks. This article is covering Simon Hall’s presentation showing the basics of color grading in Blackmagic Design DaVinci Resolve 16.
This content was originally streamed live from the Photo+Adventure – Film+Video Stage – in November. We are re-publishing and highlighting some of the best content from the stage.
DaVinci Resolve used to be known mainly as a color grading software. It still is one of the most powerful software for colorists. In recent years it, however, also became a powerful NLE editing software. Blackmagic Design managed to concentrate lots of functions from various stages of post-production in one application.
Simon Hall is a senior Blackmagic Design trainer and an experienced editor. In summer, he conducted a short DaVinci Resolve training for cinema5D and we decided to invite him to Photo & Adventure trade show to show basics of color grading in Resolve 16.
Blackmagic Design DaVinci Resolve 16 – Basics of Color Grading
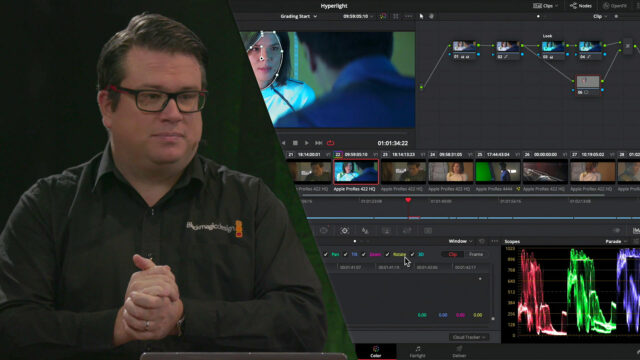
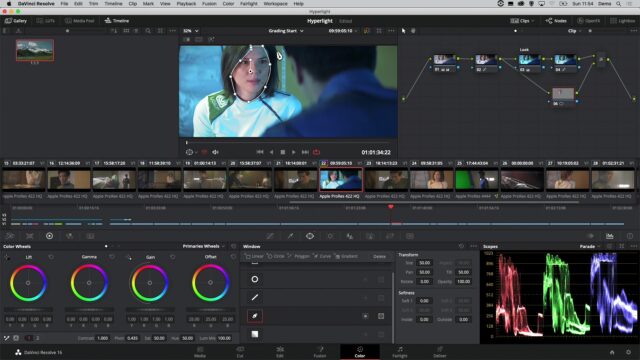
The focus of this short workshop is concentrated on the Color page of DaVinci Resolve 16 as that is where the whole color grading process happens. Simon starts the presentation with the description of tall the different windows in the Color page.
- The top left-hand corner contains a Gallery. Users can save their grades there in the form of stills.
- Next to the gallery in the middle, there is a Viewer monitor.
- The top right-hand corner contains a Node window. Simon shows node workflow. He uses a few serial nodes and also explains layer nodes, which can bypass serial nodes. These are useful for instance when doing local color adjustments with qualifiers. Simon isolates the color of a face not to mess up the skin tones while grading as an example. Nodes can be labeled for better orientation because with complex grades, the node window can get a bit confusing.
- The stripe in the middle is a thumbnail view. It includes all the clips from the timeline.
- The bottom left-hand corner contains a window with many primary color correction tools. Most used ones are the primary color wheels – Lift (for shadows), Gamma (for midtones), and Gain (for highlights). Users can use these wheels to quickly correct exposure and color temperature of the clips. As an alternative to primary wheels, there are also log wheels. Log wheels are much more specific than primary wheels – the area they affect does not overlap so much. Log wheels are therefore useful for adjusting only a specific part of the image – for instance, highlights only. The danger with log wheels is they can give an unnatural look very quickly.
- The bottom middle window contains many secondary color correction tools, like for instance more types of color curves or color qualifiers. With the help of 3D color qualifier and tracker, users can change colors of various objects in the clip, like the face which Simon used as an example.
- Finally, on the bottom right we can find monitoring tools, like for instance many flavors of parades. Simon shows mostly RGB parade, which is useful also when adjusting the white balance of a clip.
Simon further shows the advantages of working with Blackmagic RAW. Users can work with Camera Raw feature in Resolve 16. With every clip, users can change ISO, color space, gamma, white balance, and more
Resolve also has a couple of OpenFX effects on the Color page. Simon shows a Face refinement as an example of an effect. It recognizes a face in the image and tracks it. Users can then play with different sliders and adjust the look of the face. There is Eye retouching, Eye bag removal, Lip retouching, color corrections and more adjustments available.
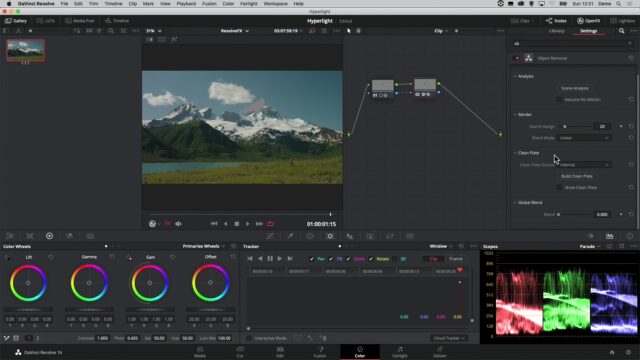
Simon also shows a new feature in Resolve called Object removal when he removed an airplane from a clip.

DaVinci Resolve 16 – Basics of color grading with Simon Hall – Object removal. Image credit: cinema5D
Resolve accepts a wide range of formats and it includes debayer settings for each of them, so users can grade material from virtually any digital camera. Simon also demonstrated how well Resolve 16 is optimized. It should be stable even on mid-range laptops, like Apple’s MacBook, which Simon used.
Simon Hall had of course very limited time on our stage, but Blackmagic Design offers free training manuals and online videos for DaVinci Resolve like we just reported about recently.
Do you use DaVinci Resolve 16 for color grading or do you want to start? Did you find this short workshop useful? Let us know in the comments underneath the article.


