Convert Inspire 2 Raw Files & Grade D-Log – Mastering Drone Footage – PART 4
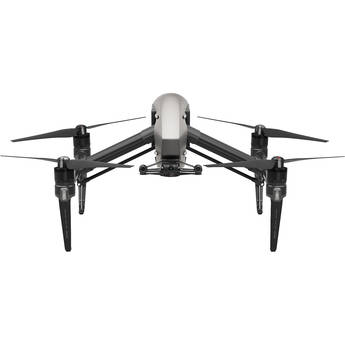
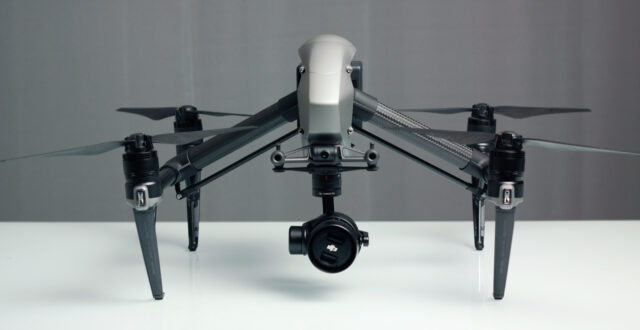
I recently reviewed the new DJI Inspire 2 drone extensively and did thorough tests in our lab. In this workflow tutorial on how to master drone footage, I will show you how to convert Inspire 2 X5S or DJI inspire 1 X5R files in order to get the best results from your Inspire footage.
Get our Inspire LUT and Inspire Raw to Log conversion presets HERE.
Why Convert Inspire 2 Raw Files?
I spent a few days filming with the Inspire 2 drone to create a drone film so I could gain some hands-on experience for my review. During the editing process, I quickly noticed that when filming in Raw mode ( = 5.2K resolution), and similar to the DJI Inspire 1 RAW drone, the DJI Inspire 2 X5S produces .dng sequences that I somehow needed to transcode in order to edit and apply LUTs.
The problem for me was that I could never get anywhere near neutral colors by simply sliding the color settings in Adobe Camera Raw, or even by using DaVinci Resolve’s “Blackmagic Film Gamma”. I had the same problem with the Inspire 1. Furthermore, to edit properly I needed some kind of proxy footage, so early transcoding was inevitable.
Of course, professional colorists can use the Raw files and tweak the colors until they are right to them, but that is not my style – I’m used to neutral Log gamma video files that I can apply LUTs to and color easily and efficiently, preferably directly in my editing app.
So, in conclusion, my requirements were to:
- Convert Inspire 2 Raw (Or Inspire 1 for that matter) to a well-preserving video format in order to edit and colorize later (without having to go back to Raw).
- Match and get a neutral Gamma on all my video files, ideally right while transcoding, so I can apply LUTs and grade easily.
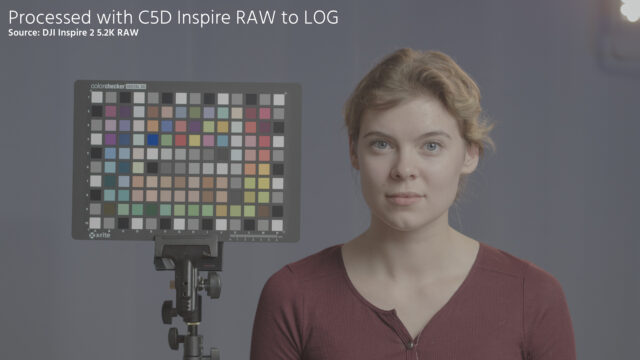
In the test lab, the colors coming from the X5S and X5R (Inspire) cameras appeared to be off by quite a bit in comparison to an Arri ALEXA, so on top of making a workflow tutorial video I also decided to create several presets and LUTs to get closer to Alexa Log C.
Inspire Raw to Log Conversion
During my test lab analysis, I found that the best workflow for .dng Raw from the drones to be as follows. Note that this workflow works both for the DJI Inspire 2 with the X5S camera as well as the DJI inspire 1 with the X5R camera. Also note that this workflow method is for Mac users only right now, although if you work with Windows you can probably adapt it.
1. Convert Inspire 2 Raw to Log in DaVinci Resolve
Notes about the DaVcini Resolve conversion
• Faster than the After Effects method described further down.
• Does not remove lens defects like chromatic aberration, vignetting and distortion.
• Gives you a generic flat gamma. (Unless you use the DaVinci LUTs)
• In my experience, it blows out the highlights a bit.
- Open DaVinci Resolve (free download).
- Browse to your Inspire Raw shots.
- Drag your folder(s) to the media pool.
- Change your project settings to the resolution of your shots. (Gear wheel at the bottom right –> Timeline Resolution)
- Go to the “Edit” tab and drag your shots into the timeline.
- Go to the “Color” tab and select each shot. Then change:
- Decode Using: “Clip”; Color Space: “Blackmagic Design”; Gamma: “Blackmagic Design Film”; Tick the “Highlight Recovery” box.
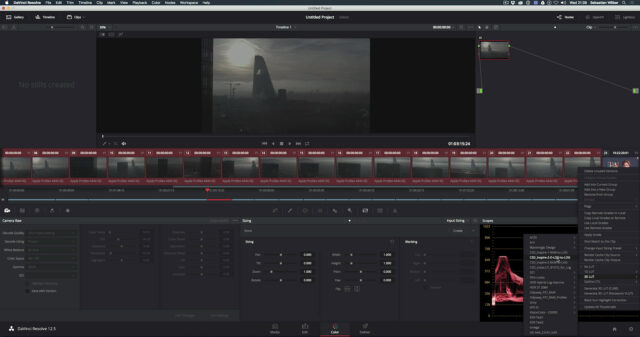
- (optional) Use our DaVinci 3D LUTs to get closer to the Alexa Colors.
- Then export your files in the “Deliver” tab. To batch convert all clips, select “Individual Clips” and “File” –> “Source Name”.
- Click “Add to Render Queue” and then “Start Render” to convert Inspire 2 Raw or convert Inspire 1 RAW files.
Using the cinema5D DJI Inspire Raw to LOG Conversion LUTs
With my conversion LUTs you can get closer to the Arri Alexa Colors and Gamma. To install them:
- Launch DaVinci Resolve.
- Start a new project or open an existing one and click on the settings icon in the lower right corner.
- Click on the “Color Management” tab.
- Click on “Open LUT Folder”. The LUT folder will open in a finder window.
- Copy the LUT .cube file(s) into the LUT folder.
- When copying has finished, click the “Update Lists” button in the DaVinci Resolve settings window.
And to use them:
- Follow the instructions laid out earlier and apply the “Blackmagic Design Film” Gamma.
- Before exporting, right click each clip thumbnail and select “3D LUT” –> “C5D_Inspire-1-RAW-to-LOG” or “C5D_Inspire-2-RAW-to-LOG”.
2. Convert Inspire 2 Raw to Log in After Effects
[Update March 31st 2017]
With DJI’s new firmware for the Inspire 2, there is now an option to select “D-LOG” gamma while shooting in RAW mode. Please note that this option has little to no effect on your RAW files, but it will lock your exposure to ISO 500. If you can shoot at ISO 500, which is a good place to expose RAW correctly, then use the “D-LOG” option while recording RAW. Otherwise, if you want to be more flexible, leaving the “D-LOG” option off while recording RAW is recommended.
Notes about the After Effects conversion
• Removes color noise from your footage.
• Removes chromatic aberrations, vignetting and distortion from your shots by using the embedded Raw lens data.
• The Olympus 25mm lens data is currently faulty, so any footage shot with this lens will not look great. Let’s hope DJI will fix this.
• This conversion takes a very long time. Expect your computer to run for at least a day for 30 minutes of footage.
- Open Adobe After Effects CC.
- Drag and drop your folder(s) containing the Raw .cdng sequences into the After Effects “Project” tab.
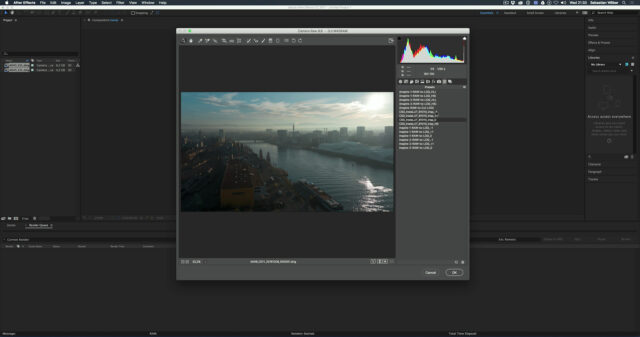
- The Camera Raw App will open.
- (optional) Go to the Presets tab (second from the right) and select one of the cinema5D RAW to LOG presets.
- For each shot (folder with .cdng sequences) you import, the Camera Raw App will open individually.
- Once all your shots have been imported into After Effects, you can drag them to the “Render Queue” tab at the bottom.
- Select your desired target codec under “Output Module” in the “Render Queue” tab.
- Select your desired file destination under “Output To”.
- Click “Render” in the “Render Queue” tab to convert Inspire 2 Raw or convert Inspire 1 RAW files.
For the best possible quality, select the Apple ProRes 4444 or 4444 XQ codec. To save space, go for Apple ProRes 422 HQ.
Using the cinema5D DJI Inspire RAW to LOG Conversion LUTs
With my conversion presets you can get closer to the Arri Alexa Colors and Gamma. To install them:
- Navigate to your “Library” folder in Mac OS X. If it is hidden you can reveal your library folder by going to your home folder and then selecting “View” –> “Show View Options” and ticking the “Show Library Folder” checkbox.
- Navigate to “/Library/Application Support/Adobe/CameraRAW/Settings/”.
- Place all the .xmp files inside this directory.
- Restart After Effects.
And to use them:
Follow the instructions laid out earlier. To use the presets, go to the “Presets Tab” (second from the right) in the Camera Raw window of each clip and select one of the presets.
“Inspire-*-RAW-to-LOG_0” is the standard preset. “+1” means pushing the shot if it was underexposed. “-1” means pulling the shot if it was overexposed. For shots with overexposed portions of the image you can also choose the “HL” or “HS” presets. “HS” saves your highlights, “HL” blows your highlights and makes the rolloff more smooth.
Note that the presets inside the parenthesis “(…)” are NOT always recommended, as they may produce a “flicker effect” in rare occasions.
Inspire Raw to LOG presets
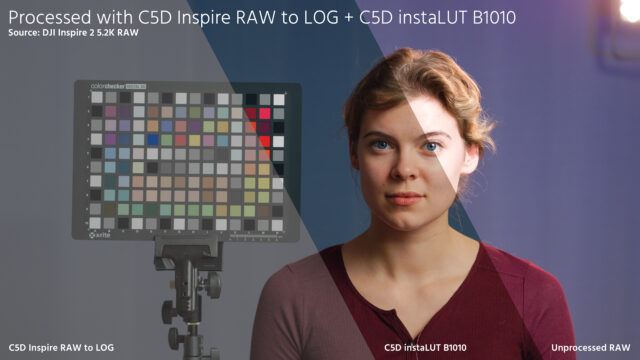
If you intend to get awesome shots, I’m sure you will benefit from my presets. I’ve spent a lot of time and effort to get them right, which is why we are not offering them for free. The package also includes the C5D instaLUT B1010 (.cube file) for Log footage (ARRI Alexa and Inspire RAW to LOG) and DaVinci presets for fast conversion of Raw and D-Log footage. This is the best way I found to convert Inspire 2 Raw files to a better format.
Disclaimer
The presets don’t turn your shots into 100% Arri Alexa Log C footage. They were created by hand and they were intended to get your colors and gamma into the ballpark of Alexa Gamma, so third party LUTs can be used more easily and D-Log and Raw can be matched more easily. That said, for me they are a big help and I hope you enjoy them too.
As I mentioned in my video, the After Effects workflow gives you the best possible quality and I use it all the time, but DaVinci Resolve converts quicker and the files are also very usable in case you need your files fast. If you shot your video in 4K (UHD) on the Inspire 2 you should use Apple ProRes and D-LOG and you won’t have to convert Inspire 2 Raw files at all. I have tested and explained this in my review.
3. Convert Inspire 2 D-Log to Log in DaVinci Resolve
With my conversion LUTs you can also convert your D-Log footage (recorded in Apple ProRes) to get closer to the Arri Log C look as explained earlier.
Note
These only work for the Inspire 2 which records in high quality at 4K resolution with the Apple ProRes codec. It is not recommended to use them on the Inspire 1 or any other DJI drone available right now, as the quality and bitrate of those is not high enough to work properly in such a flat Log Gamma.
To install them: follow the instructions laid out under point “1.”. To use them:
- Open DaVinci Resolve (free download).
- Browse to your Inspire D-Log shots.
- Drag your shot(s) to the media pool.
- Change your project settings to the resolution of your shots. (Gear wheel at the bottom right –> Timeline Resolution)
- Go to the “Edit” tab and drag your shots into the timeline.
- Go to the “Color” tab and select all shots.
- Right click each (or all) clip thumbnails and select “3D LUT” –> “C5D_Inspire-2-RAW-to-LOG” or “C5D_Inspire-2-RAW-to-LOG”.
- Then export your files in the “Deliver” tab. To batch convert all clips, select “Individual Clips” and “File” –> “Source Name”.
- Click “Add to Render Queue” and then “Start Render”.
4. Convert Inspire 2 Raw to D-Log in After Effects
Here is one more conversion preset as a bonus that I haven’t mentioned in my video. It is called “(Inspire-RAW-to-DJI-LOG)”, part of my cinema5D Raw to Log conversion package. You can select it in the presets tab during the After Effects Camera Raw conversion that I explained in point “2.” This allows you to convert Inspire 2 Raw shots into a gamma that is closer to the D-Log look that you get with AppleProRes recordings on the Inspire 2. It should make it easier to match your footage if D-Log is your target gamma.
5. Direct Workflow in Premiere Pro CC
There is also a very simple way to use the D-LOG to Log LUT in Premiere Pro CC directly. The LUT contained in the Raw to Log package converts D-LOG to Log and it can be applied in the Lumetri Color Panel. The benefit of this method is that you do not have to convert your files, but you can work on them natively. The downside is that you cannot apply this to RAW, but only to D-LOG footage, shot on the DJI Inspire 2 with the X5S camera.
- Go to the Lumetri Color Panel in Premiere Pro CC.
- Under “Basic Correction”, choose the C5D_Inspire-2-D-LOG-to-LOG.cube LUT as “Input LUT”.
- Choose your look under the “Creative” tab in the Lumetri Color panel. Choose any .cube file of your liking that works with Alexa Log C.
Conclusion
That’s it. I hope this workflow tutorial on how to convert Inspire 2 Raw files or Inspire 1 RAW files into Log was useful for you, even if you don’t use my presets and LUTs. I tried to make this tutorial informative for everyone, but I must admit that I see my presets as an integral part of my own workflow to get my footage to where I need it to be. If you have any questions don’t hesitate to let me know in the comments, and please post links to your work where you used the presets successfully!
