What are the Differences Between the FREE & PAID Versions of DaVinci Resolve?
Blackmagic Design’s DaVinci Resolve is a powerful editing, video effects, and sound production suite used by everyone from big Hollywood productions to YouTube content creators. You can get the free version, or pay $295 for the Paid Studio version.
You might be wondering who the free version is for. What are the differences between the free and the paid Studio version? We are here to guide you through all of the differences!
Why is there a free version of DaVinci Resolve?
First of all, why is there even a free version of the program? This is pretty clever marketing on behalf of Blackmagic Design. Resolve is used as an attractive gateway into the Blackmagic Design ecosystem. The thinking of CEO Grant Petty is that once you really get to know Resolve, you will also be interested in the hardware they offer, such as the speed editor, color grading panels, or the ATEM mini-series.
As your expertise grows and you become more professional, the more you will invest in Blackmagic products – and this strategy seems to work well (judging by my current desk setup, it sure worked on me). So, there are no signs that the company will change this any time soon.
“We want people to be able to create great content for free, but also have the opportunity to unlock further professional features once their skill level has reached a certain point.”
Simon Hall, Senior Technical Sales Specialist at Blackmagic Design
So, why should you pay?
Which brings us to the next question: why should I pay around $295 for the full Studio version? First of all, one of the biggest differences to some competitors: it’s only a one-time fee; there are no recurring charges and Blackmagic does not charge for updates. So, if you bought version 15 some years ago, all updates, including the current version 18.6, have been free of charge. You can find our article on what to look out for when upgrading versions here, and you can find a list of all the new features of version 18.6 in this document by Blackmagic Design.
We will guide you through the differences according to the workflow in Resolve, starting at the Media page and ending at Export. In the end, you will know whether the free version is sufficient for your needs or if you will make the jump to the paid version of the program.
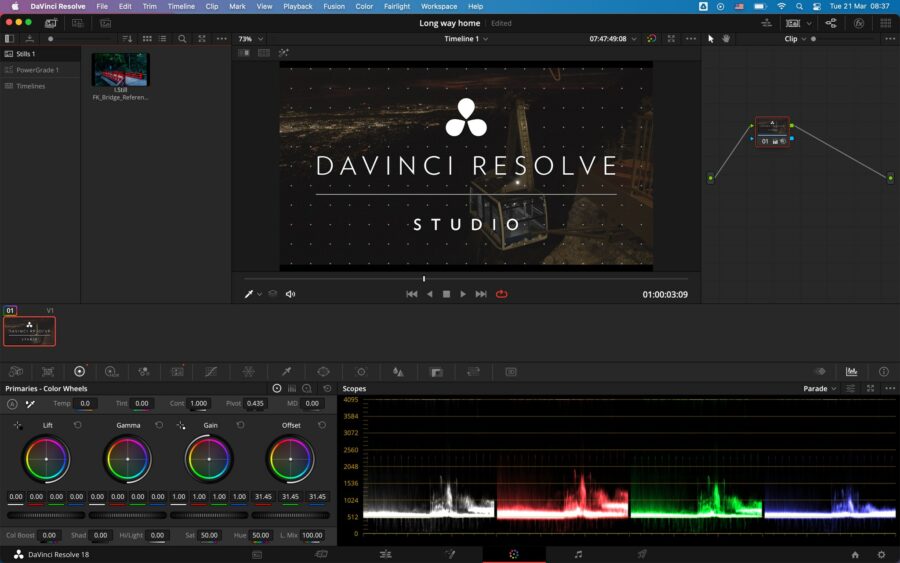
Media page
You will start noticing differences once you upgrade your camera gear and professionalize your workflow. While the free version can handle many formats and codecs, only the Studio version will play back formats such as AVCHD, HEIF, J2K HT, and Sony XAVC, or 10-bit formats such as the H.264 10-bit 433 out of the Panasonic GH series. Here is a link to a list of all supported Codecs directly on the Blackmagic site.
A feature missing in the free version is face detection for creating smart bins for different actors. This is a great feature for organizing your material for a long-form project with many different people.
Cut and Edit page, collaboration, and performance
The differences come mostly from the program’s performance itself. While both versions use the GPU for processing, only the Studio version can make use of multiple GPUs. However, it seems like one powerful GPU will do a better job than a few weaker ones, so if you are thinking of investing in graphic power, then go for one powerful card.
The timeline resolution in the free version is limited to Ultra HD 3,840 x 2,160. However, you can create timelines in different aspect ratios even in the unpaid version of the program.
The Beginner’s Guide to DaVinci Resolve
Two Edit Page Inspector features that can only be found in Studio are Smart Reframe (which automatically puts the most important part of the video at the center when zoomed in or using aspect ratios different from the one the video was shot in e.g. when going vertical for footage that was shot horizontally) and Lens Correction (for getting rid of spherical lens distortions and other aberrations).
Both free and paid include multi-user collaboration on projects (featuring a chat function), but only the paid version supports markers and comments synchronization using Dropbox, as well as remote grading (which lets colorists work with clients via the internet), remote rendering, and remote monitoring of 444, RGB 10-bit video and audio streams.
A very useful tool, especially when dealing with long interviews, is the audio transcription feature. It analyzes a clip from the media pool and gives you a transcription allowing you to edit via text. See our video on this handy tool here:
Further features only found in the Studio version include:
- Support for HDR10, HDR10+, Vivid, and Dolby Vision workflows and H.265 Dolby Vision encodes
- Support for HDR metadata over HDMI/SDI
Color page and color correction tools
This is the area that DaVinci Resolve is most known for, and the free version offers a lot of tools needed to correct and grade your material to achieve a professional look.
Some features only found in the paid version include the Magic Mask, a tool for easy masking that can save you a lot of time by avoiding rotoscoping – or the face refinement tool for beauty touch-ups, since both these tools use AI features of the Neural Engine working in Resolve. See how the magic mask works in this video from MrAlexTech:
Also, only available in the paid version are HDR scopes, which enable you to create videos complying with standards such as Dolby Vision or HDR10+. Studio also features more advanced noise reduction tools than the free version, including temporal and spatial noise reduction tools that can be used separately or together. While the temporal noise reduction will analyze changes between frames, the spatial noise reduction tool looks at neighboring pixels to find and reduce noise in the picture.
Other tools and effects on the color page that can only be found in the Studio version:
- DCTL import (DCTL stands for DaVinci Color Transform Language and allows you to create tools that can act like LUTs or plugins for image manipulation, check out this page if this sounds interesting to you)
- Re-light (which allows you to add virtual light sources to scenes)
- Depth Map (which analyzes the image and generates a 3D depth matte to quickly grade the foreground differently from the background)
- Grading of stereoscopic 3D projects
- Film Halation (for adding a glow around high contrast edges, which can be found on footage recorded on analog film)
- Speed warp (for creating smooth slow motion)
- Superscale for upscaling HD to 4K
- Film grain
- Camera blur
- Motion blur
- Motion trails
- Lens flare
- Lens blur
- Lens reflections
- Pencil sketch
- Analog Damage (for vintage looks)
- Aperture Diffraction
- Automatic Dirt Removal
- Beauty
- Stylize and Pencil Sketch
- Chromatic aberration
- Chromatic adaptation
- Auto color matching
- Color Stabilizer
- Contrast Pop
- Deflicker
- Dehaze
- Detail recovery
- Dustbuster
- False color
- Frame replace
- Object tracking
- Object mask
- Object removal
- Patch replacer
- Sharpen
- Sharpen Edges
- Smear
- Soften and Sharpen Skin
- Surface Tracker 18
- Texture Pop
- Tilt Shift Blur
- Warper
Creating effects in Fusion
Interestingly enough, the effects suite within DaVinci Resolve or the Fusion page has only minor differences between the free and Studio versions.
Features only available in Studio include:
- Fusion Camera Tracker
- Fusion VR Toolset
- Control Scripts from local or remote machines
So, you can do nearly everything that Fusion offers for free, although this page has quite a steep learning curve. Once you wrap your head around concepts like nodes though, you will be able to create great effects here.
Working on audio in Fairlight
For audio mixing in Resolve, we use the Fairlight page. The free version already offers a lot of features such as the royalty-free audio library (which can be downloaded from the Blackmagic Design website).
A new AI feature added in the latest version of Resolve Studio is the audio classification. This feature will analyze audio clips and automatically put them into bins according to their content (such as music, effect, dialogue, etc.). See Jason Yadlovski’s video on this feature here:
Only in Studio can you find the following functions:
- Output stereo sound higher than 192 kbps
- Voice Isolation (to get rid of unwanted ambient sounds)
- Dolby Atmos audio
- MPEGH import and rendering
- SMPTE ST.2098 support
- B-chain audio monitoring
- Auro-3D audio
- 3D panner
- 3D Spaceview
- Support for object and channel-based immersive formats (ADM, 22.2, SMPTE, MPEG-H, and others)
Deliver page and export options
Here you will find some major differences between the versions. The free one limits exports to 4K Ultra HD and 60 fps. Studio enables you to export up to 32K and 120 fps with advanced HDR delivery. If you need to create DCI 4K 4,096 x 2,160 or even higher resolutions, then you have to go for the paid version.
Studio also supports hardware-accelerated encoding and decoding of codecs such as H.264 and H.265, which will not only speed up working with this type of material but also significantly shorten the rendering process when exporting. Frame.io integration is only supported in this version as well.
Workflow integration plugins
You will need the Studio version if you plan on connecting to third-party software for tasks such as digital asset management or automation. You can even write plugins yourself and log them into the JavaScript APIs. Furthermore, it supports scripting in both Python and LUA allowing you to set up custom workflows.
Conclusion
As you can see, the free version of Resolve already offers you a lot of functionalities for creating great content. Since you can download it directly from Blackmagic Design’s website, it is easy if you want to give it a try and see if you can get comfortable with it. You can find our article about great resources for beginners here. Once you have figured out your needs, you can still make the upgrade to the paid version at a later stage. For most users planning to go more professional, this will be the next logical step.
Price and availability
You can get the free version of DaVinci Resolve directly from Blackmagic Design. You can find the Studio version at retailers such as B&H and CVP.
Are you using DaVinci Resolve and if yes, are you paying for the Studio version? When did you make the switch to Studio and what features made you go for it? Let us know in the comments!
