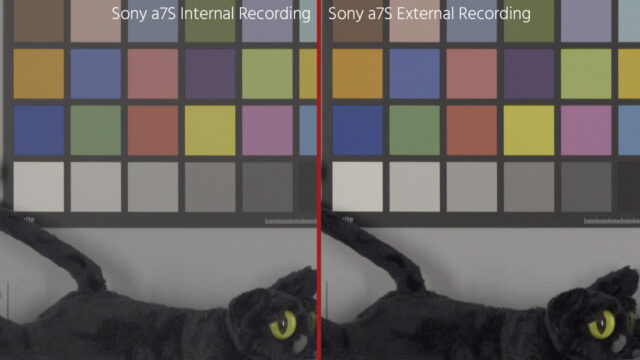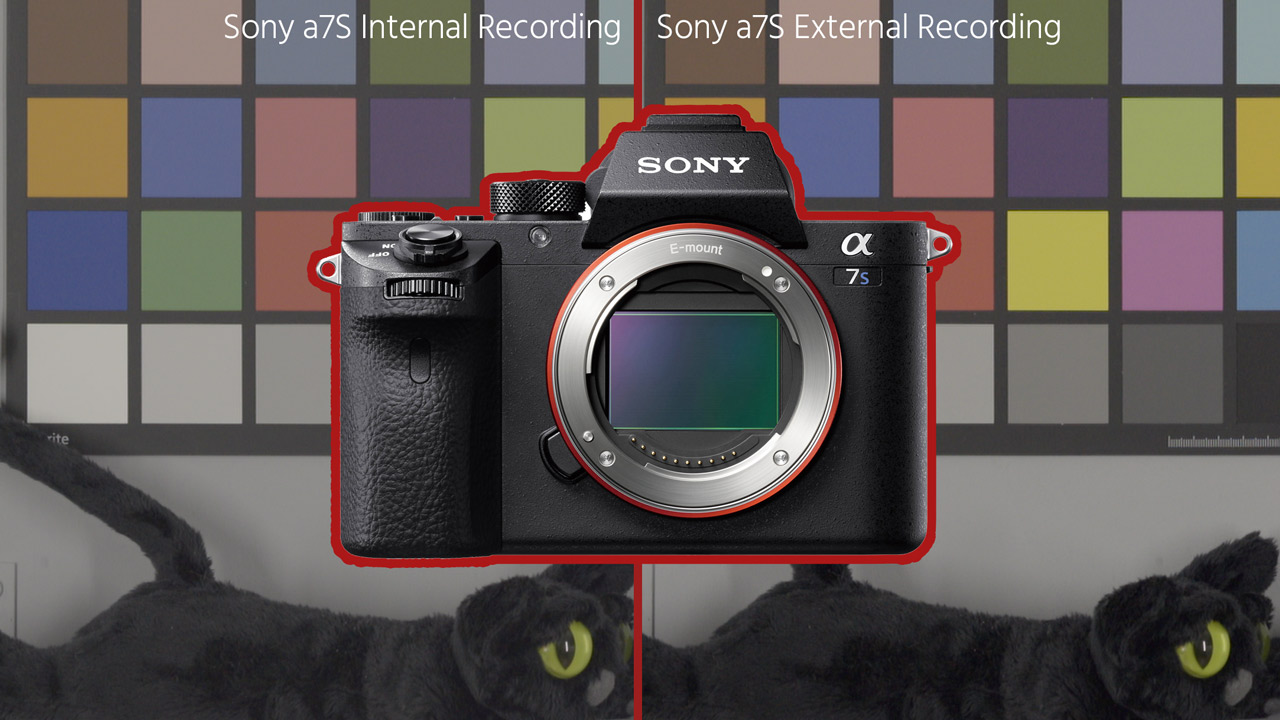
To say that the Sony a7 series of mirrorless cameras has been popular among videographers is an understatement. A large number of filmmakers have been using these cameras and some them make good use of the external recording feature to get even higher resolutions and data rates.
Unfortunately, there has been a pitfall plaguing the cameras for a while now. Of course, I’m talking about the crushed blacks and highlights on external recordings. This article will take a deeper look at why this phenomenon appears and how to resolve it. Or at least, how to work around it. [UPDATE: We have developed a LUT that fixes it.]
Crushed Blacks on External Recordings
It is no wonder that external recording is so popular on the Sony a7S. With the assistance of an external disk recorder, such as the Atomos Shogun, the possible resolution increases from 1080p to 4K and filmmakers can tap into high-quality codecs such as ProRes or DNxHD (as opposed to Sony’s H.264 derivative, XAVC).
Sadly, when using S-log2 Gamma Space, crushed blacks and skimmed highlights can make a surprise appearance at the editing desk. A good portion of the lows appear cut off, and some highlight information tends to be lost, too. In S-log3 only the blacks are affected (as the video output only goes as high as 94%). The contrast is raised and, in essence, the whole purpose of S-log is defeated. This leads to images that were perfectly fine during shooting becoming broken.
This phenomenon has been the main reason that some people have avoided using external recorders with the Sony a7S, a7S II, and a7R II cameras.
What causes the Crushed Blacks Phenomena?
Let’s face it. We’re often quick to blame manufacturers when things like this crop up. In this case, however, it turns out the culprit isn’t Sony. After digging deeper into the matter, we discovered that the reason we lose image information on external recordings is that the NLE is incorrectly interpreting the data it is given—it doesn’t realise that we’re using the higher bandwidth Gamma (S-log2/S-log3). In our case, the NLE in question is Adobe Premier Pro CC 2015.
The image above is a waveform representation (captured in S-log2 with DaVinci Resolve) of a recording of an OEFC chart. In the camera’s S-log2 & S-log3 Gamma Setting, apparently data from 0 to 1023 is used for each channel. However, when no further metadata is embedded in the recordings, all NLE’s, including DaVinci Resolve, automatically interpret the footage recorded on external recorders with video levels from 64 to 960. This cuts off some information in both the blacks and the highlights. The orange arrows point out where that happens.
When you record in-camera (XAVC, for example), then metadata is written directly to the file to tell your NLE to use 0 – 1023 (If you’re working in 10bit). On external recordings, however, this metadata cannot be transferred via the HDMI cable thus either the recorder would have to set that metadata flag (which it probably doesn’t), or it has to be set in your NLE manually.
The Fix
[UPDATE:] We have developed a custom LUT that fixes this problem either in post, or directly on a recorder, so you have 0 rendering time and 0 quality loss. Get the LUT by clicking the button below, or read all about it here.
The Workaround
Unfortunately in the NLE’s that many of us use (Adobe Premiere Pro CC 2015 & Final Cut Pro X) there isn’t an option to manually set the data levels. The NLE will always automatically interpret the footage with levels from 64 to 960 (or 16-240 in 8bit) and this will cut information, leading to crushed blacks and skimmed highlights and there is no way to change that yet.
To correctly interpret externally recorded footage you will either have to switch to another NLE that lets you set this manually, or go through DaVinci Resolve, which allows you to re-interpret the footage. Fortunately, DaVinci Resolve is a free download.
[UPDATE]: Thanks to xdcam-user we realized there is a workaround directly in Premiere.
To get your video levels back to include the full range of your external Slog recordings do the following in Adobe Premiere Pro CC.
After importing your footage to the timeline:
- Apply the effect “Fast Color Corrector” to your footage.
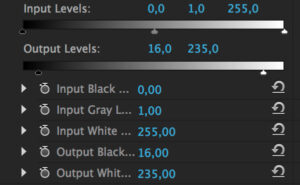
- In the effects tab on the “Fast Color Corrector” effect change your “Output Black” to 16 and your “Output White” to 235.
Make sure that the “Fast Color Corrector” is always the first effect in your filter-stack (before Lumetri for example), otherwise you will get the wrong results.
Your footage now uses the full range right within Premiere. Other “Levels” filters will not get your levels back by the way.
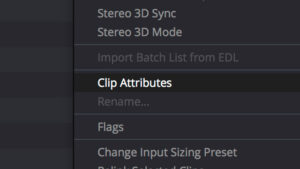
If you’re using an externally recorded clip from an a7 series camera, then go to the EDIT tab in DaVinci Resolve and right-click on the clip(s) you are importing in your library window. On the drop-down select “clip attributes.”
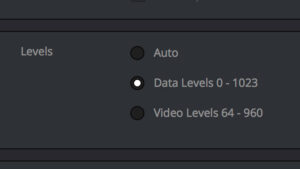
A window will open that lets you choose either “Auto”, “Data Levels” or “Video Levels”. By default this is set to “Auto”, but we want to select “Data Levels 0 – 1023” to properly display our S-log2 / S-log3 footage.
After all of your clips are set to “Data Levels”, drag them to the timeline where you will then be able to color the clips to your liking—with all information in the blacks and highlights. Once this is done, go to the DELIVER tab in DaVinci Resolve to export the clips.
Note that the above tip only applies to external recordings! When handling internally recorded files (XAVC) the levels should always be left to “auto”.
 Adobe Premiere After Effects CC
[Update: Here’s the fix for After Effects]
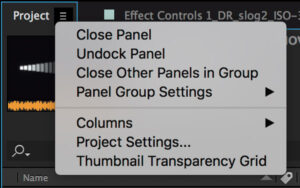
In After Effects the fix is a bit more tricky. First you have to open “Project Settings…” which can be accessed by right-clicking the small menu box on the project tab.
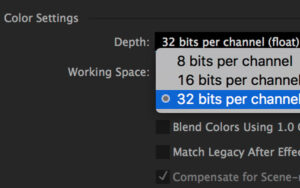 In the window that opens you have to change your project’s Color Settings.
Click the “Depth” dropdown and select “32 bits per channel (float)”. Then click “Ok”.
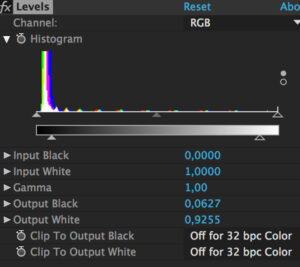 Now you have to apply the “Levels” effect to your footage. It can be found under Effects –> Color Correction –> Levels.
In the Effect Controls tab under “Levels” you can now set your ouput levels. Set Output Black to “0,0627” and Output White to “0,9255”. Those are the values that correspond to 16-235 in the 32-bit space.
Now your footage includes all data levels of Slog.
Besides being a more complicated workaround the real downside of this method is that it will considerably slow down your rendering speed.
Final Cut Pro X
Unfortunately Final Cut Pro X seems to handle the video range incorrectly as well and I have not found a fix. Although the xdcam-user article claims that Final Cut X handles superwhites correctly, this was not the case in my tests. To prepare externally recorded Slog footage for a correct grade in Final Cut X you will probably have to go through DaVinci first, or simply switch to Premiere Pro, like I did a while ago. I know many people out there love Final Cut X, so no offence please.
Future Solutions?
Of course, it would be an easy fix if Adobe and Apple would just give us an option to use the full range of levels in Premiere / After Effects & Final Cut Pro — just like in DaVinci Resolve. Apparently some users have been aware of this issue for a while, but so far there has been no direct implementation of such feature. We can only hope that this article will add some pressure.
If you are affected by this, you can help and let the software companies know by leaving a comment underneath and fill out the feature request form.
For Adobe Premiere Pro CC: Adobe feature request form.
For Adobe After Effects CC: Adobe feature request form.
For Apple Final Cut X: Apple feature request form.
[UPDATE:] We have developed a custom LUT that fixes this problem either in post, or directly on a recorder, so you have 0 rendering time and 0 quality loss. Get the LUT by clicking the button below, or read all about it here.

