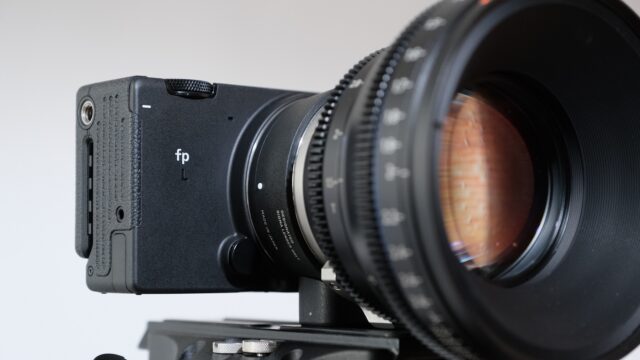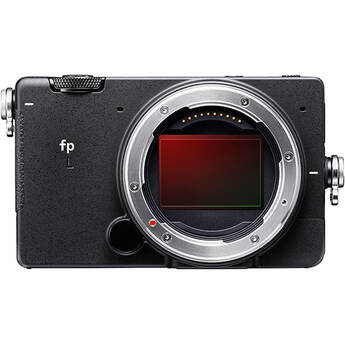
The SIGMA fp L has arrived at the CineD headquarters in Vienna – time to take it for a spin in our lab. Curious how it fares? Read on …
If you haven’t seen it yet, have a look at Jakub’s article looking at the specs of the SIGMA fp L, Johnnie’s mini – documentary and review and an interview we had with SIGMA’s head of product planning, Wakamatsu-san where we asked some questions in order to help us understand how this advanced product actually works.
The SIGMA fp L offers quite some interesting specs, boasting a whopping 61MP sensor. The body is super small for a full frame camera, offering a decent rear screen and now a viewfinder as an accessory. Via an external SSD (e.g. a Samsung T5), 12bit Cinema DNG 4K RAW files can be recorded.
So without further delay, lets have a look how this little camera fares in our lab test.
Rolling Shutter of the SIGMA fp L
A LOT of incomplete information was given by others when it comes to the rolling shutter performance of the new camera. Here at CineD we do our best to give you the full picture and we can only hope that others will follow by adjusting their conclusion. After all, accurate information will help people to make the right purchasing decisions and obtaining knowledge in general. Now, here is where things get interesting. If you ask me about rolling shutter, I have to ask “at which crop factor?”. The SIGMA fp L offers an interesting feature, allowing to set crop factors from 1 to 5 when shooting in Full HD and up to 2.5 when filming in UHD.
When talking with Wakamatsu-san, we clearly established that crop factor has a direct influence on how the SIGMA fp L behaves. The performance of dynamic range, resolution, and autofocus, are all tightly connected to the chosen crop factor, and not surprisingly, depending on the individual crop factor, rolling shutter performance, too. See below how it changes when recording in UHD mode:
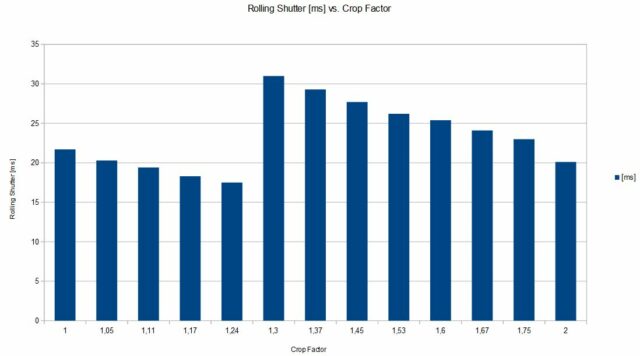
As can be seen, at crop = 1 (full frame), the rolling shutter starts at 21.7 [ms]. Which is a quite average value – about 0.9 [ms] higher than its predecessor, the SIGMA fp.
Quite interestingly, cropping into the image lowers the rolling shutter, reaching it’s minimum of 17.5 [ms] at 1.24x crop factor. This is a quite decent rolling shutter for an APS-H like frame at 1.24 crop. But don’t go to the next 1.3x crop factor – here the rolling shutter shows it’s highest value at 31 [ms] – a value that leaves a lot to be desired!
I think what’s happening here is the following: we have a 9520 pixels wide sensor. At 1.24x crop (actually 1.2395 to be precise) we are reaching 7680 pixels of sensor width – exactly 8K which is 7680 pixels wide (and 4320 lines of picture height). Hence, just skipping every second line (or doing some sort of binning) leads to 3840×2160 which is UltraHD – leading to the fastest possible readout.
From a crop factor of 1.3x until 1.75x onwards, rolling shutter values for UHD recording are higher than for 1.0x full frame. In this region, supersampling of the cropped sensor seems to occur, at the expense of higher sensor read out values. I didn’t shoot a resolution chart to confirm this, but my guess is that the image quality should be best in that region.
Dynamic Range of the SIGMA fp L
As usual, we are shooting a Xyla 21 step chart and use imatest to calculate the dynamic range (see our setup & explanation here.)
SIGMA mentions ISO100 and 1250 as the two values where dynamic range should be best (results below indicate a dual native ISO design of this sensor).
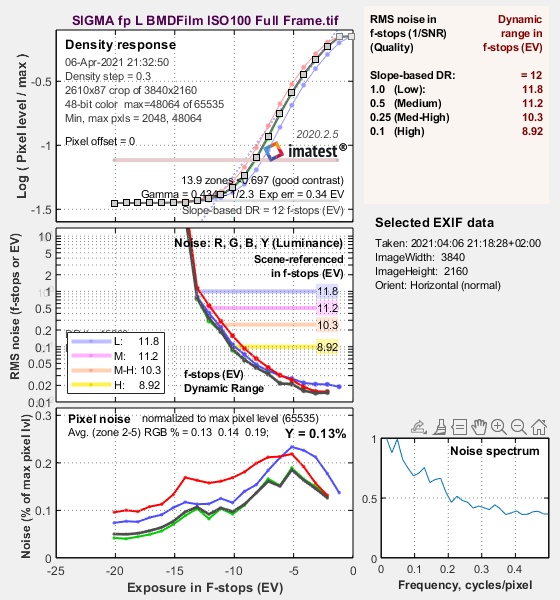
SIGMA also recommends to use sRGB or Blackmagic Design Film when developing the files in DaVinci Resolve. I tested both, and got exactly the same values of dynamic range at ISO100 (as it should be – the respective gamma curve places the stops at different code values, but the root mean square values of noise at the respective signal to noise ratio’s stay the same).
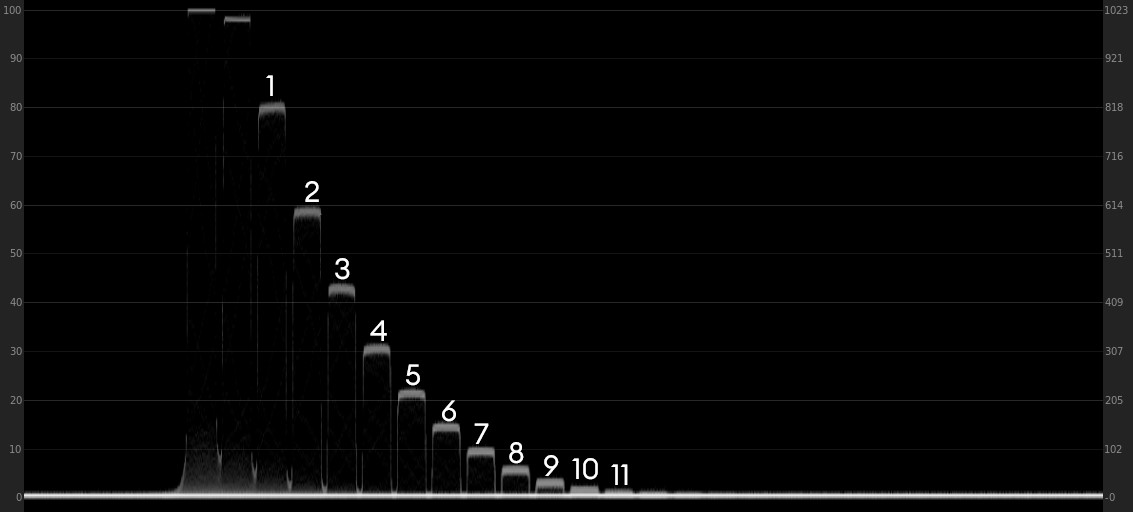
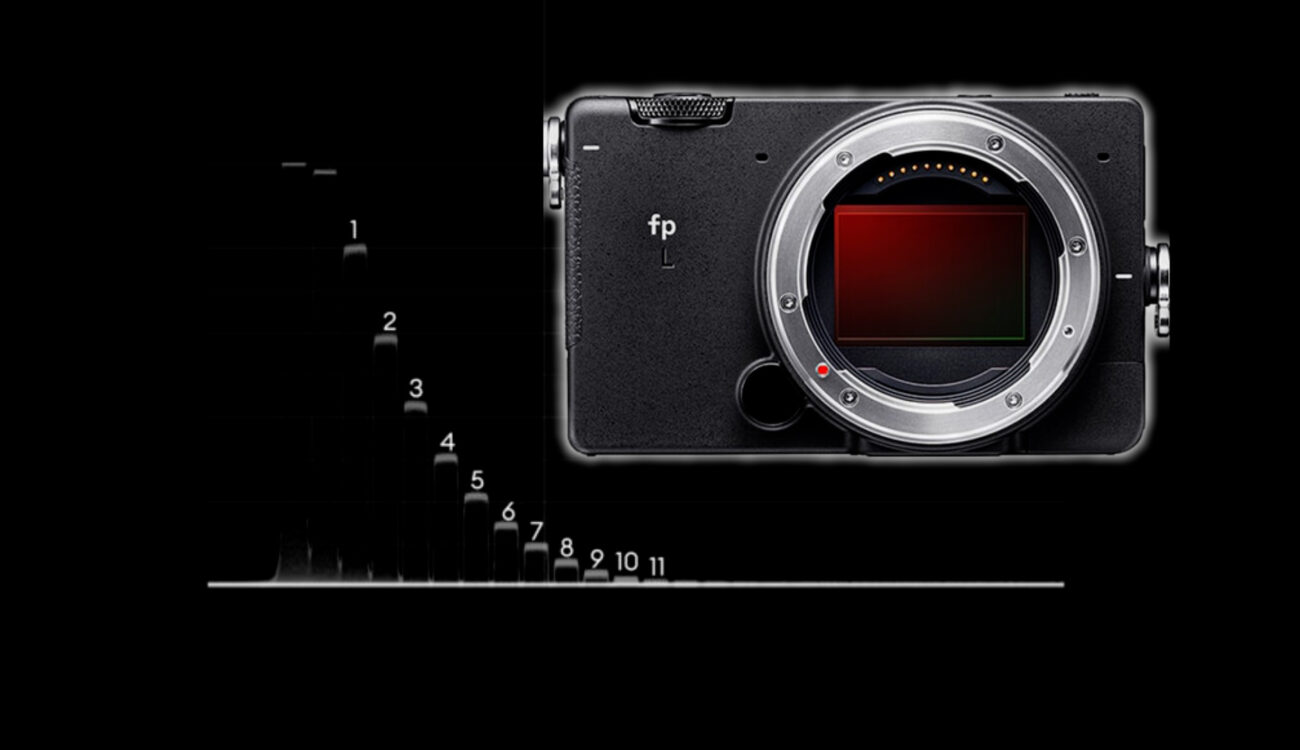
Shooting the step chart at ISO 100, the following waveform plot is obtained if sRGB is used as the gamma curve. About 11 stops can be identified above the noise floor:
At ISO 100, we are getting 11.2 stops of dynamic range at a signal to noise ratio of 2, and 11.8 stops at a signal to noise ratio of 1 for a full frame sensor readout, developing the files with the Blackmagic Design Film gamma curve. In 1.24 crop mode, results are exactly the same (hinting at line skipping, not supersampling the information).
At ISO 1250 things get complicated. The internally displayed waveform (and the same for external displayed waveform via HDMI) indicates massive clipping for a given set of f-stop / and shutter angle, but when the files are developed using Blackmagic Design Film gamma curve, all is good, and the highlight stops are actually still within range. That made it super difficult to hit the right exposure for the Xyla21 test chart, and I noticed this when repeating the exposure series with the help of my colleague Florian. At the end we found, that the internal and external (via HDMI) waveform displays are correct for ISO100, but wrong for all higher ISO’s.
That makes it impossible to expose correctly …. I hope SIGMA fixes this with a firmware update!
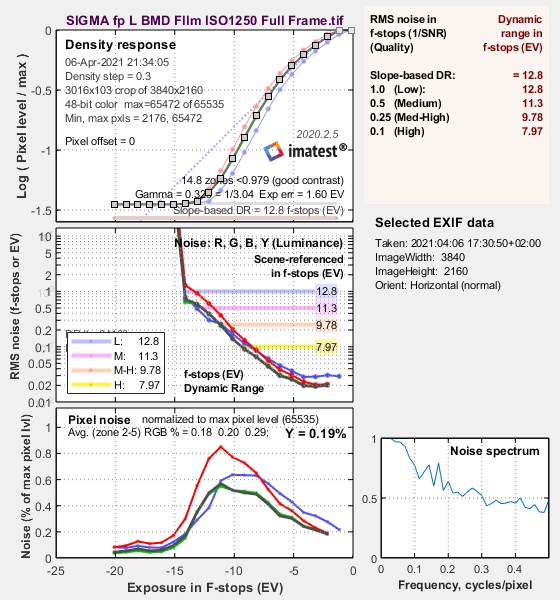
Results using BMD Film gamma at ISO1250 are obviously very similar if not better, 11.3 stops at SNR = 2 and 12.8 stops at SNR = 1 are reached.
Good news is the fact that ISO100 and ISO1250 show very similar dynamic range vales of around 11 stops (at SNR = 2), indicating a dual native ISO design.
Latitude of the SIGMA fp L
As described earlier, latitude is the capability of a camera to retain colors and detail while over- and underexposed. When overexposing, we place the subjects face (in our case my colleague Johnnie) just a tad below clipping.
At an f-stop of T1.5 and maximum brightness of our studio lights at ISO100 and 360° shutter angle Johnnie’s face was just below clipping. I wasn’t able to check higher exposure values as the studio lights were simply not strong enough (the relative position of the lights to the subject and the background is fixed to have the same range of exposures within the image for each camera).
For the latitude exposure series below, I again used 3840×2160 12 bit CDNG at ISO100 and BMD Film as the color space and gamma curve. Just boosting the saturation a bit leads to a nice looking image – no further grading needed ;-). Colors are really looking good on this camera.
Nevertheless, at the start of the overexposure testing at T1.5 the color checker chart was already partially clipping – highlight recovery in DaVinci Resolve however was able to bring back the clipped colors with good accuracy:
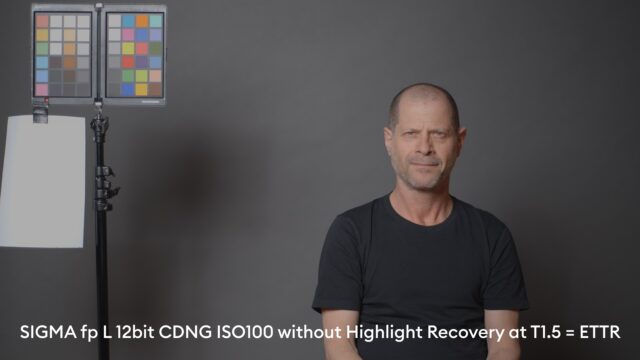
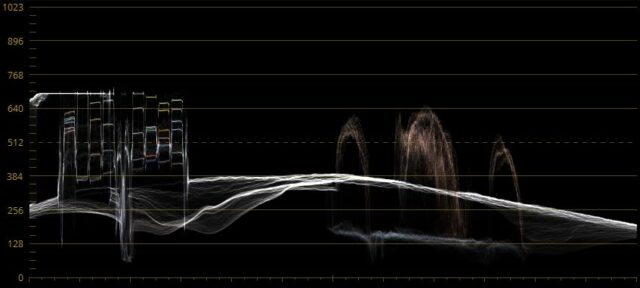
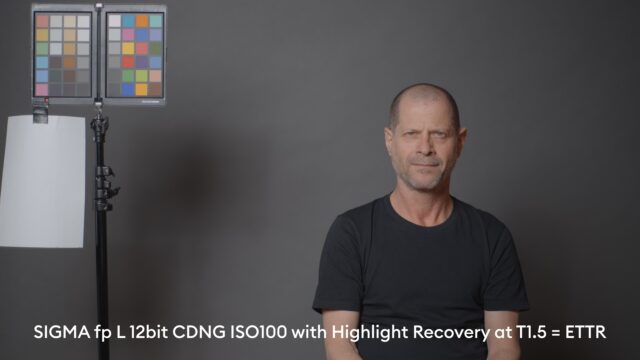
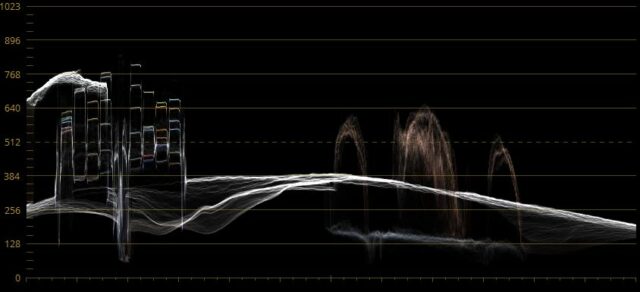
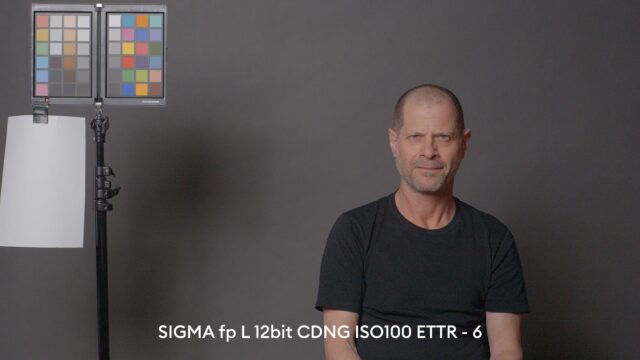
As there is no clear point of reference for the base exposure with the 12bit CDNG files, I will call the T1.5 and 360° shutter angle files the “0” ETTR (expose to the right) exposure. Now, successively underexposing by closing the iris of the ZEISS CP.2 85mm T1.5 lens to T2.0, T2.8 until T8 and from there onwards reducing the shutter angle from 360° to 180°, 90° and 45° leads to 8 stops of underexposure (ETTR -8).
At ETTR -6 (and pushed back) already noise is present in the image, but it is a very fine noise that is pleasing to the eye:
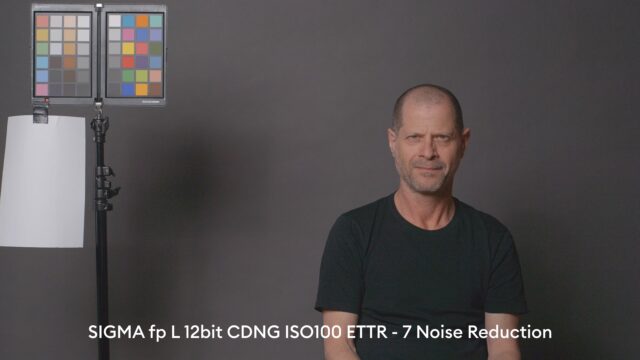
At 7 stops below ETTR = 0 (and pushed back) noise becomes a dominant factor in the image. Noise reduction helps but also areas of a greenish / pink tint appear:
At 8 stops below ETTR = 0 (and pushed back), noise is corrupting the image to an extend that it cannot be fully recovered. Larger patches of green and pink areas appear in the image. Also, in the waveform plot it can be seen that shadows are clipped (not shown here).
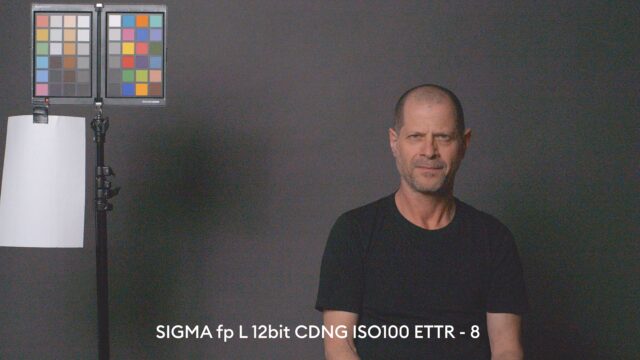
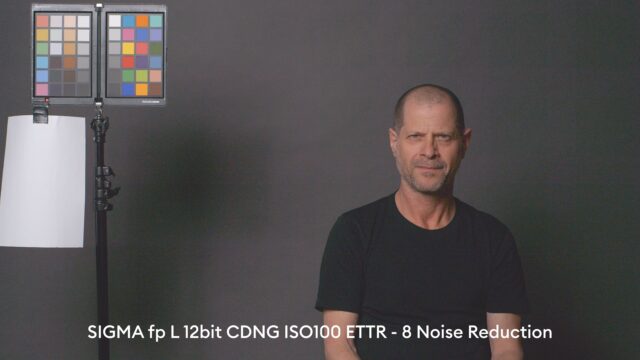
As can be seen above, the 8 stops underexposed image (pushed back) cannot be saved by noise reduction, the limits are clearly reached, also because of the larger greenish and pinkish areas in the image.
Hence, the SIGMA fp L offers about 7 stops of exposure latitude. This is OK for a full frame sensor, and similar to the Sony a7S III – for comparison, the Panasonic S1 or S5 for example offer about 8 stops of exposure latitude.
Summary
The SIGMA fp L offers quite an interesting package, with its high resolution 61MP sensor and external 12bit CDNG recording. I have to say however, that for us filmmakers, I cannot see any advantage over the previous SIGMA fp apart from the nice feature of being able to use individual crop factors.
Those individual crop factors have to be used with caution though, as the rolling shutter can be seriously bad at certain values – my recommendation is to use 1.24x crop, as explained above.
Have you shot with the SIGMA fp L or it’s predecessor fp yet? What are your thoughts on this small and versatile full frame camera? Let us know in the comments below.
