SLR Magic Anamorphic Adapter – Anamorphot 1,33x 40 Adapter (Compact), A Beginner’s Perspective and First Look
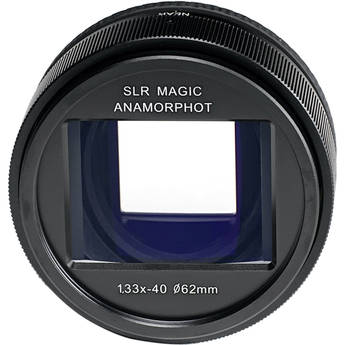
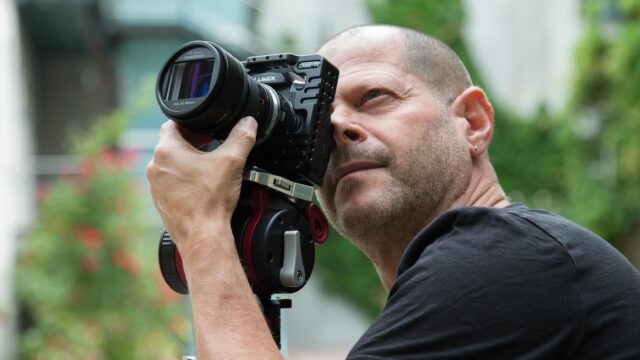
I recently had a chance to test the new SLR Magic Anamorphot 1,33x 40 budget anamorphic adapter for 16:9 sensor cameras that was first presented during NAB 2017. Read on for my impressions of this SLR Magic anamorphic adapter as I plunge into the world of anamorphic shooting for the first time!
Before continuing, it is important for me to state that this is my first engagement with the anamorphic world so, by all means, please treat the information here as experimental, and the video shown above as my first try. Being an “anamorphic beginner”, I tried to simplify the shooting and editing process as much as possible, as the subject of anamorphic can become complicated and, if using real anamorphic glass, VERY expensive.
Why do I want the anamorphic look?
The first question to ask is “Why even bother to shoot anamorphic?”. My simple answer is that the anamorphic aesthetic is simply beautiful, and brings us “filmmakers-on-a-budget” a step closer to that desired cinema look: that wide cinematic perspective, the oval shaped bokeh and those interesting horizontal flares are all part of the anamorphic package.
How do I achieve that look?
One way to achieve that wide cinematic perspective is by shooting a regular 16:9 image and then cropping the upper and lower parts of the frame to mimic that look. Obviously, by doing so we are literally throwing away up to 33% of the recorded information, so maybe that is not the best way to go…
Anamorfake It Until You Make It
That leaves us with two other options to achieve that desired look and aesthetic feeling. The first is to purchase true anamorphic lenses at the risk of ending up with a deep hole in the pocket – especially if considering to buy new lenses. The second is adding an appropriate anamorphic adapter to the front of our existing aspheric lens. Here I used the SLR Magic Anamorphot 1,33x. When shooting a true anamorphic image, one has to use a camera with a 4:3 sensor or, alternatively, a camera that can read the 4:3 portion of the sensor like the Panasonic GH5. In contrast, when using an anamorphic adapter, we are required to use the 16:9 capabilities of the sensor as the adapter will act as a device that takes in all the information and squeeze it horizontally by a factor of 1.33x. This means that the native view on your camera LCD screen/viewfinder, or the output to your monitor, will look squashed. With the help of a capable monitor, you can “de-squeeze” the picture and map it correctly for a proper viewing experience when shooting. Later, when editing, you can choose the right preset to modify your image to that wide full-resolution 2.35:1 aspect ratio at the click of a button.
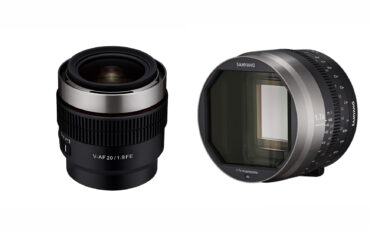
The SLR Magic Anamorphot 1,33x 40 budget adapter
So, what is so special about this new adapter and why was it important for me to test it? SLR Magic already has a kit of anamorphic lenses ranging from 35mm, 50mm and 70mm – which you can see the review of by my colleague Tim HERE – and they already have a few large-diameter anamorphic adapters. However, it was only when interviewing Andrew from SLR Magic during NAB 2017 and talking to him about this new $499 small-diameter SLR Magic Anamorphot 1,33x that I could finally start imagining shooting with this method without breaking my hard-earned savings account.
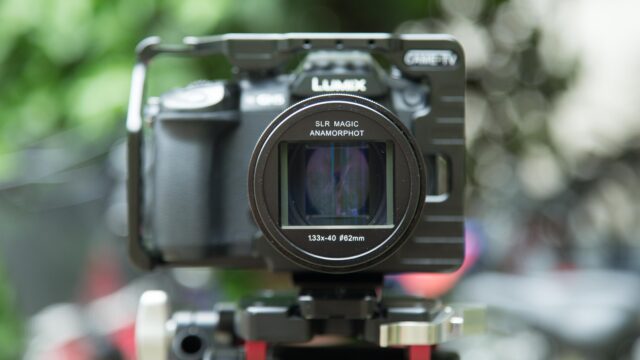
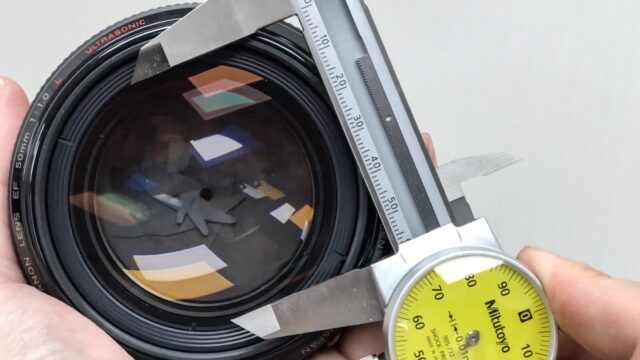
Although you can use any DSLR/mirrorless/large-sensor camera to shoot with the SLR Magic anamorphic adapter, as the number “40” in the product’s name suggests, the key element for having a successful result is to use a lens with a 40mm (or smaller) inner diameter size. I’m not talking about the lens’ outer diameter, but rather the actual glass itself. For my review, I took our beloved Panasonic GH5 and explored filming with this new adapter in two different ways:
- With Panasonic’s own 12-60mm f/2.8-4 autofocus kit lens.
- Metabones Speed Booster Micro Four-Thirds to EF mount together with ZEISS Distagon f2.8/35mm and ZEISS Planar f1.4/50mm.
Mind you, I made a mistake when using the Panasonic kit lens as the glass has a diameter of 46mm instead of the recommended 40mm, a piece of information that was communicated to me after filming my piece, so obviously I learned the hard way… The results, as demonstrated in the video above, are less than satisfying. The camera/lens/anamorphic adapter worked just OK in autofocus mode (one of the selling points of this SLR Magic anamorphic adapter), BUT I could not pinpoint if this was due to the camera’s overall autofocus behavior or due to the adapter itself. Furthermore, the image quality suffered A LOT, with very pronounced soft edges, vignetting and evident chromatic aberration. But most disturbing was the difficulty to manually focus on my objects. Needless to say, lessoned learned and, as advised by Andrew from SLR Magic, I should have used a lens with a 40mm (or smaller) inner glass diameter to achieve appropriate results.
On the other hand, putting the SLR Magic Anamorphot 1,33x on a small-diameter prime lens like the Zeiss Distagon or Planar was a totally different story. Of course, I was restricted to manual focusing, but it was not an issue at all. Also, the very noticeable chromatic aberration was gone too. These findings lead me to the conclusion that the performance of the adapter is very much dependant on the lens you choose.
What I’ve learned in my first ever anamorphic engagement and things to remember:
- Shooting with wide lenses will immediately translate into a “cylindrical perspective”, meaning that some curves in your frame won’t be straight but bent. Some like it and consider it “artistic expression”. For me personally, it is a bit disturbing. Well. I will have to get use to it as it is part of the “look”.
- Usually a focal length of 40mm and up will help in avoiding the “cylindrical perspective” phenomenon and vignetting.
- Measure the diameter of your glass carefully without scratching the glass itself in order to determine if it will work with this SLR Magic anamorphic adapter.
- Use a monitor that can de-squeeze the image in order to see the correct image perspective.
- Choose your F-stop carefully as shooting wide open could result in ugly-looking bokeh. SLR Magic recommends using an aperture of f/4 as a maximum for achieving acceptable results.
- The rolling shutter effect will be increased when shooting anamorphic. Plan your moves accordingly.
- Watch where your light is coming from in order to avoid inner adapter reflections.
- In Adobe Premiere Pro CC (latest version), after importing the anamorphic clips to your project, you should be able to achieve the correct aspect ratio by highlighting them, clicking “Modify” – “Interpret footage” – “Pixel Aspect Ratio” – “Conform to” and choose HD Anamorphic 1080 1.333.
Conclusion:
With the appropriate fixed focal length or zoom lens, the modestly-priced SLR Magic Anamorphot 1,33x can act as a good starting point and alternative for anyone looking to explore the world of anamorphic filming. Please take into account that the shooting process might be slower then what you are used too, but in my opinion the end results are certainly worth it. Last but not least, I’m fully aware that my video did not faithfully portray the full potential of the “anamorphic look”. I’m truly looking forward to shooting more with this adapter and get better over time.
The short documentary above was shot on a Panasonic GH5 set on V-Log. It was edited on the latest version of Adobe Premiere CC and color corrected with FilmConvert set to FJ Velv 100.
For more valuable information explaining What is anamorphic? Please look at the below video taken from ARRI’s channel:
Want to know more about what to expect and how to work with the SLR Magic Anamorphic Adapter? Click here for an excellent tutorial from Wex Photographic.
For additional information concerning this adapter and shooting anamorphic in general, please check the below videos made by Andrew Chan from SLR Magic:
What does the number 40 and 50 on the Anamorphic adapter mean?
Should you use the Anamorphot 40 or 50?
Will we make a larger anamorphot adapter?
Using the Anamorphot with various lenses
Tips when using the SLR Magic Anamorphot Adapter
A big thank you to Ulrike Theresia Wegele, Josef Pemmer, Philip Pemmer and Donat Kuti for supporting this film!
