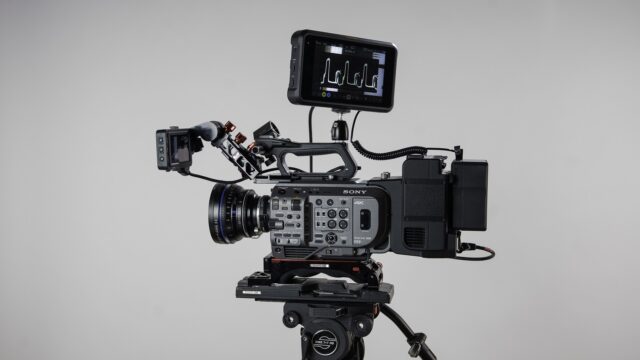
After publishing our lab test of the Sony FX9 using the internal XAVC Intra codec in September 2020 here, new firmware versions were announced by Sony. Also, the option to output RAW from the Sony FX9 became possible using the XDCA-FX9 extension unit and the Atomos Shogun 7 recorder – enough reasons for us to have a second look! Interested? Read on…
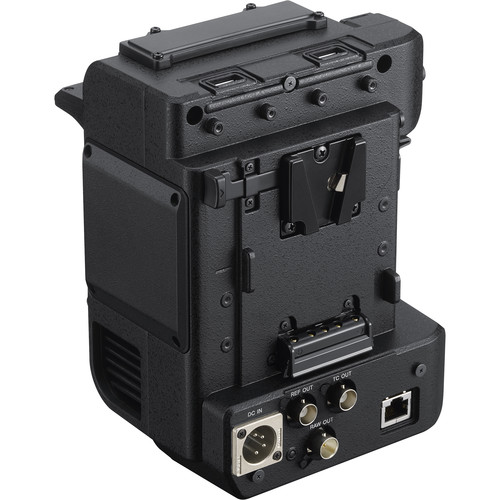
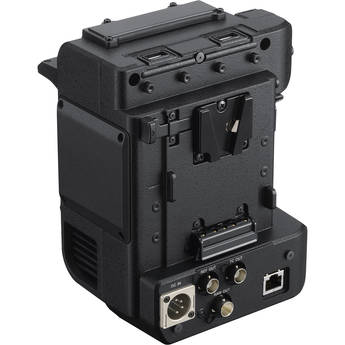
The XDCA-FX9 extension unit allows Sony FX9 users to output a 16-bit linear RAW signal – which sounds great, but to the best of our knowledge no recorder is available on the market which can record this signal.
However, the Atomos Shogun 7 accepts this 16 bit linear RAW signal and converts it into 12bit RAW, thereby allowing the recording of ProRes RAW HQ files.
Hence, we were quite curious to see if a better performance in terms of latitude and dynamic range can be squeezed out of the Sony FX9 sensor using this combo.
A 6K sensor shooting RAW in 4K?
The Sony FX9 features a 6K sensor, but the full sensor RAW output with the XDCA-FX9 extension unit has a resolution of 4128×2192 – a bit more than 4K DCI. So obviously, some image processing / downsampling is happening before the RAW stream is made available.
How to deal with the ProRes RAW files in Post-production?
Well, so far DaVinci Resolve does not support ProRes RAW files (hopefully in the future), so I had to use Adobe Premiere Pro to develop the files for further processing. For windows users, the latest version 14.8 allows to import the files and do a conversion into the SGamut3.Cine / SLOG3 space.
I exported the Xyla 21 stepchart 4K (4128×2192) ProRes RAW HQ files on a max. bit depth timeline to ProRes 4444 XQ, and from there onwards used the files in DaVinci Resolve to export TIFF files for the analysis of dynamic range in IMATEST.
For the latitude test, I used the exposure slider in PremierePro to adjust the over- and underexposed shots back to our base exposure (see “Belichtung” in the image below) – that works really well! Unfortunately however, that’s all you can do in PremierePro for now – no white balance adjustment, or any other options in the RAW dialogue.
Also, in conjunction with the exposure correction I applied an SGamut3.Cine / SLOG3 to Rec709A LUT in PremierePro to the latitude studio scenes before exporting the files as ProRes 4444 XQ for further analysis in DaVinci Resolve.
Is 4K ProRes RAW CPU / GPU intensive? The answer is a clear “no”. To give you a reference, on my Ryzen 3900x windows PC with a loaner GeForce RTX 3090 card (thank you NVIDIA!) a 4K PremierePro timeline as described above is fluid and snappy, the RTX 3090 GPU card shows 5.8 GB memory usage and runs at 8% load …
Dynamic Range of the Sony FX9 in ProRes RAW at ISO800
If you are not familiar how we test dynamic range, please have a look here.
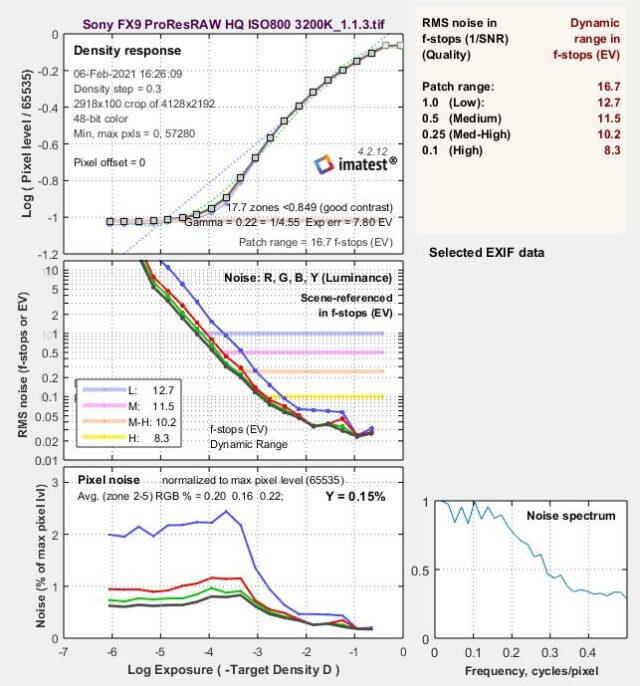
At ISO800, the waveform plot of the Xyla 21 stepchart reveals about 12 stops above the noise floor, but a 13th and 14th stop is still visible inside the noise floor:
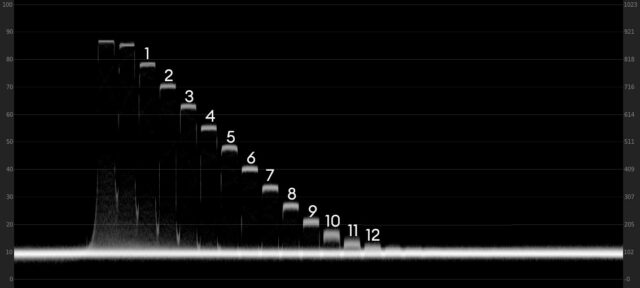
IMATEST calculates a dynamic range of 11.5 stops at a signal to noise ratio (SNR) of 2, 12.7 stops at SNR = 1.
Looking at the graph in the middle of the IMATEST results sheet above, additional stops are identified in the noise floor beyond the SNR = 1 (blue) (Low) line – with ProRes RAW one should be able to carve out those stops within the noise floor in post-production – confirmed by our latitude tests, see section below.
This is exactly the same result as in our lab test back in September 2020, using the internal XAVC Intra 422 codec, which clearly shows that no additional noise filtering / processing is happening for the internal XAVC recording when compared to the external RAW output.
Dynamic Range of the Sony FX9 in ProRes RAW at ISO4000
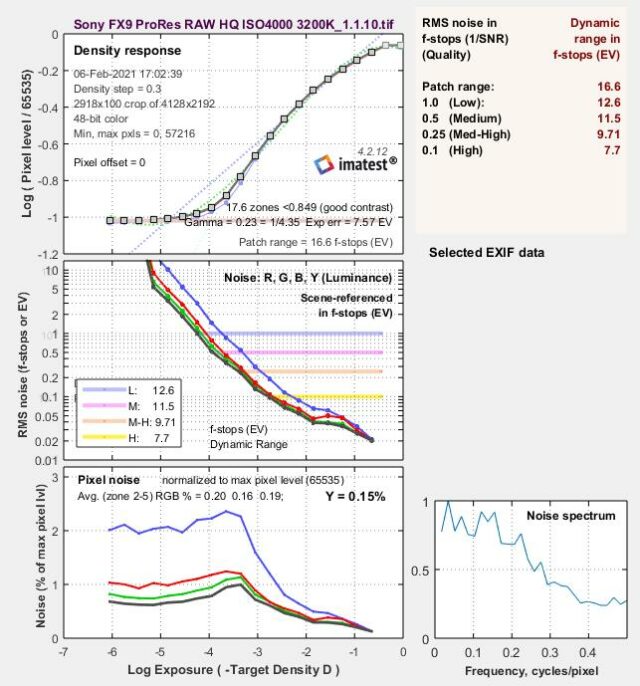
As already mentioned in our lab test in September 2020, at the second native ISO value of 4000 the same results as for ISO800 are achieved – quite remarkable! Hence, no compromise in image quality is made switching between the two native ISO values.
Here is the waveform plot for ProRes RAW at ISO4000:

IMATEST calculates 11.5 stops at SNR = 2, 12.6 stops at SNR = 1 for ISO4000. Also here, additional stops can be identified above the blue (bottom) line of the graph in the middle, within the noise floor.
Latitude Test for the Sony FX9 at ISO800 using ProRes RAW
As mentioned earlier, latitude is the capability of a camera to retain colors and detail when over- or underexposed.
Recently, we extended our lab test to include overexposure as well – as a reference to our past latitude (underexposure) tests, we still give you a base exposure reference that shows a maximum luma value around 60% on the waveform monitor for the subject’s face. Hence, “over” designates the number of stops above the base exposure reference, “under” the number of stops below the base reference.
From there we overexpose and underexpose the scene.
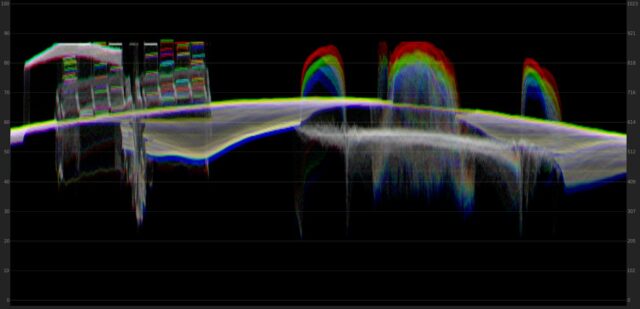
For the Sony FX9 this meant adjusting the studio lights to f1.4, ISO800 and a shutter angle of 360° Nino’s face was starting to clip the red channel (see the RGB waveform plot below, the red channel shows a plateau and also a few patches of the color checker have clipped including the white sheet of paper):
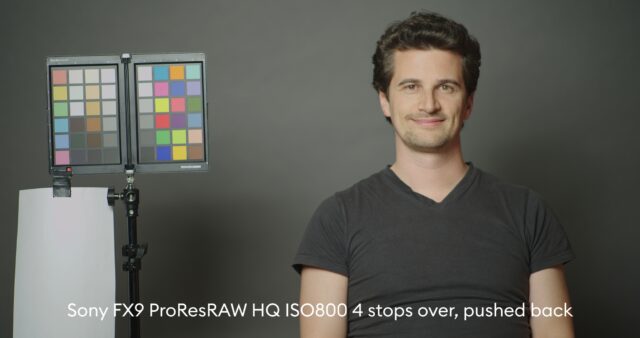
From here onwards, we stopped down the lens to f2, 2.8, … to f8 and then in addition adjusted the shutter angle to 180°, 90°, 45° and 22.5° – in summary covering 4 stops above our base exposure scene and 5 stops below.
As a reference to past tests, here is the base exposure scene, at f5.6 with Nino’s face a tad below 60% luma (before grading, in the SLOG3 space):
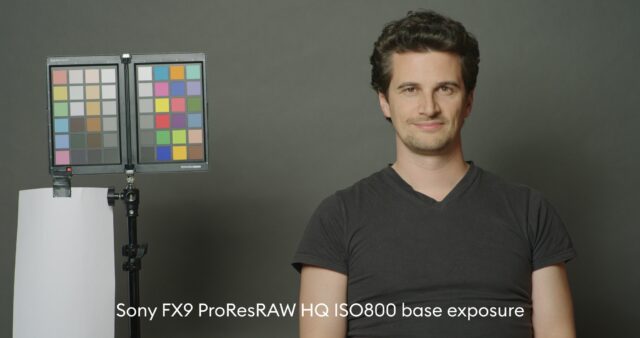
No significant color shift is visible compared to the 4 stops over scene. And here the same scene, 3 stops underexposed and brought back:
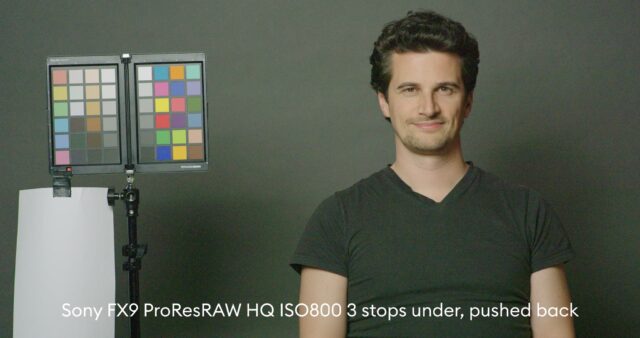
In a very similar manner to our September 2020 latitude test of the FX9, at 3 stops under and brought back to base exposure noise starts to raise its ugly head, and the image becomes greenish.
However, the noise in the ProRes RAW files is more finely dispersed than in the internal XAVC 422 Intra files, which showed ugly patches of chroma noise (see our September test), hence noise reduction still yields good results if you feel you need it.
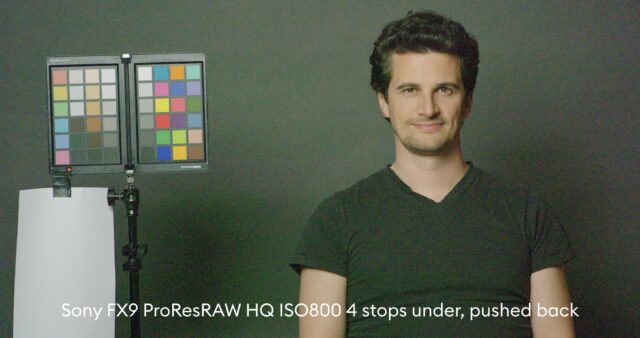
At 4 stops under, pushed back noise becomes excessive, the image becomes even more greenish and now also in the ProRes RAW files larger patches of chroma noise become visible:
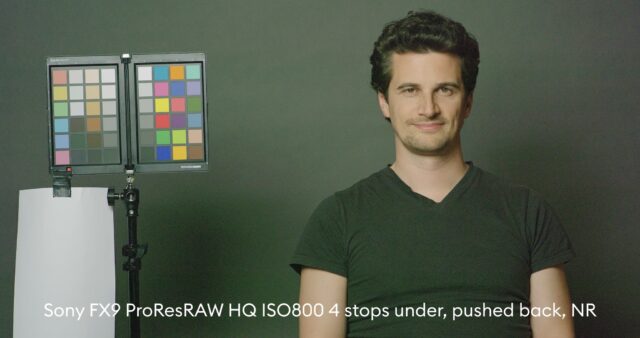
I found it hard to remove the noise using temporal and spatial noise reduction in DaVinci Resolve without affecting the image too much, see below:
The image is at the cusp of being usable, clearly the limits have been reached.
And here is the advantage of ProRes RAW – the 4 stops under image with noise reduction is still sort of OK.
In our test back in September the 4 stops underexposed image could not be rescued by noise reduction (using the internal XAVC 422 Intra codec) – it was too corrupted by large blotches of chroma noise – which could be artefacts resulting from the rather low bitrate of 250mbit/s.
ProRes RAW in general shows a less grainy type of noise, which is easier to mitigate by noise reduction.
For the record, here is the 5 stops underexposed image, pushed back to base reference:
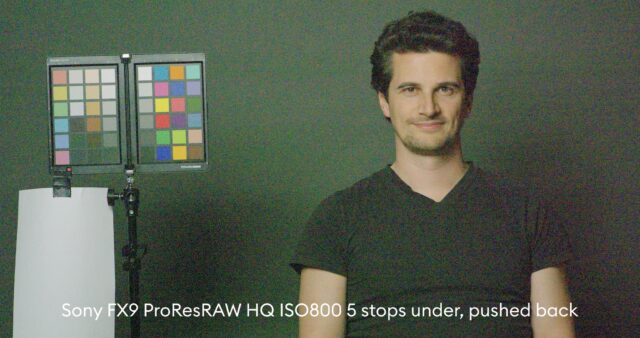
Noise reduction doesn’t help at this point – game over.
In summary, we can deduct about 8 stops of exposure latitude for the Sony FX9 using ProRes RAW – 4 stops over and 4 stops under.
This is a very good result, in line with the full frame Canon C500 MKII, or the Panasonic S5. Examples for APS-C cams which come close to 8 stops of exposure latitude are the Canon C300 MKIII, and the BMPCC6K.
Summary – is it worth it to shoot ProRes RAW on the Sony FX9?
Well, the answer to that question depends if you are on macOS or Windows, which is your preferred editing / color correction / finishing software and if you want to seriously push your footage in post-production.
As mentioned, DaVinci Resolve does not support ProRes RAW. FCPX (macOS) and Avid Media Composer (macOS and Windows) support ProRes RAW natively, as well as After Effects and PremierePro – however, limited to a basic exposure correction and Log transformation (so far).
And then there is the cost of the XDCA-FX9 extension unit (2500 USD) and the Atomos Shogun 7 (about 1700 USD with batteries and 1TB SSD) which sums up to 4200 USD and adds quite some bulk to your camera …
On the plus side, you get a 12bit RAW codec offering more flexibility and latitude in post – in our studio scene example about 1 stop more latitude compared to the internal XAVC Intra codec.
What is your opinion? Have you considered shooting RAW on the Sony FX9? Let us know what you think in the comments section below …
