Media storage can be confusing. This guide should help you to optimize for performance, redundancy and security.
When it comes to hard drives and storage, it’s easy to be overwhelmed. Mistakes can be costly when your data is at risk. I’ve compiled this guide to help you navigate the media storage landscape armed with some basic knowledge. This article will cover direct-attached external drives, desktop RAID arrays, and internal RAID arrays. I’m not touching on NAS or networking in this post.
Duplicate Your Data!
This should go without saying. Always duplicate your data onto at least two separate physical drives. This starts when offloading camera cards on set, and continues to the storage you are using for post-production.
Project files are typically small and can easily be backed up, even to the cloud. Many other types of temporary files can be recreated, such as NLE cache files, and even transcoded media. It’s critically important that you always keep more than one copy of your original camera media.
On Set
Small bus-powered external SSD drives, or hard drives are often used on set to offload camera cards daily, and may then be used to shuttle camera media to larger storage or shared storage on or off-site. On larger productions, your DIT may also use much larger direct-attached RAID arrays on location. Whatever your particular data-wrangling workflow may be, it’s important to always maintain duplicates at every stage of the workflow. Ideally, one set of duplicated camera media should be kept off site, at a production office, your post facility, or even just at home.
Transfer Speed On Set
At this point, I will mention one often overlooked aspect of on-set data workflow when selecting external hard drives. On set time is critical, and the faster you can offload (ideally to duplicate drives simultaneously), verify and turnaround camera cards, the better. Camera media is of course very fast, but if you use cheap, slow external hard drives over a slow interface, it makes offloading camera cards a lot slower than it should be. A single spinning disk hard drive will only give you sustained read/write speeds of up to 80MB/sec. There is nothing worse than holding up an entire production waiting for data transfer from camera cards. Trying to save a bit of money on hard drives here can be very expensive for the overall production.
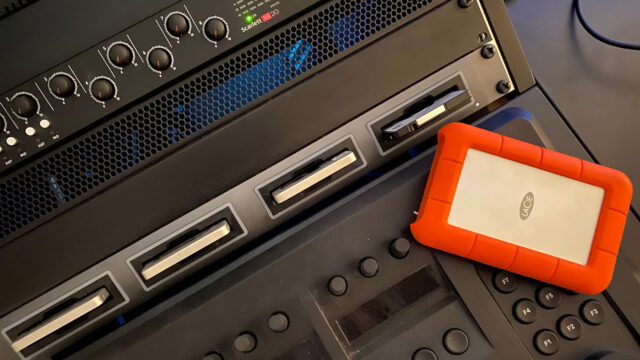
The Blackmagic Design MultiDock can accommodate four SSD drives which can be configured as a RAID 0 array. This is a software RAID managed by the host OS. Image credit: Jeff Loch
Post Production
It’s also important to duplicate camera media and critical project files during post-production. This is important even if you’re using enterprise-class shared storage configured with a high level of redundancy, and certainly if using a direct-attached desktop RAID, or other directly attached drives to cut from. Whatever storage you are working from, it’s important to keep a duplicate of all camera media on a second desktop RAID, or separate drive that sits on a shelf somewhere, or even off site unless needed.
Individual External Hard Drives
External hard drives come in many flavors. They aren’t all the same, and the common USB drive you find at your supermarket may be fine for backing up your photos and documents, but isn’t likely to be well suited to your video workflow. When looking at external hard drives, it’s important to consider what kind of drive is inside it, and also what kind of interface it has with the outside world.
An external hard drive that has a fast interface, such as Thunderbolt connectivity, may still have a slow hard disk inside it. What really matters is the maximum read and write speed of the internal hard drive itself. Ideally, you should consider using external SSD drives for most video work, whether you’re offloading camera cards on set or using it to edit with from your laptop. However, SSD’s are more expensive and offer far less capacity. Depending on just how much data throughput you need, even a single 7200RPM hard disk may be enough. The choice is really up to how you intend to use it, and what kind of media you plan to work with.
Hard Disk Drive (HDD)
Traditional spinning platter hard disk drives have rapidly grown in capacity in recent years, with 14TB single hard drives available. These hard drives can be anything from 2TB up to 14TB and come in both 2.5″ and 3.5″ physical sizes. The internal platters spin at either 5200RPM or 7200RPM depending on the drive, and there are enterprise drives that spin at 15,000RPM but these are not drives you will find inside a typical external hard disk drive enclosure. You can expect only around 80MB/sec sustained read/write speeds from a single spinning disk hard drive, so the bottleneck is the hard drive itself more than the interface with your computer.
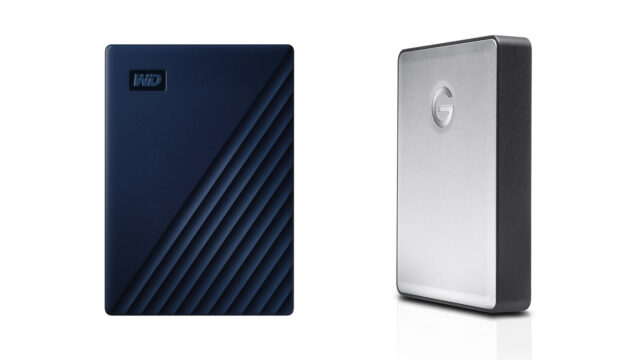
I’ve tested a cheap and common WD Passport external HDD (left) to deliver just over 80MB/sec average over USB 3.2 gen 1 (130MB/sec advertised) and provides only USB-A type cable. The G-Drive Mobile (right) can deliver similar throughput and comes with adapter cables to both USB-A and USB-C type connectors. Image credit: Western Digital and G-Technology
A 5200RPM hard drive can typically maintain an average of 100-110 MB/sec read and write speed, while a 7200RPM hard drive will average 120-130MB/sec.
Solid State Drive (SSD)
A SSD, or Solid State Drive uses NAND flash memory to store data, and is capable of extremely high data throughput. A typical USB 3 external SSD can maintain well over 500MB/sec read and write, and even this is limited by the SATA3.0 interface rather than the memory itself. A typical NVMe SSD over a PCIe interface can support well over 3000MB/sec. External SSD drives with a Thunderbolt interface will support up to 2800MB/sec.
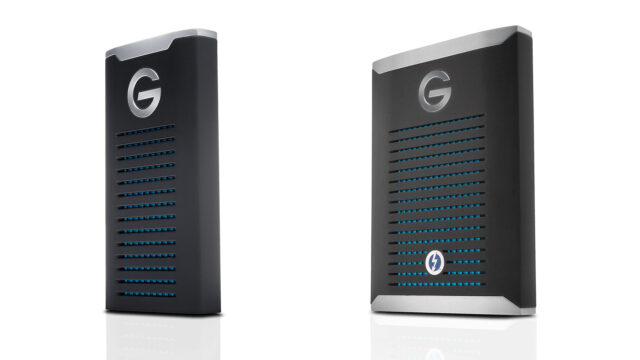
The G-Drive Mobile SSD (left) uses USB-C connector and provides up to 560MB/sec over USB 3.2 Gen 2. The G-Drive Mobile Pro SSD (right) also uses a USB-C type connector but provides up to 2800MB/sec over Thunderbolt 3. Image credit: G-Technology
SSD is the best choice for media professionals because these data rates make offloading data from camera cards much faster, and allow realtime playback of multiple streams of high-resolution media from compact, portable external drives.
Interfaces
Many external USB hard drive manufacturers misleadingly exaggerate the maximum data throughput of external hard drives. Consumers don’t understand the technicalities, and bigger numbers printed on the box must be better, right?
The interface used to connect an external hard drive with a computer is just as important as the type and speed of the drive inside. That said, most common interfaces, these being flavors of USB 3 and Thunderbolt are all fast enough to deliver a single stream of most common video codecs and formats, and even multiple streams of many of them.
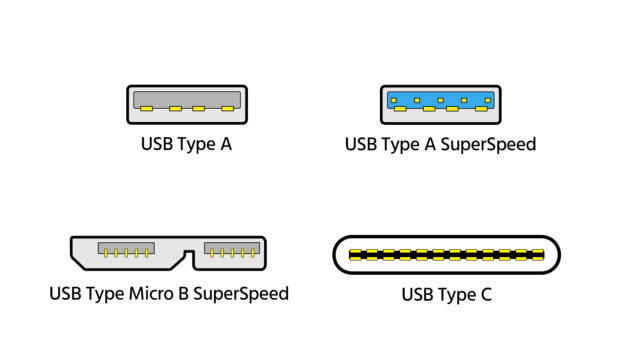
Shown are the most common USB type connectors currently. The original USB Type A is for reference only and has been widely replaced by USB Type A SuperSpeed. Many portable hard drives feature the USB Type Micro B SuperSpeed connector on the enclosure, and a cable to either USB Type A SuperSpeed or USB Type C.
USB 3.x
The naming convention of USB has become really messy. Here’s how it breaks down.
- USB 3.2 Gen 1, is USB 3.0. It has a maximum throughput of 5Gbps. This is also known as SuperSpeed USB.
- USB 3.2 Gen 2, is USB 3.1. It has a maximum throughput of 10Gbps. This is also known as SuperSpeed USB 10Gbps.
- USB 3.2 Gen 2×2, is USB 3.2. It has a maximum throughput of 20Gbps. This is also known as SuperSpeed USB 20Gbps.
You may also hear USB discussed in terms of the type of connector. USB types, like A, B, and C, tell you the shape of the port and connector, but not the data transfer speed.
USB-C is the latest type of connector, and is usually associated with USB 3.2 Gen 2 but not necessarily, it can also be USB 3.2 Gen 1 or it may not be USB at all.
Thunderbolt 2 & 3
To confuse things even more, the USB-C type connector is also used for Thunderbolt 3. Thunderbolt 3 offers data transfer rates up to 40GBps, which is four times that of USB 3.2 Gen 2.
- Thunderbolt 2 has a maximum throughput of 20Gb/sec
- Thunderbolt 3 has a maximum throughput of 40Gb/sec
Power
Both USB and Thunderbolt can carry power, and so many smaller external hard drives may be bus powered which is something to keep in mind if you need to use them with a laptop untethered from mains power.
Media Bandwidth
When considering any kind of storage, the first thing you should have in mind is the required data bandwidth to playback your media in real time. Here are just a few examples, these data rates are approximate for comparison only.
- 4K XAVC (H.264) – 50MB/sec (MB not Mb/sec… 1MB = 8Mb)
- 4K 24p ProRes RAW – 40-100MB/sec
- 4K 24p ProRes RAW HQ – 80-140MB/sec
- 6K 24p ProRes RAW HQ – 180-300MB/sec
- 8K 24p ProRes RAW HQ – 320-530MB/sec
- 4K 24p ProRes 422 HQ – 95MB/sec
- 4K 24p ProRes 4444 – 140MB/sec
- 8K 24p R3D 5:1 – 260MB/sec
It’s clear from this list that an external USB3 5400RPM hard drive isn’t going to support playback of most of these formats. One exception will be just about any H.264/AVC based video from popular mirrorless cameras and DSLR’s. The data rates required for these codecs are low enough even at 4K resolution, and your hard drive will not be a bottleneck, but decoding H.264 in real time on your computer might be.
This doesn’t mean you can’t use a slower hard drive purely for backup of your camera files, it just means you won’t be able to play the videos directly from it.
RAID
What exactly is a RAID? A RAID stands for Redundant Array of Independent Disks. It is a virtualized volume whereby data is written across an array of multiple physical hard drives to provide redundancy in case of drive failure, and/or higher performance, usually both.
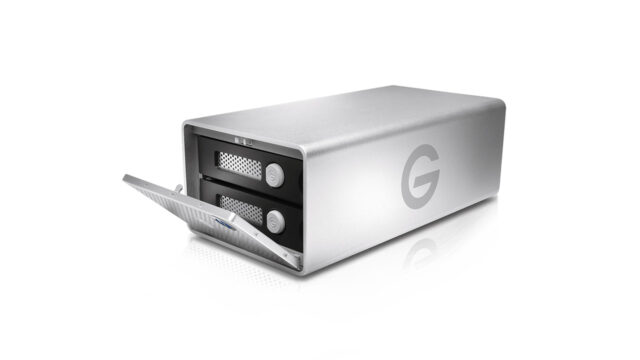
A small portable external RAID may contain just two physical hard disk drives, and this can be configured either for redundancy, where data is duplicated to both internal drives, or for striped for performance where data is split and written across both drives simultaneously allowing twice the data throughput. For a two-drive RAID, performance comes at the cost of redundancy and vice versa. However, the more physical hard disk drives in the RAID array, the more options exist to balance redundancy and increased performance.
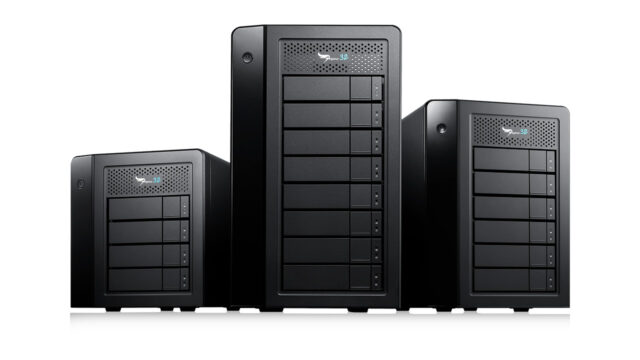
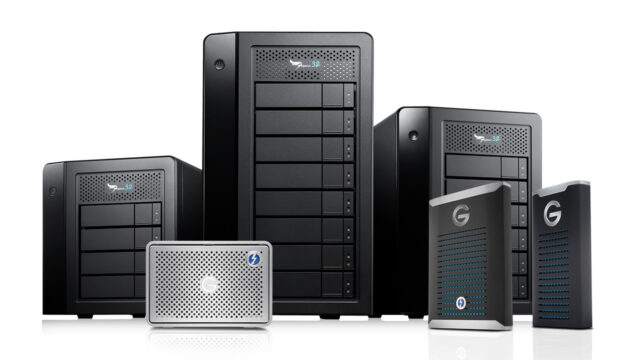
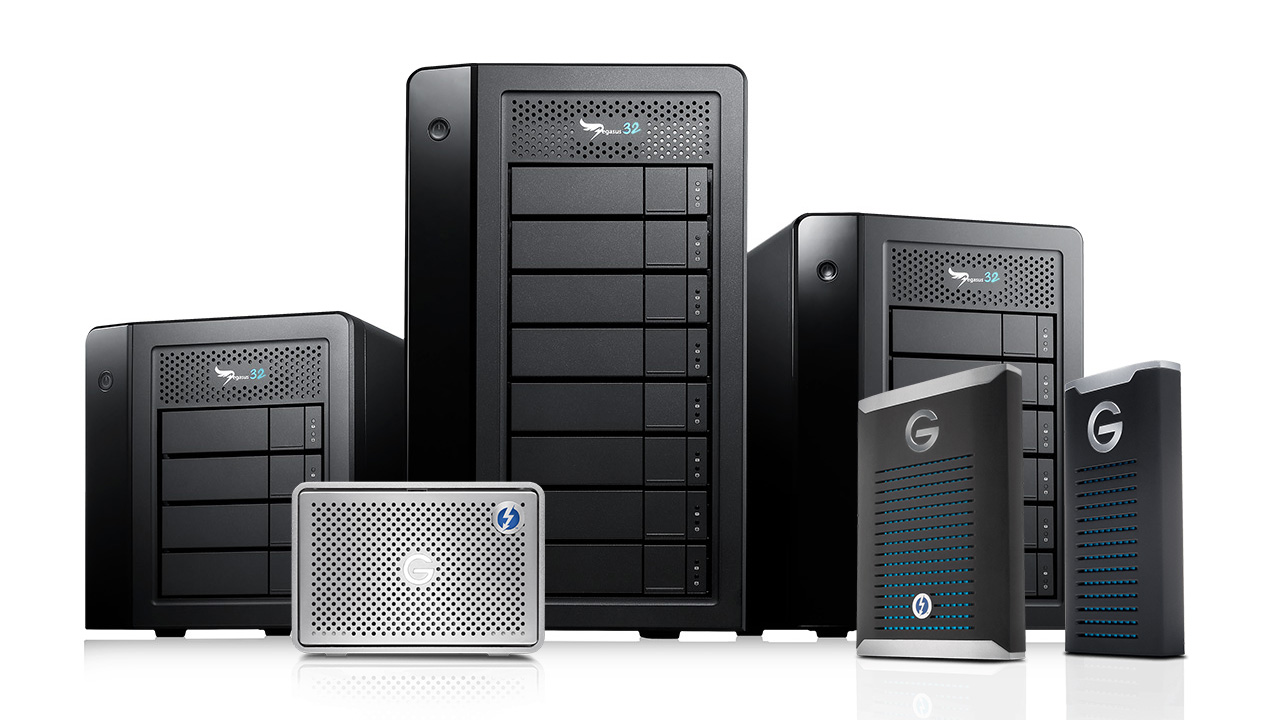
The popular Promise Pegasus32 desktop RAID arrays come in different sizes from 4-bay to 8-bay. Image credit: Promise
Larger RAID arrays can come in the form of direct attached desktop or rack mounted RAID enclosures. You can also build an internal RAID array directly into a workstation chassis, and of course, there are shared NAS (Networked Attached Storage) RAID storage servers which I’m not going to get into in this article.
Any of these could have between four and eight, twelve, sixteen or more drives in an array. Rack mounted SSD RAID arrays often comprise 24 SSD’s per array and are capable of extremely high bandwidth. It is also possible to stripe data across multiple arrays in a variety of ways, however this is firmly into enterprise storage territory and beyond the scope of this article.
I have only mentioned RAID levels below that apply to the types of storage I’ve described above.
RAID 0
By en:User:Cburnett – Own workThis W3C-unspecified vector image was created with Inkscape., CC BY-SA 3.0, Link
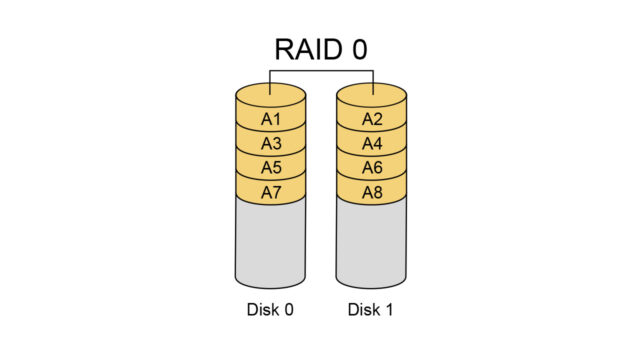
Maximum performance, no redundancy.
RAID 0 stripes data evenly across all the physical drives in the array, but has no mirroring or parity. This means that parts of a single file exist across all the drives in the set, and if one drive in the array fails, all data is permanently lost. There is no data recovery possible. RAID 0 is useful for small external two drive RAID enclosures where increased read/write bandwidth is the priority, and data is being duplicated to another physical drive as well.
I would never recommend relying on a single RAID 0 configured array for safe storage of camera media.
RAID 1
By en:User:Cburnett – Own workThis W3C-unspecified vector image was created with Inkscape., CC BY-SA 3.0, Link
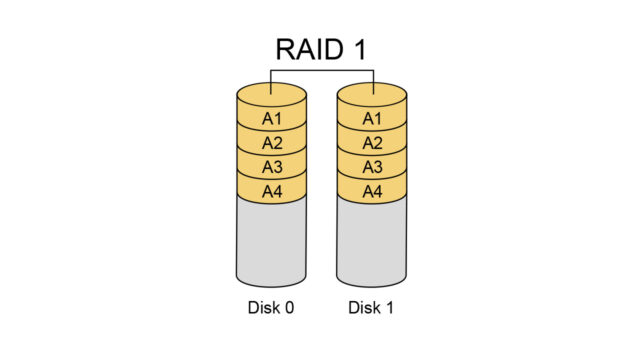
RAID 1 simply mirrors data between two drives, but has no parity or striping. This gives full redundancy, but in most implementations is only as fast as one of the two drives.
If one of the two drives fails, it can be replaced and the data rebuilt from the remaining drive. However, all of the data is at risk until this process is complete.
RAID 5
By en:User:Cburnett – Own workThis W3C-unspecified vector image was created with Inkscape., CC BY-SA 3.0, Link
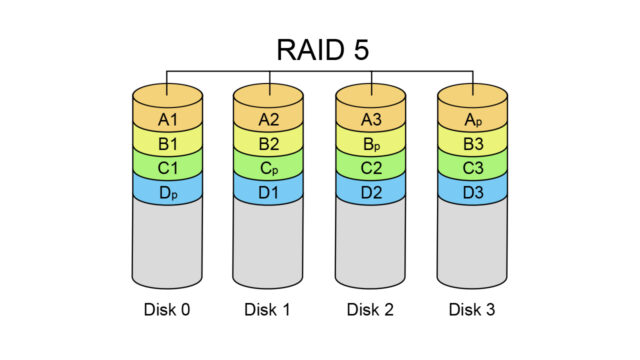
RAID 5 offers block level striping, which increases performance, and parity whereby the contents of any single disk is also distributed among the others disks. For example, in an eight drive array configured as RAID 5, the total storage capacity and throughput will be equal to seven out of the eight drives. If any drive in the array fails, it can be removed, and a new replacement drive swapped into the array. The contents of the failed drive will be rebuilt onto the new drive from the parity data existing across the other seven drives.
A hot spare can be denoted in a RAID 5 array, decreasing the useable capacity and throughput of the array by one further drive, but offering immediate rebuild in the event of a drive failure.
Data is only at risk for the duration that the replacement drive is being rebuilt.
All data in the array is permanently lost if more than one drive fails at a time, or if a second drive fails during rebuild.
RAID 6
By en:User:Cburnett – Own workThis W3C-unspecified vector image was created with Inkscape., CC BY-SA 3.0, Link
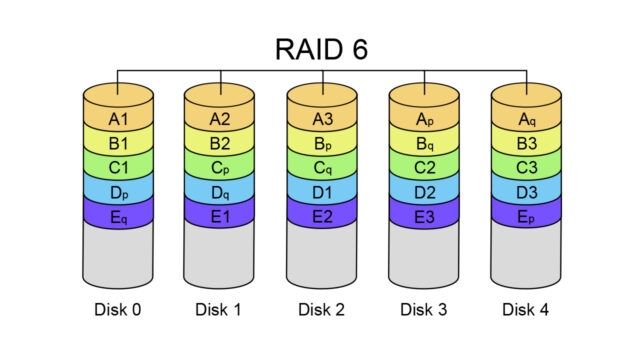
RAID 6 is similar to RAID 5 but offers double distributed parity. Using the eight drive example, storage capacity and throughput of the array will be equal to six of the eight drives. Any two drives in the array can fail and their respective contents can be rebuilt from parity data existing on the remaining six drives.
The likelihood of two drives failing is considered very low. So the real advantage of RAID 6 is that the data is not at risk in the event of a single drive failure.
Which RAID Level Should You Use?
I would recommend configuring portable external two disk RAID drives as RAID 0 for higher data throughput. These should always be used in pairs to offload camera cards, and are good to shuttle a whole shoot day worth of camera media to be transferred to shared storage or larger RAID storage you’re using for post. They can be good drives to edit smaller productions directly from also, but in this case data should be duplicated somewhere else as well. I would always consider a RAID 0 drive as temporary storage, there’s no safety or redundancy built-in unless it’s mirrored.
For larger direct attached desktop RAID arrays I recommend RAID 5. It is a good balance of redundancy and performance. You should always keep at least one spare hard drive for your RAID enclosure just in case you need to swap. A RAID 5 array will still be accessible and operate with one failed drive but your data is at risk, it’s important to swap out a failed drive and let the array rebuild as soon as possible.
One major risk associated with RAID 5 on arrays using high capacity drives is the time it takes to rebuild. The RAID is critical and your data is at risk for as long as the rebuild takes. RAID 6 would be a better choice for large RAID arrays using drives larger than 4TB.
Duplicate Your Data Again!
Even if you’re working from a RAID 5 or RAID 6 array and your media is protected from a drive failure, you should still have your camera media and project files backed up onto other storage. I’ve built nested RAID arrays for clients where two identical RAID sets are further mirrored as a RAID 1 but even this doesn’t count as duplication. It’s still all in one rack in one machine room, in the same building.
Camera media should always be duplicated onto separate physical storage, and kept off site if possible.
This is called disaster recovery. Disasters do happen.
A Quick Note About LTO Tape
A great way to store critical data long term is on LTO tape by using a single direct attached LTO drive. This can either be through dedicated backup software, or using LTFS for direct drag and drop data transfer.
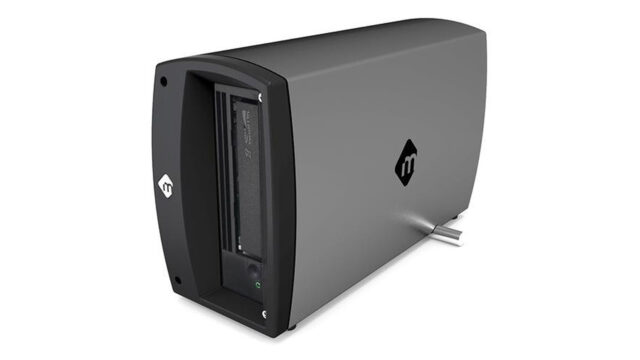
The mLogic portable LTO drives are great for quickly backing up large amounts of data safely for long term archival. They have Thunderbolt connectivity and can be used by DIT’s on location too. Image credit: mLogic
A single LTO-8 tape can store 12TB of media and supports speeds up to 300MB/sec depending on the drive. When stored correctly, LTO tape cartridges can be expected to last up to 30 years. This is a far longer shelf life than any mechanical hard drive. Current LTO tape cartridges will remain backwards compatible in future drives by up to one generation. So a current LTO-8 cartridge will be able to be read and written in a LTO-9 drive.
The Cloud
Cloud storage isn’t yet very practical for vast amounts of high resolution camera media. However, it is good for smaller project files, certain other media assets, and even Resolve database backups.
File Systems
Everything I’ve discussed so far is about physical hardware. It’s also important to format your storage with the right file system for your needs. A file system describes how data is stored, addressed, managed and accessed on your physical storage, by a computer operating system and software.
Here is a rundown of some common file systems.
ExFAT
ExFAT is a Microsoft file system created to bridge the gap between NTFS and the older FAT32 file system. It can store single files larger than 4GB and is the only file system I’m listing here that is natively supported by both Windows and macOS.
However, ExFAT is a non-journaling file system and is at risk of corruption when write operations are interrupted. I would not recommend ExFAT for media drives, with the exception perhaps of very temporary shuttle drives used to keep data for a short period of time that needs to be shared easily between macOS and Windows machines. Even then there is a risk if these drives are not ejected safely or pulled during data transfer.
NTFS
NTFS is a journaling file system created by Microsoft that is far more secure and less susceptible to corruption even in the case of unexpected shutdowns, crashes and interruptions.
NTFS is readable by MacOS but write access on NTFS formatted volumes requires a third party software such as Paragon NTFS for Mac.
MacOS Extended
MacOS Extended is also known as HFS+ and was the standard file system used by macOS from 1998 until today for mechanical and hybrid hard drives, and up until the introduction of APFS for solid state and flash storage in High Sierra.
APFS
APFS has replaced MacOS Extended for solid state and flash storage. It will also work on mechanical hard drives, but is optimized for solid state media. APFS is not compatible with older Macs running El Capitan or earlier.
Which File System Should You Use?
Your best file system options are NTFS if you’re primarily operating in a Windows environment, and either macOS Extended or APFS is your workflow is primarily Mac-based.
If you’re formatting mechanical hard drives and RAID arrays, it’s best to choose either NTFS or MacOS Extended. These journalling file systems are robust and secure.
For SSD media you can choose NTFS or APFS depending on whether you are primarily working in a Windows or Mac environment. Third party software is available that allows Windows to mount and read/write to APFS formatted media, as well as mounting NTFS media on Mac.
Avoid using ExFAT in all cases to avoid risking your data to corruption.
Conclusion
When all of this is said and done, the most important thing to remember is to always duplicate your project files and source camera media. Transcodes can be transcoded again, cache files can be regenerated, exports and renders can be rendered again. These things may cost you time, but if you lose your source camera files you’ve lost everything.
Even if you follow all of the recommendations and best practices, the fact is, drives and even entire RAID arrays can fail. You can use your fastest and most expensive storage to work from, but having a backup copy (or even a backup of a backup) on one or more cheap consumer external hard drives can be enough to rescue a project.
I hope this helps some of you to consider or reconsider your workflow. I’d love to know what tips and tricks you have that I may have missed or overlooked. How are you managing your media and keeping your files safe? Let us know in the comments below.
