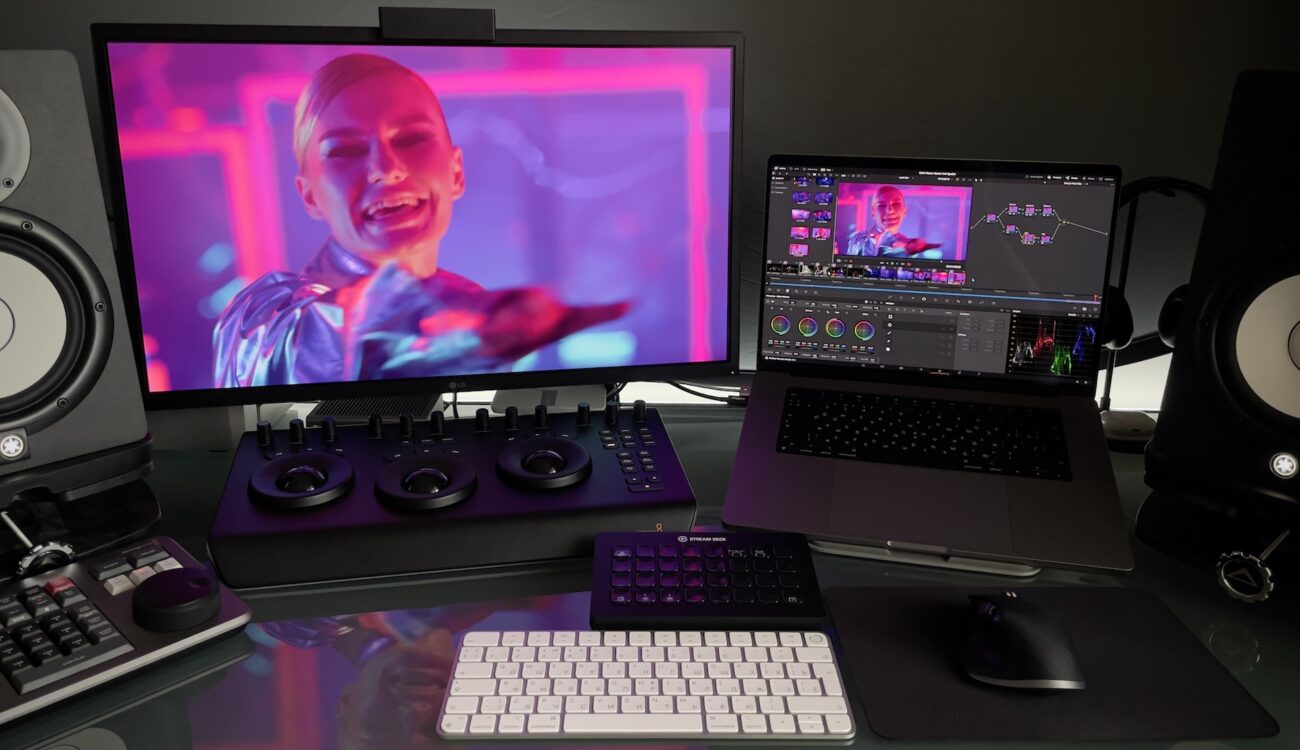
This is a how-to guest post by Mike Starkov, a master of Applied Maths and Physics | Post Supervisor | Colourist | BMD Certified Trainer | Asana Ambassador | 15+ years in film production | Senior Professor of the Faculty of Cinematography of the Institute of Film and Television.
Making a film is a collaborative process that can involve ten or even hundreds of people who need to communicate in order to achieve their common goal – to make a high-quality visual on time and under budget. A colorist is one of those crew members in post-production who is responsible for getting the most out of the image to support the story by enhancing the creative vision of the director and cinematographer.
Ideally, each and every person involved in film production should be thinking ahead while working. Their aim should be to deliver optimal results and enhance workflow efficiency, ultimately saving time and money. In this article, we will cover the best industry standard practices for transferring the final cut of the project from the editor to the colorist.
Responsibilities
Depending on the size of the production, different people in different positions are responsible for preparing the picture-locked timeline for color grading from editorial, as well as receiving and conforming the timeline on the colorist’s side. In large-scale productions, there can be an assistant video editor or online editor, for example, who is, in fact, a super organized, knowledgeable geek. They are able to foresee any possible issues in the conforming and finishing stages. In small-size projects, editors and colorists themselves may be responsible for exchanging the materials and metadata.
The way the project is prepared for color grading may depend on whether finishing and mastering will be done at the color grading facility or if there will be a round trip back to editorial. The post-production supervisor or head of the pipeline may be responsible for developing and supporting the pipeline and workflow.

Fig. 1: An example of a section of an animation project’s post-production pipeline:
Editing is highlighted in green, while color grading and mastering are indicated in purple.
Credit: Mike Starkov/CineD
Ideally, the total project pipeline should be tested during pre-production, from image acquisition and archiving, data management and syncing, generating offline proxies and editing, to color management for VFX and color grading, finishing, and mastering.
Variables and options
There are a number of professional NLEs, compositing, 3D modeling, color grading, and finishing apps commonly used in the industry, for example, Avid Media Composer and Adobe Premiere Pro for editing, and FilmLight Baselight and Blackmagic DaVinci Resolve Studio for color grading. This time, we will mostly review the collaboration between the editor and colorist working in Premiere Pro and DaVinci Resolve Studio, respectively.
The two most commonly used ways for delivering the project to a colorist are:
- Total timeline render in ProRes/DNxHR + EDL
- Trimmed Original Camera Files (OCFs) + CG/VFX EXR files + XML + Reference video.
The first option is very limited and is preferred for fast turnaround projects that were originally captured in somewhat compressed formats, which did not involve extensive visual effects workflow.
The second option is more versatile and can be used for grading RAW media.
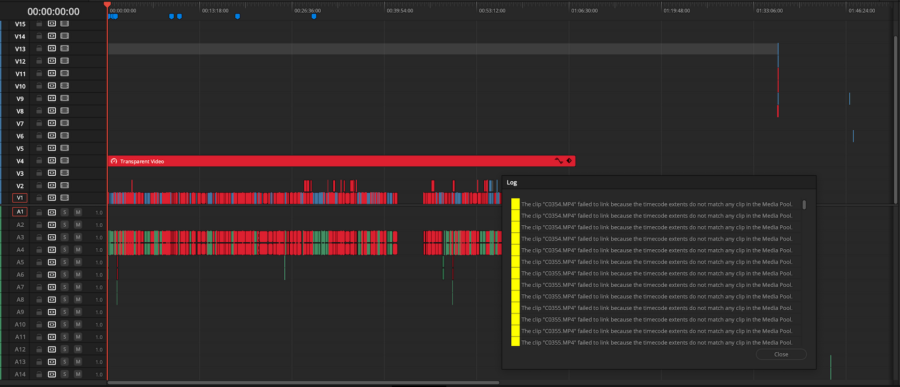
Fig. 2: Conforming a poorly prepared timeline can take up to 1-2 days, thus wasting time and money. Credit: Mike Starkov/CineD
The list
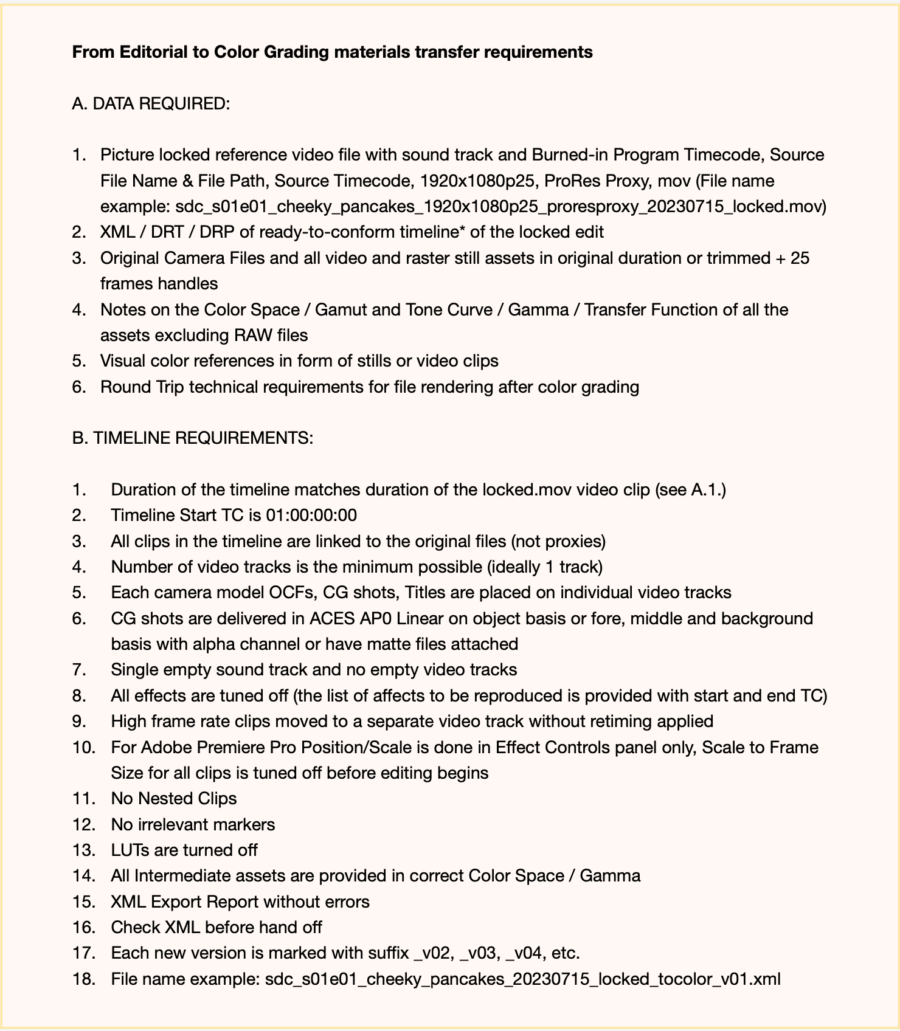
I encourage you to save the following list and use it as a reference whenever you need it. Feel free to update it according to your workflow.
In detail
Let’s shed some light on the requirements listed above, find out why they are so important, and how following these recommendations can optimize and simplify post-production making it more seamless.
A. DATA REQUIRED:
1. Picture locked reference video file with soundtrack and Burned-in Program Timecode, Source File Name & File Path, Source Timecode, 1920x1080p25, ProRes Proxy, mov (File name example: sdc_s01e01_cheeky_pancakes_1920x1080p25_proresproxy_20230715_locke d.mov)
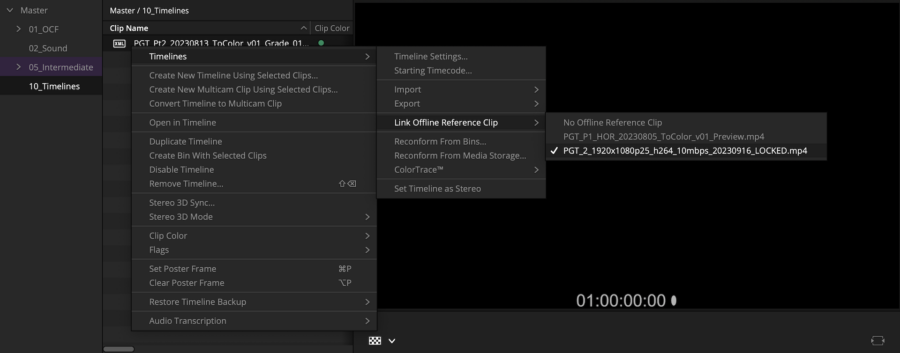
Fig. 3: Linking reference video file to the timeline that’s being conformed. Credit: Mike Starkov/CineD
Picture-locked status means no further edits (and ideally, there shouldn’t be any) will be made from that point onward. The director can be the person to lock the picture. Prior to rendering, the burn-in metadata is added to show the correct program (record) timecode of the final cut, individual source (clip) file names, file paths, and timecodes to help in case of manual conforming. The resolution of 1920×1080 is more than enough to judge the framing and other attributes of each frame in the final cut. Being an intra-frame codec, ProRes is perfect for real-time playback and Proxy flavor does not take up much disk space. We should also pay attention to naming conventions throughout the project.
2. XML / DRT / DRP of a ready-to-conform timeline of the locked edit
XML is one of the most widespread formats for exchanging timeline metadata. It holds each clip’s timecode and other clips’ timeline attributes. It’s even better if the editor can send the DaVinci Resolve Timeline (.drt) or DaVinci Resolve Project (.drp) file to speed up the conforming process. Note that DaVinci Resolve is free to download.
3. Original Camera Files and all video and raster still assets in original duration or trimmed + 25 frames handles
To save a good chunk of storage and time required for cloud uploading/downloading, it is advisable to data manage the timeline and include handles for transitions, restoration, or minor, final editing tweaks. Upload not only the OCFs but also all the visual assets utilized in the timeline, including stock footage, stills, logos, etc.
4. Notes on the Color Space / Gamut and Tone Curve / Gamma / Transfer Function of all the assets excluding RAW files
Setting up color management properly greatly speeds up color grading and provides mathematically correct color rendition. This is why we need to know the color-related specs of the original camera files. However, this does not apply to RAW media as it is managed automatically on de-bayering.
5. Visual color references in the form of stills or video clips
Color grading is both a technical and a creative process. The director, cinematographer, and production designer contribute their input to the project while on the set. To support their creative intent, visual references as well as live client sessions help a lot.
6. Round trip technical requirements for file rendering after color grading
When sending graded files back to the editor or finishing artist, certain specific requirements might be required.

Fig. 4: A well-prepared timeline can streamline the conforming process. Credit: Mike Starkov/Cine
B. TIMELINE REQUIREMENTS:
1. The duration of the timeline matches the duration of the reference video clip (see A.1.)
Timeline, timecode, and duration should match the reference clip to help visual check.
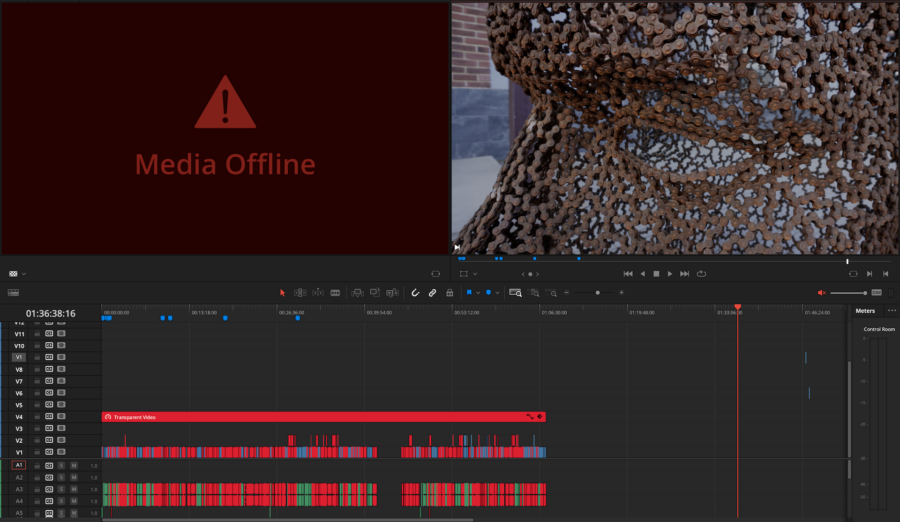
In Figure 5, the reference video duration (left viewer) and timeline duration (right viewer) do not match because there are odd clips at the end of the timeline.
2. Timeline Start TC is 01:00:00:00
One extra hour at the beginning of the timeline may be necessary for the technical needs of the broadcast, e.g. to add color bars before the actual program.
3. All clips in the timeline are linked to the original files (not proxies)
This is a desirable but optional step that can potentially help in avoiding any possible conforming issues while re-linking OCFs.
4. Number of video tracks is the minimum possible (ideally 1 track)
Compare timelines in Figure 5 (on import) and Figure 4 (after conforming was completed). Ideally, it should look like the final version right from the start (upon import), so the colorist won’t have to spend hours relinking and synchronizing clips with missing elements or corrupted timecodes.
5. Each camera model OCFs, CG shots, and Titles are placed on individual video tracks
When working with multicam edits or in situations involving extensive CG/VFX workflow, it’s advisable to organize assets with different color characteristics on individual video tracks.
6. CG shots are delivered in ACES AP0 Linear on an object basis or fore, middle, and background basis with alpha channel or have matte files attached
Depending on the CG workflow, certain shots might necessitate targeted color grading adjustments on specific parts of the image. Therefore, mattes or alternative options should be supplied for these shots.
7. Single empty soundtrack and no empty video tracks
Any odd empty tracks add extra complexity. The absence of audio clips and unnecessary empty video/audio tracks can potentially simplify the conforming process. A stereo audio clip can be added from the reference video clip later if needed.
8. All effects are turned off (the list of effects to be reproduced is provided with start and end TC)
XML can carry over some basic effects but the chance that it will be reproduced incorrectly is pretty high. In order to save time, it’s advisable to turn off all the effects, e.g. retiming, stabilization, blur, etc. When finished, they can be added from scratch or copied from the editor’s timeline, depending on the workflow.
9. High frame rate clips moved to a separate video track without retiming applied
As a part of the previous suggestion, when retiming is off, the clip duration can be affected. These clips have to be moved to the track above in their original duration. Retiming may be applied later.
10. For Adobe Premiere Pro Position/Scale is done in the Effect Controls panel only, Scale to Frame Size for all clips is turned off before editing begins
This is essential if the project needs to make a round trip back to the editor. Scale to Frame Size rasterizes the image once applied, hence interpolation may occur if the Scale is set at higher than 100%.
11. No Nested Clips
Nested clips might possess unpredictable attributes that XML can’t transfer correctly. Therefore, a better approach would involve decomposing these clips or rendering them in place and then relinking new intermediate files (refer to B.14).
12. No irrelevant markers
Any irrelevant markers can be confusing unless they were made specifically for colorists and should carry important notes on grading.
13. LUTs are turned off
Color references may also be baked into the reference video clip (see A.1.) but all the Lumetri corrections and LUTs must be turned off in the timeline provided to the colorist as they will eventually interfere with overall color grading, especially if a round trip is involved.
14. All Intermediate assets are provided in a correct Color Space / Gamma
The rule of thumb is that the output color space / tonal curve is the same as the input. For example, if you have to render in place, the output color space / tonal curve should remain the same. When dealing with CG, the color space can be expanded to ACES AP0 Linear, and corresponding notes should be provided to the colorist.
15. XML Export Report without errors
Adobe Premiere Pro creates a report each time you export XML. All the errors in this report, if any, should be corrected in editorial.
16. Check XML before handoff
An optional step is to create an empty project and import the XML that was just generated to check for any possible errors before uploading.
17. Each new version is marked with suffix _v02, _v03, _v04, etc. 18. File name example:
sdc_s01e01_cheeky_pancakes_20230715_locked_tocolor_v01.xml
File/Folder/Bin names should remain coherent, even if the project is accessed five years later by a new editor. Refer to common file naming conventions by Netflix.
Conclusion
Colorists, editors, assistants, DITs, dailies techs, post supers, producers, directors, and cinematographers – they must work closely together and typically have good relationships because their teamwork is important.
In this article, we discussed the most effective way for editors and colorists to collaborate, aiming to simplify the entire post-production process and conserve energy, time, and resources.
Each project is different, so it’s important to keep improving your workflow. Do not hesitate to ask for advice and ensure your post-production runs like clockwork.
You can reach out to Mike, or find out more about his work, here: http://facebook.com/michaelstarkovsky, http://instagram.com/mikestarkov, http://twitter.com/mikestarkov, https://linkedin.com/in/mikestarkov.
Is your workflow similar to what was described here? Do you have additional tips to share with us? Comments are welcomed in the section below.


