In Part 1 of our lab test of the Blackmagic Design URSA Mini Pro 12K we looked at rolling shutter and dynamic range – in part 2 we now have a closer look how this camera performs in our over- and underexposure test. Also, we will check the highlight recovery options with BRAW in post. Interested? Read on …
If you have not read part 1 of our lab test of the URSA Mini Pro 12K, I suggest you have a look there as well in addition to this article. Camera settings for the latitude test were 12K, BMD Film, ISO800 and 5:1 compression ratio. Thank you pro media for the test camera by the way!

As mentioned earlier, we currently have a loaner RTX3090 GPU from NVIDIA (thank you!!) – as we always use a 2K timeline for the latitude test (to keep consistent with earlier tests) the RTX3090 has no issues whatsoever with the 12K files from the URSA Mini Pro – the GPU runs at 8% load with a memory usage of 10.8 GB. Really a joy to work with!
The Standard Studio Scene – Latitude of the URSA Mini Pro 12K
As you may have seen in recent articles, we now also test overexposure in our standard studio scene. Adjusting the studio lights, we set a base exposure of around 60% luma value (for BMD Film without grading) in the waveform for the face of our subject, in this case my dear colleague Jakub. Then we open up the iris of the lens (we used the ZEISS Compact Prime CP.2 Super Speed 50mm T1.5) until the skin starts to clip on the forehead.
From there we successively underexpose the scene by closing down the iris of the lens until T8.0, and then we adjust the shutter angle to lower values from 360° to 180°, 90°, 45°, 22.5° and 11.25°.
In post, using DaVinci Resolve 17 Studio we bring back the over- and underexposed files to our zero exposure level.
This so called latitude test really shows how well a camera retains colors and details when over- or underexposed, brought back to base exposure.
Highlight Recovery: In this special case with the URSA Mini Pro 12K, we deliberately started to partially clip the forehead already at T2.0, and then opened up the iris one stop further to T1.5 to check if the highlight recovery option in DaVinci Resolve can recover clipped color channels (available on all Blackmagic cameras if you shoot in BRAW).
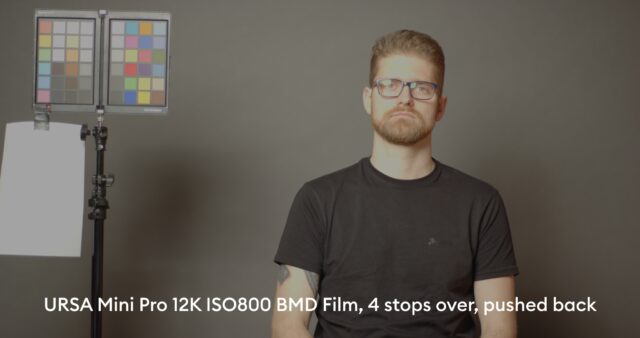
4 stops overexposed and brought back to base exposure
As mentioned before, at T2.0 or 3 stops overexposure and brought back, Jakub’s skin starts to clip. Now pushing it one stop further, here is the image at 4 stops of overexposure (T1.5) – without highlight recovery. As can be seen, on Jakub’s forehead the skin massively clips. Also, the color patches on the Datacolor Spyderchecker have partially clipped:
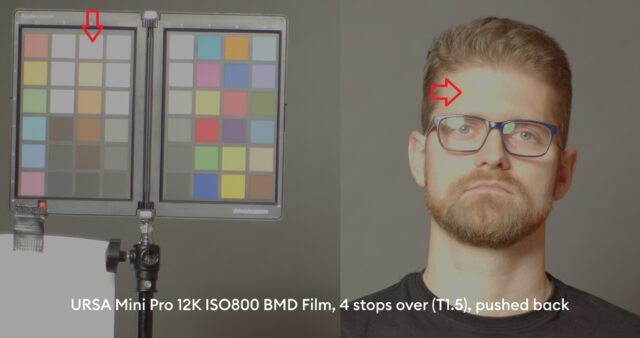
Let’s have a closer look at the color patches and Jakub’s forehead by zooming in 200%. The two red arrows show the clipped areas:
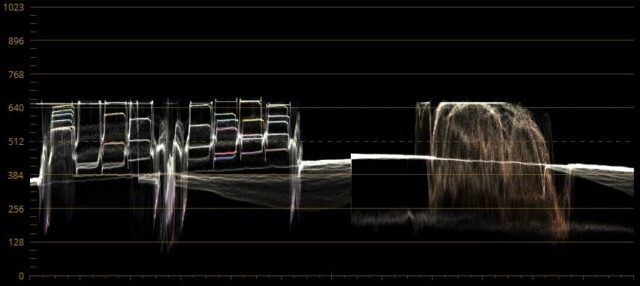
Now, the million dollar question: can the “Highlight Recovery” option in the RAW tab in DaVinci Resolve recover details?
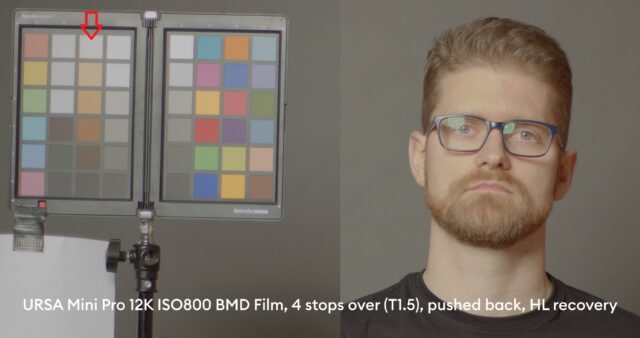
4 stops overexposed with “Highlight Recovery” – well, as can be seen in the image below, the algorithm which tries to reconstruct color channels is doing quite a good job – patches of the color checker are reconstructed and Jakub’s forehead has improved. However, the color accuracy suffers quite a bit – skin tones are yellow with no differentiation and patches are not accurately recovered – when compared to the base exposure scene, see below.
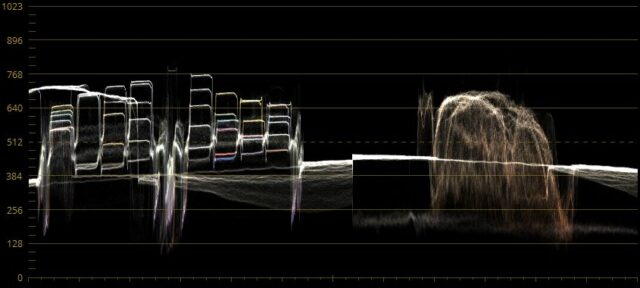
Have a look at the base exposure scene, especially how nuanced the color patches are (on the left side for the skin colors) and the tonality on Jakub’s forehead:
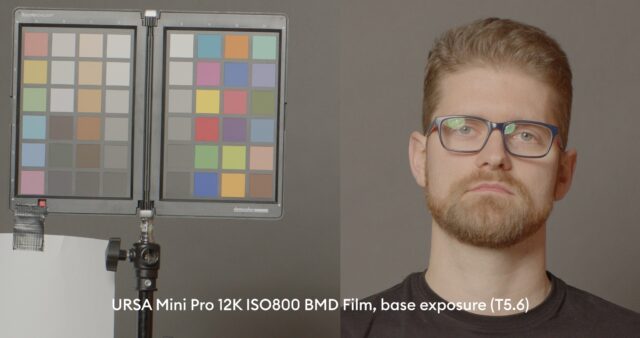
3 stops of overexposure, pushed back – without highlight recovery, at T2.0 Jakub’s forehead starts to clip at 3 stops of overexposure, also again the left side of the color checker shows partial clipping:
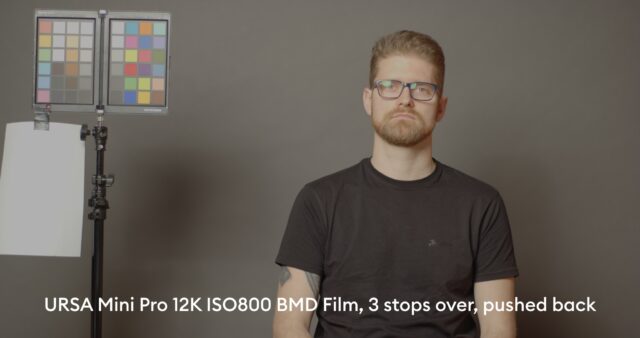
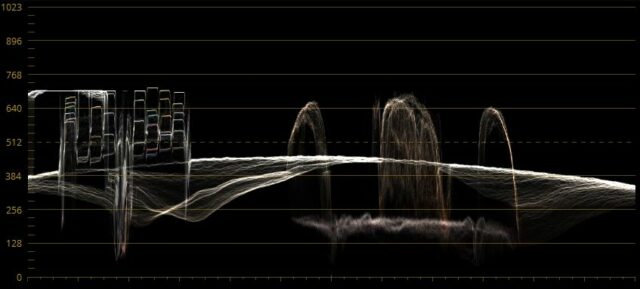
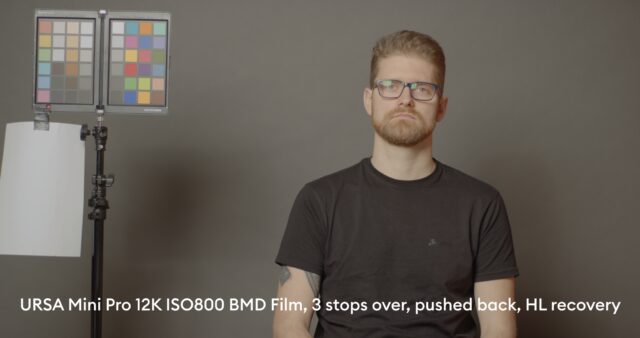
Using “Highlight Recovery” – on the 3 stops overexposed image we can see that all color channels are reconstructed properly now on the color checker as well as Jakub’s forehead:
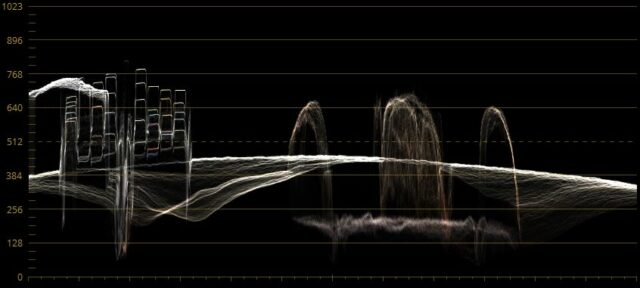
Here you can see the power of highlight recovery – even thought the scene started to partially clip, all colors can be brought back with very good accuracy. But as demonstrated on the 4 stops overexposed scence, highlight recovery has its limits – which was to be expected.
Now you know why we do not count highlight recovery when measuring dynamic range – color accuracy suffers. HL recovery is more of a bonus feature that helps you to get away with a partially clipping scene. E.g. if you want to bring back a clipped sky, you can use that feature in conjunction with desaturating your highlights to avoid funky colors while still creating a nice highlight roll off. This is exactly what the RED KOMODO is doing with it’s in built highlight recovery feature. See our article here.
Now, reducing the exposure levels to 3 stops under we start to see quite some noise and a color shift towards pink in the scene:
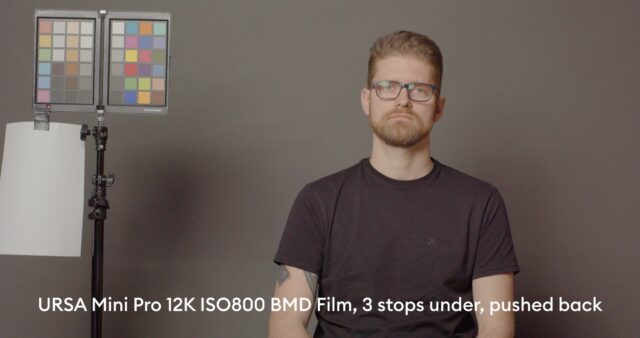
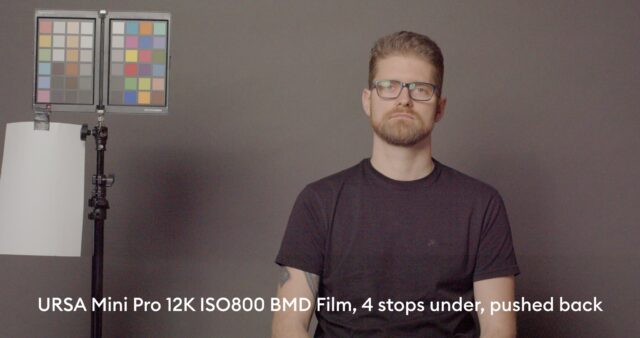
At 4 stops underexposure and brought back the image becomes pinkish and heavy noise is present. Also, horizontal lines appear in the image. By the way, in case you ask, there is currently no option for “black shading” or “Sensor calibration” in the camera.
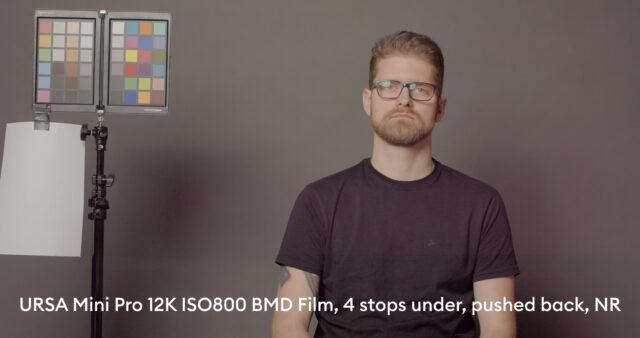
As the noise is very finely dispersed, noise reduction (DaVinci Resolve) helps to save the image – but the horizontal line in the lower part becomes more obvious. I have no explanation for this darker part of the image below the horizontal line. It looks like a flicker phenomenon (under the 50Hz studio lights), shutter angle was at 45°. However, in the camera setup menu, “Flicker Free Shutter” was set to 50Hz – so there should not be an issue here. Also, I did a second set of shots 15mins later and this phenomenon was the same:
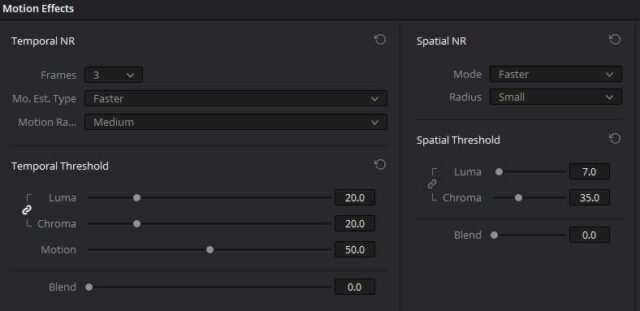
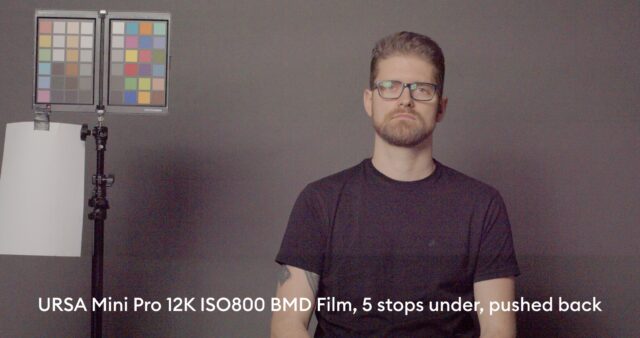
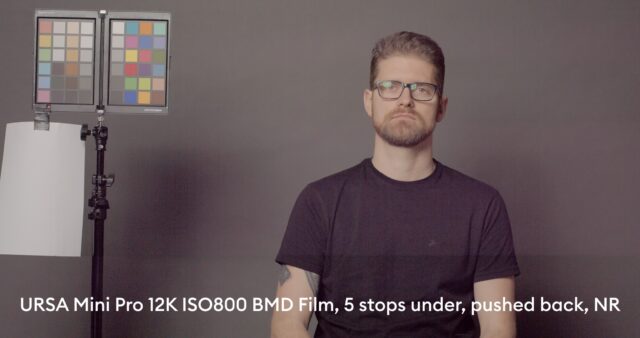
And finally, just for reference the 5 stops underexposed image, brought back. The first image below is without noise reduction, the second is with noise reduction. Resolve NR settings are in the third image below.
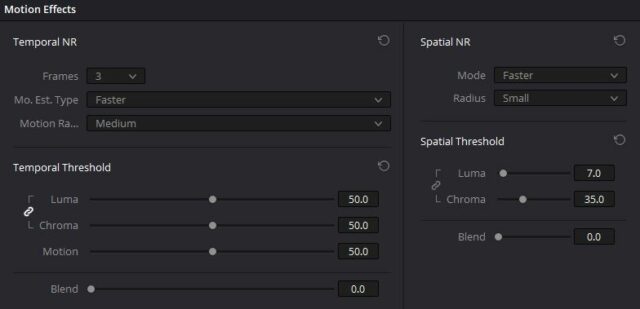
As you can see above, heavy temporal and spatial noise reduction was used in DaVinci Resolve, nevertheless the image cannot be saved as now also vertical stripes are appearing in addition to the more pronouced horizontal line in the lower part of the image. The limit clearly has been reached.
Summary
The URSA Mini Pro 12K is a very special camera. It’s monster 80 megapixel image combined with the high frame rates opens up new opportunities for reframing in post but there is very little compromise in the classical disciplines – dynamic range, rolling shutter as well as latitude: 7 stops of exposure latitude are available in our very demanding studio scene – a good result!
For comparison, in the same sensor class a Canon C300 Mark III is definitely better – showing almost 8 stops of exposure latitude – but this sensor “only” captures 8.8 megapixels (in 4K DCI).
Hence, as usual it’s all about picking the right tool for the job – but you cannot go wrong with the URSA Mini Pro 12K.
Have you used the URSA Mini Pro 12K yet? What are your experiences, and how are you using it? In the studio, in the field ….? Tell us in the comments section below.
