Media management and organizing footage are essential to video editing. Here are five different styles of workflows that you can use in any NLE. Which approach suits you the best?
As you embark on a video editing project, you are at the beginning of a long journey of editing decisions. But before you can get the show on the road, you will first have to start with your media or file organization process. And in some ways, the clip organization workflow will have a major impact on the rest of your edit, how much time it takes, and whether the process is enjoyable or frustrating.
Prep work
For example, you could choose to exert a lot of effort at the beginning of the workflow, by organizing and categorizing your media, filtering out your highlights or selects, and ensuring that all your clips are prepared. That way, when it comes to laying down your edit, your creative juices can flow unencumbered. It’s sort of like mixing all your paints in advance, creating the perfect palette, and then diving into a purely artistic state of creation.
Alternatively, you could skip the preparation process altogether, and choose to dive right into editing the story. You save a lot of time at the beginning, but you’ll also be going back to the source footage over and over again, skimming through the junk repeatedly as you look for those little gems that would fit perfectly in your rough cut. (If only you can find that one clip you recall seeing.)
For this article, we’ll focus on a hypothetical visual project, like a music video, commercial, or promo. There are many ways to organize interview footage and voice over in a project that involves an audio story, such as transcription, writing a paper edit, and building a radio edit… but we’ll save that for another discussion.
So without further ado, here are five approaches to a video editing organization workflow.
1. Just Begin Editing
This is the equivalent of riding a motorcycle without a helmet. It might feel really good at the time, but eventually your head is going to hurt.
In all seriousness, there are certainly times when the no-organization approach makes sense. You’re on a tight deadline, you’ve either got not enough footage or way too much, and the final product is only going to be a short video anyway. So why take the time to organize or categorize your footage, when it might be more efficient to start editing right away?
For example, you may have 10 hours of footage, but you’re tasked with editing a 30 second simple promo. So all you would need to find is maybe 10 decent shots, create a super rough cut with the right vibe and pacing, and plan to improve the video with further iterations. When you have a good first cut, you can go back and look for better clips to replace the first round of clips.
If you’re happy with the rough cut, export and call it “v1”, and send it off to the client. They will likely suggest specific clips to replace the footage you’ve selected anyway. But this way you’ve arrived at a rough edit very quickly, and now you can spend time finessing the final edit.
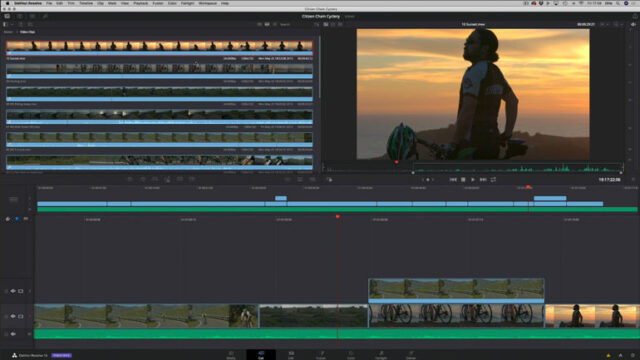
This style of editing is becoming more the norm, thanks to some advances in video editing hardware and software. In the MZed course The Definitive Guide to DaVinci Resolve by Ollie Kenchington, there is a lesson that specifically illustrates how the whole new “Cut Page” is specifically designed for this type of quick and dirty rough cut editing. Watch that lesson now.
We’ve all been there, so there’s no shame in the unorganized editing workflow if it makes sense for the project. For more complicated edits, this approach can quickly become a nuisance as you have to keep going back through your rough footage to find usable clips. But when it works, it works.
2. Organize with folders
Before you can start to lay down a story with reckless teenage abandon, you at least need to figure out an approach to importing or ingesting your footage. If you’re only using one camera on one media card, you could simply import everything into your NLE straight off the card, and call it a day.
But if you’re using multiple cameras, footage from different shoots, a variety of source material, or you prefer to backup your media to a drive first – before importing into your NLE – then you’ll want to consider organizing your footage at the file/folder level.
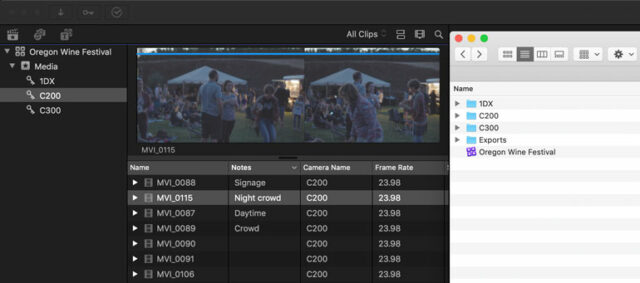
How do you do that? It’s easy, you just need to create a system and then stick to it. For example, you could create a folder for each day during the shoot. Or a folder for each camera – whether you call it A and B-camera, or the name of the camera model.
In addition to a bare-bones organization system, you could also pick and choose your favorite clips and copy/paste them into a Selects folder. And you could rename the files with descriptions of what’s inside.
The best part about the folder organization system is that it’s incredibly simple, doesn’t require any software, and anybody who comes across your project will be able to make sense of the media clips, even without opening up an NLE.

On the other hand, copying and pasting clips into different folders can use up unnecessary hard drive space, and at a certain point, you may lose track of which files are the original media clips. So, using the folder system with subjective naming conventions may not work for you. But at the basic organization level, I’m a big believer in creating a folder system before importing media into an NLE.
And in some software, the folder labels will follow the media organization within your NLE. For example, in Final Cut Pro, the folders become Keywords within the Event.
3. Use your NLE organization system
Here we arrive at the official recommended system to prepare your footage for editing – using the organizational tools that are built into your video editing software. The tools are only getting better, so you might as well give them a chance.
Whether they’re called bins or events or folders in your NLE, start with a basic system to arrange your media in a way that makes sense for your project. Then, apply meta information to your clips – either one by one if you want to give each clip a unique description, or apply meta tags to a group of clips.
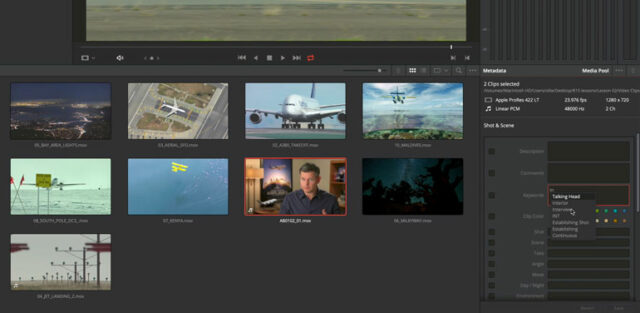
For example, you may have your shoot days as your folder system, and within them, you would have tags or keywords to describe the clip’s technical information, like camera, frame rate, and resolution, followed by organizational details like what’s inside the clips.
If you’re using DaVinci Resolve, you can learn more about managing footage in the Media Pool in this lesson from the Definitive Guide to DaVinci Resolve. Adobe Premiere also has an assortment of organization tools to help manage your source files, including bins and sub-bins, color-coded labeling and metalogging, and creating subclips. And if you use Final Cut Pro you can experiment with Smart Collections, working in tandem with the main organization system of Libraries, Events, and Projects.

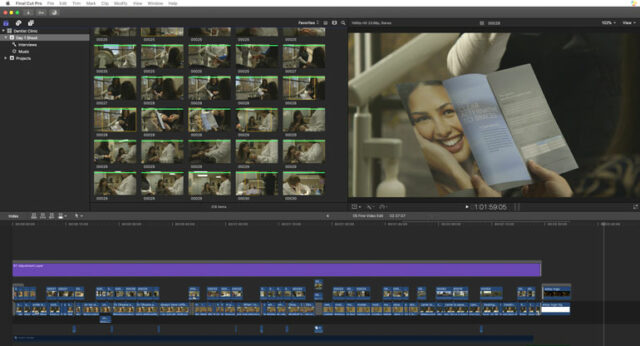
Once you’ve got your footage imported and organized in Final Cut Pro, here’s a great way to go through the footage and highlight your selects. The built-in system for creating Favorites – or subclips – is a quick way to go through all your footage once and form individual clips out of every usable shot. This is one of my favorite approaches to beginning the editing process because you only have to watch footage once, and when you’re finished you have this beautiful palette of good shots that you can drop into your timeline or project. You’ll never have to go back through the unusable shaky footage again – but don’t worry, it’s all still there if you want it.
Final Cut Pro also has more custom methods of organizing footage, using Keyword Collections, which are like bookmarks to your source clips or to portions of them where a specific person or theme appears. But whether you use Final Cut or another program is not important – each video editing software has its own built-in clip organization system to help you manage your media before you begin editing.
4. Let Artificial Intelligence sort your footage
New to the video editing scene is artificial intelligence, and if you have the right type of project, AI can actually be a powerful and useful tool for organizing your footage.
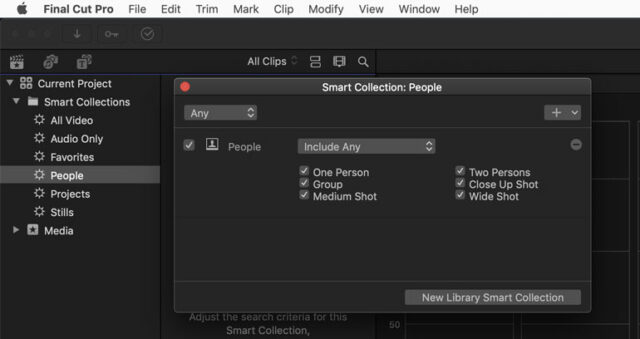
The new People Detection tool in DaVinci Resolve is an innovative way to organize clips based on facial recognition. It utilizes deep machine learning to find similar faces and then group them into smart bins, so you can quickly sort clips by whoever is in them.
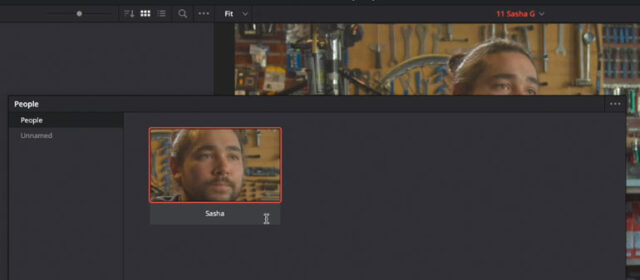
If you want to see Blackmagic’s neural network in action, Ollie Kenchington demonstrates how the People Detection tool works in this lesson on MZed. It’s quite remarkable, and sorting footage by subjects is a great way to start a video editing workflow.
5. Organize While Editing Multiple Sequences
Finally, we get to an approach to a media organization that really works for some video editors. Essentially, instead of spending time sorting through footage in bins or folders, here you would choose your best clips and start to place them in sequences or timelines.
It’s essentially the same approach to creating Favorites or Selects, but instead of building up a large palette of usable clips that will eventually be useful in an edit, this approach immediately starts to place clips next to each other so you can start to watch the flow of clips and begin building your potential sequences.
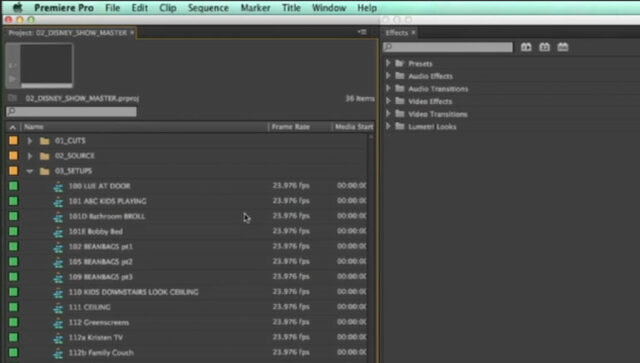
In the Workspace and Workflow lesson in The Cutting Edge course, Saturday Night Live editor Adam Epstein shows us why and how he has been using this method for all of his rapid turnaround projects. You’re still going through all your source footage just once, as you create your subclips with in and out points. But instead of placing the subclips in a giant bin, you start to lay them down in mini sequences.
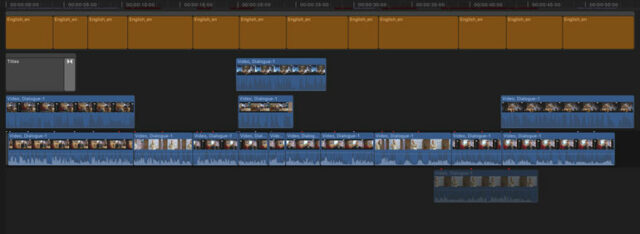
Here’s where the beauty of this approach comes in: as you sort through multiple takes of similar clips, now you can stack each one above and below each other on separate tracks. Then, as you create short sequences, you can temporarily turn on/off the different clips stacked above and below each other, auditioning them to see what works best.
You can also create multiple sequences and arrange your subclips using another level of organization. For example, you may have a sequence for “Best Clips,” one for “Master Shots,” and another for “Closeups.” You may also have a sequence for your slow-motion clips, so if you shot at 60fps, for example, you can now retime your footage and preview them correctly as you’re sorting through them.
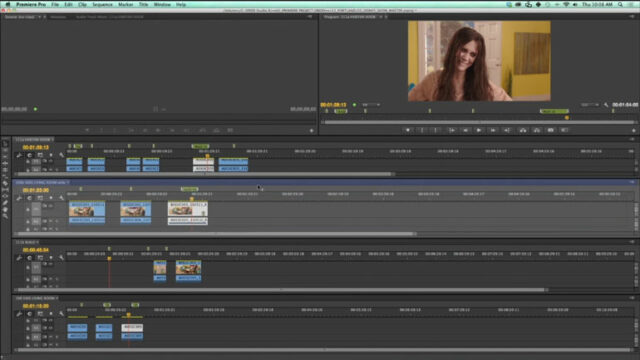
In his Adobe Premiere layout, Adam creates lots of sequences, each for a particular scene he’s working on. And then he rearranges his workspace so that the sequences are stacked. That means he can preview multiple sequences and move clips around from sequence to sequence.
The best part about organizing in sequences – or timelines – is that you’re starting to build your edits as you’re sorting through footage. You might quickly move some clips around to see how they flow next to each other. Or you may get a dose of inspiration and suddenly feel like editing a section of your rough cut.
Most importantly, you’re not subdividing your editing workflow into a machine-like system of mechanical organization followed by the creative editing part. With this approach, you’re tapping into both the science and art of video editing as you go through your footage, allowing yourself to be efficient and creative at the same time.
What’s your favorite way to tackle footage organization before you begin editing? Let’s hear your favorite workflow below!
