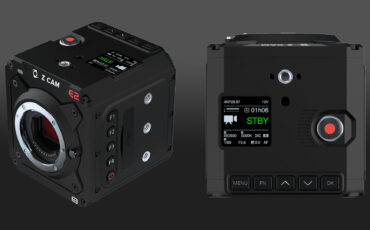
Z CAM E2-F6 Review, Lab Test and Sample Footage: A Visit to the Zoo Schoenbrunn
During this last year, I was able to review the Z CAM E2 and E2c flagship cameras – both sporting a micro four thirds sensor. And while I found the Z CAM E2 to be a very very capable camera, I was always curious to get my hands on the fullframe Z CAM E2-F6 camera. Up to 6k from a big fullframe sensor with ProRes internal recording options – wow! How will it fare in comparison to other full frame cameras that we recently reviewed? Read on …
The Z CAM E2 flagship cameras from the Chinese manufacturer Z CAM have made some waves in the filmmaking community by offering a unique combination of beautiful images, capable codecs (internal ProRes recording), high framerate options and minimalistic body design while retaining very attractive prices.
The Z CAM E2-F6 arrived in the cinema5D headquarter a while back, and looking at the specs I couldn’t wait to get outside and shoot some stuff! It was the first weekend (mid June) that the Austrian government lifted some restrictions after the complete COVID-19 lockdown, and the Vienna Zoo reopened again – that was my chance to grab some sample footage.
Just a quick word on the structure of this article – I will cover the real world footage from the zoo first, then move to the lab part where rolling shutter, dynamic range and latitude measurements will be covered.
Filmmaking for Photographers
Shooting at the Vienna Zoo
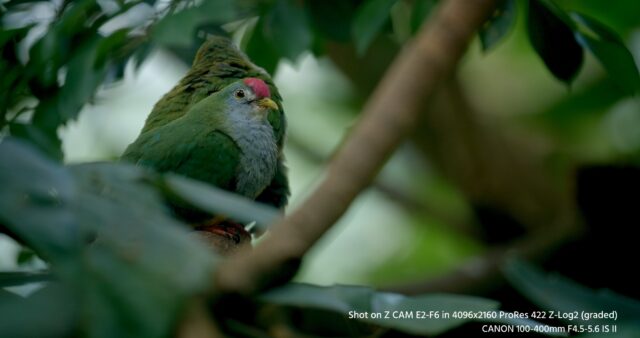
For the sample footage I decided to shoot full-frame 4k DCI 4096×2160 in ProRes 422, using the Z-Log 2 profile (noise reduction “off”) – 6k would eat up too much space and supersampled 4k should look gorgeous (yes, it does)!
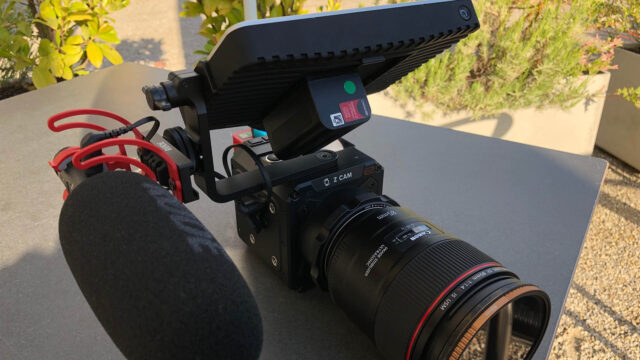
I built up a minimalistic setup with a 7″ SmallHD FOCUS monitor and the Rode VideoMic NTG, and brought 3 lenses along: a Sigma 24mm f1.4 ART, a Canon 85mm f1.4 L IS USM and a Canon 100-400mm 4.5-5.6 L IS II USM. The body of the Z CAM E2-F6 has a lot of mounting options so a cage is not really necessary.
It was clear for me to shoot handheld (I hate tripods), and here the optical image stabilization of the two Canon lenses was very helpful, as the Z CAM E2-F6 does not offer any kind of image stabilization.
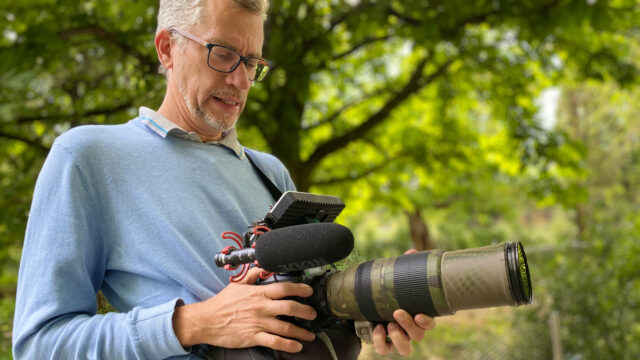
Pulling focus was done manually, as I found the autofocus options of the Z CAM E2-F6 not reliable enough.
While I was compiling the footage for this review, I was very happy to see that the Z CAM E2-F6 ProRes files were really easy to grade – no LUT was used, just some saturation and contrast was added using the lift, gamma and gain controls in DaVinci Resolve and voilá: out of the box beautiful colors and super detailed images. That’s very much the same experience like with the Z CAM E2 flagship camera that I reviewed about a year ago.
Battery life was really impressive – a Sony NPF 970 got me through the whole afternoon (5 hrs on and off) shooting 45mins of footage. I left the camera “on” 70% of the time, as I found the bootup time of 11 seconds too long to quickly grab a shot.
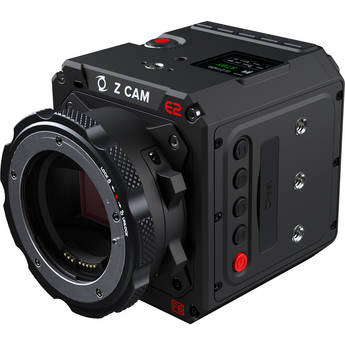
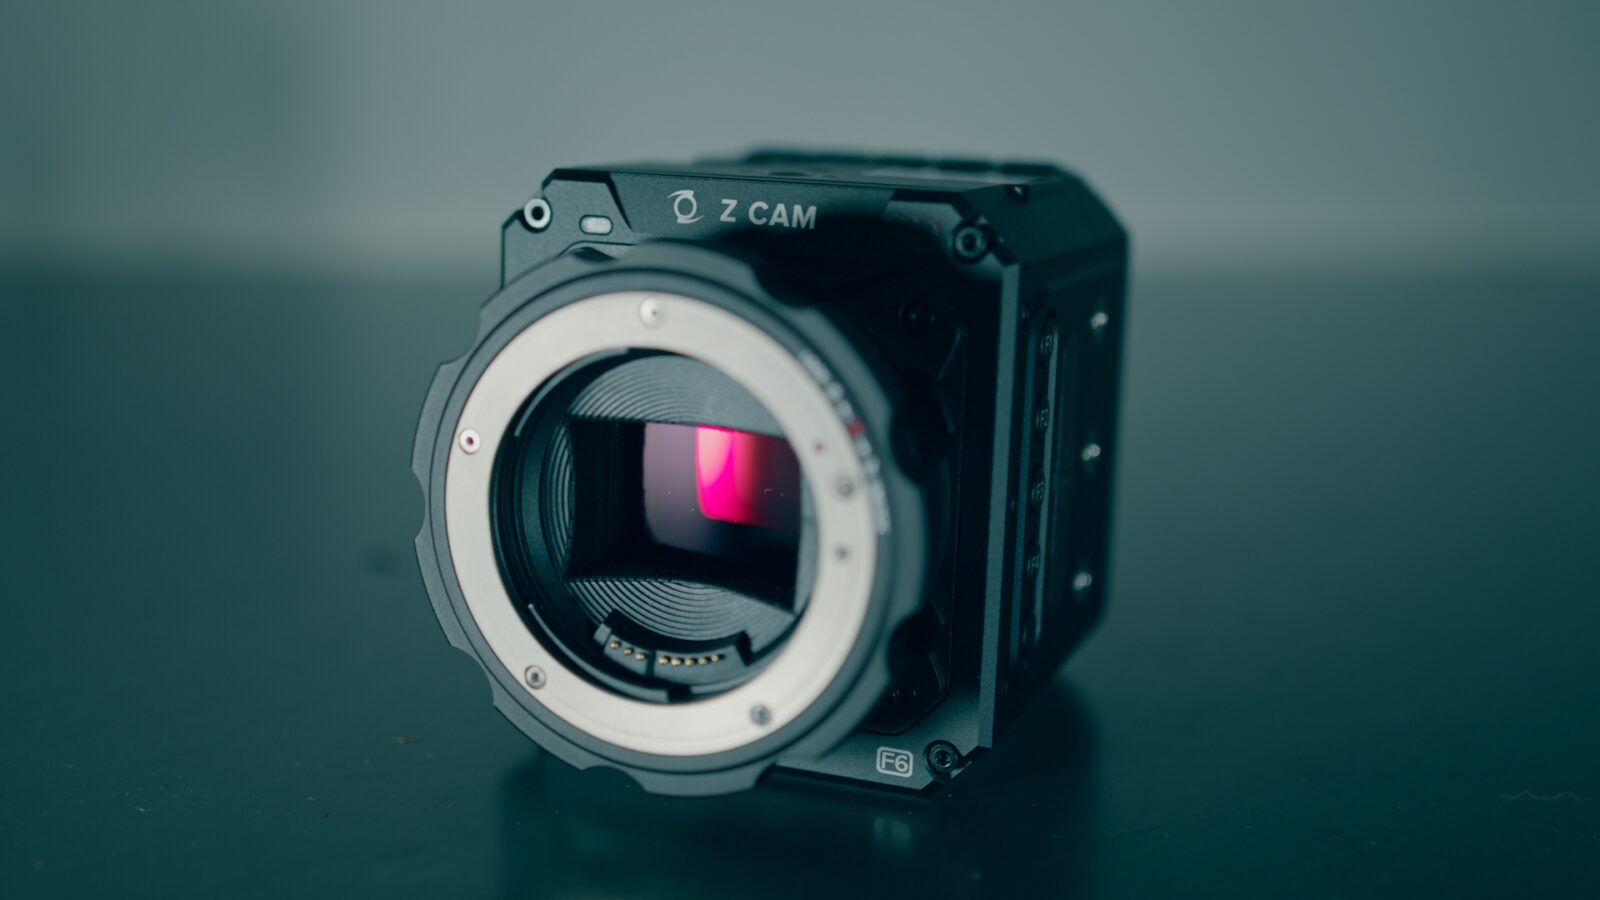
The Z CAM E2-F6 sports a locking EF mount (interchangeable to EF, PL, M) and an optional eND module (for EF and PL mount, 1.7~6.7 stops, to be purchased separately – not used in this review).
The locking EF mount is very professional, no play between lens and mount, feels very solid. However I’m personally not the biggest fan of a locking EF mount as it is quite difficult to change lenses without having the camera on a tripod. Not ideal for a one-man band.
The buttons on the body are now different and much improved – nice!
Last but not least, the high framerate options are very impressive – up to 4k 120fps are possible in Super 35 cropped to 4096×1728 resolution (H265):
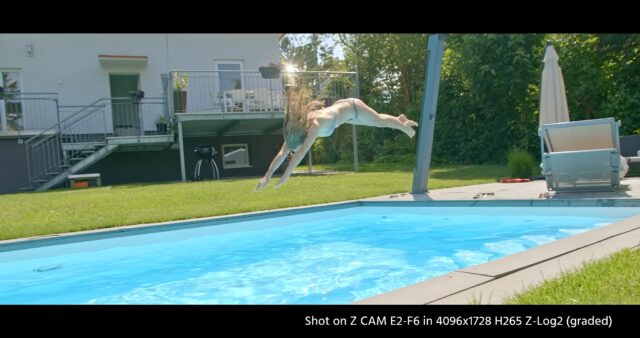
Z CAM is very active in constantly improving features of this cam, so Firmware 0.96 is out in the meanwhile, which offers the following improvements:
- improved auto gain performance
- Boot up time reduced to slightly below 10sec.
- 12bit ProRes RAW recording over HDMI (with the external ATOMOS Ninja V) in 4K up to 60fps and 5.8K up to 30fps
With that positive shooting experience, I was eager to run the Z CAM E2-F6 through our standard lab test procedures. Firmware version was still 0.94 for all footage of this review, including the lab test.
Running the Z CAM E2-F6 through our Lab
Rolling Shutter Performance
First up is the measurement of the rolling shutter. To test this, we are using a strobe light at 300Hz, which produces horizontal black and white stripes as a result of the readout nature of CMOS sensors.
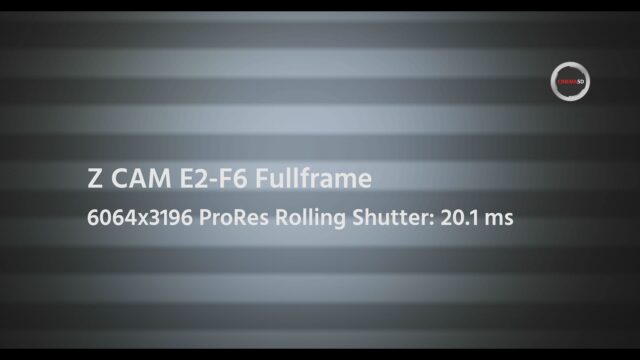
In fullframe 6k mode, 20.1[ms] of rolling shutter are measured (17:9) – this is quite a good result in comparison to other fullframe sensor read out times – only topped by the Canon C500 Mark II at 15.8ms.
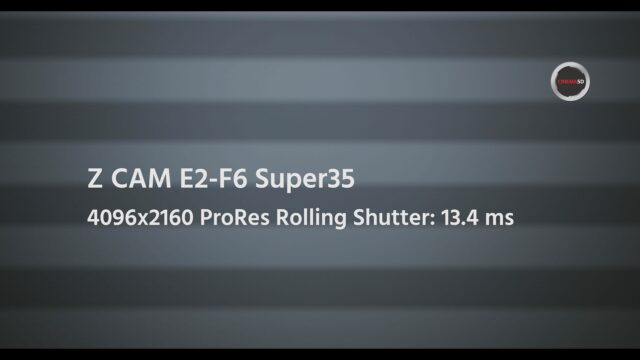
In Super 35 mode (APS-C crop) the rolling shutter result is 13.4 [ms].
Dynamic Range at ISO400 and 2500
If you are interested in how we do our dynamic range tests, please have a look here.
All the lab footage including the underexposure test were shot with internal noise reduction set to “off”.
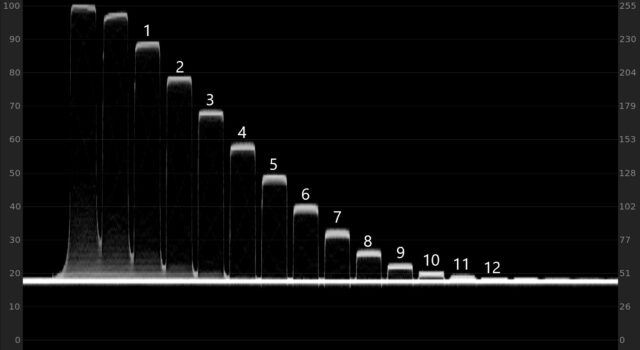
First, lets have a look at the waveform plot of the Xyla 21 stepchart – about 12 stops can be identified:
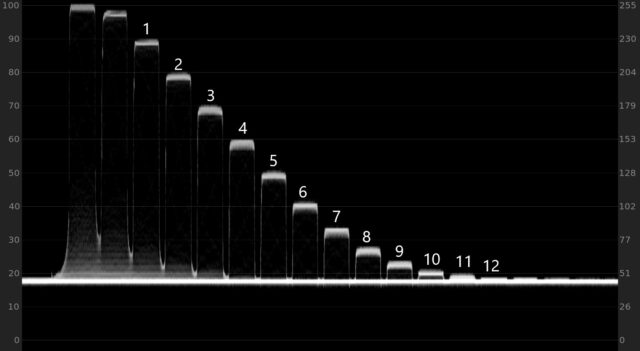
Looking at the waveform plot, a few things come to my mind: a) the noise floor is very clean (seems like a lot of noise filtering is going on to uncover the lower stops), b) it sits at a rather high Luma value thereby wasting space of the 10bit container (close to 20%), and c) the 12th, 13th and even a hint of the 14th stop are visible, but there is no amplitude difference (or code values) between them.
Hence, if you try to extract information from this (dark) part of the image, banding should occur – or in other words, you cannot really dig into the shadows. Hence, underexposure is a problem with this camera. More on that later in the underexposure results.
The IMATEST analysis of the stepchart footage confirms the findings above:
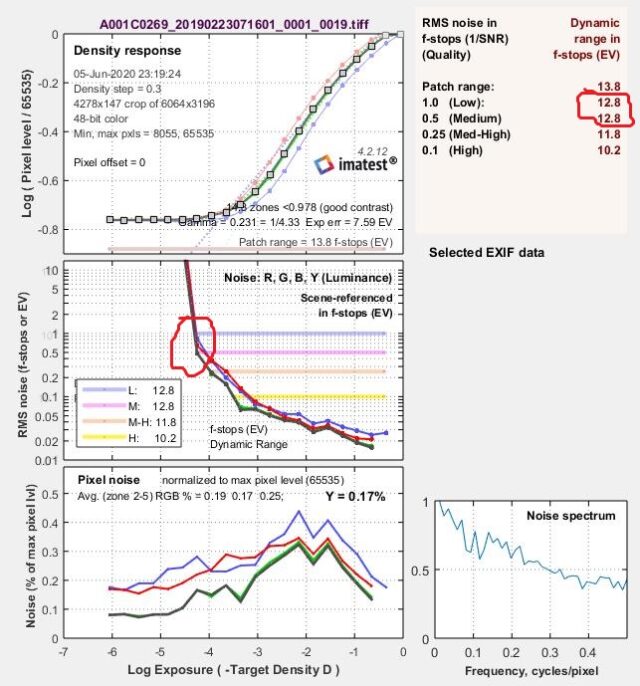
IMATEST obviously gets confused and gives the same result for a signal to noise ratio (SNR) of 1 and 2. Hence, we cannot trust this result. Also, no further full stops beyond the 13th stop are identified (see red circle in the middle graph to the right above).
Because I still wanted to create a reference, I used a real life high dynamic range scene and shot this scene side by side with my BMPCC6k. The highlights were at the cusp of clipping on both cams, and in post I pushed up the shadows to reveal details:
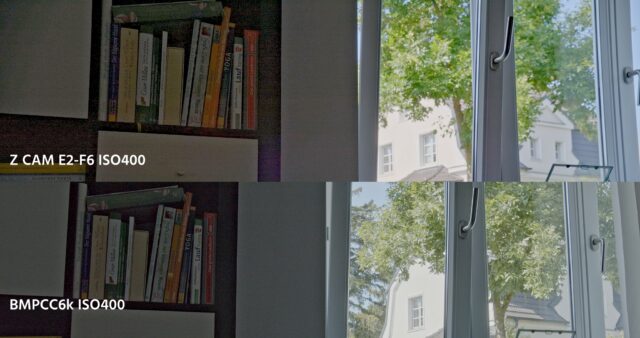
We rated the BMPCC6k at 11.8 stops (SNR = 2), and as the shadows looks definitely cleaner than the Z CAM E2-F6 (albeit close) I would rate the dynamic range of the of the Z CAM E2-F6 at 11.5 stops.
This value is more than enough for most shooting scenarios, but definitely on the lower end of recent fullframe sensor cameras. The Panasonic S1H for example shows 12.7 stops at SNR = 2 in 6k mode in our tests.
The Z CAM E2-F6 features a dual native ISO sensor at ISO 400 and 2500. Rerunning the lab tests at ISO 2500 revealed a very similar result like with ISO 400. The waveform looks almost identical, and also at ISO2500 IMATEST cannot provide a reliable result:
Latitude (underexposure) Test of the Z CAM E2-F6
We have a standard studio scene were we expose my colleague Nino’s face at 60% luma value on the waveform monitor. This gives a base exposure of F4 at 360° shutter angle, 25fps.
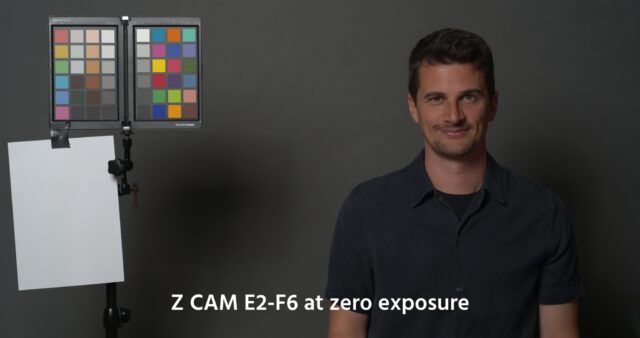
From there the shutter angle is successively decreased to 180°, 90°, 45°, 22° and finally 11.25° – resulting in 5 stops of underexposure.
In DaVinci Resolve (16.1) the respective images are pushed back again to the zero exposure level, using the lift, gamma and gain controls.
This test reveals a lot of insight how well a camera retains colors and details in an underexposure scenario.
Underexposure Test using ProRes422, 6064×3196 Z-Log2 ISO400
So, let’s jump ahead to the 3 stops underexposed scene:
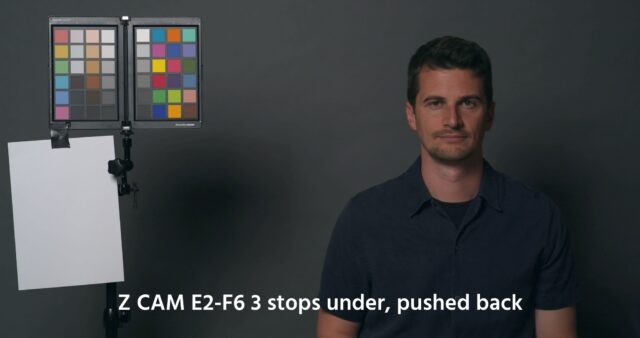
At 3 stops underexposure (pushed back to zero) the image looks quite good, but some noise is already showing up. The image become a bit greenish, and signs of banding / posterization are already visible in the dark areas of the shot. Have a look on the right side behind Nino, or the dark spot below the color checker to the left.
This is the issue I mentioned before, that the lower stops have no amplitude difference (code value difference), thereby posterization is happening.
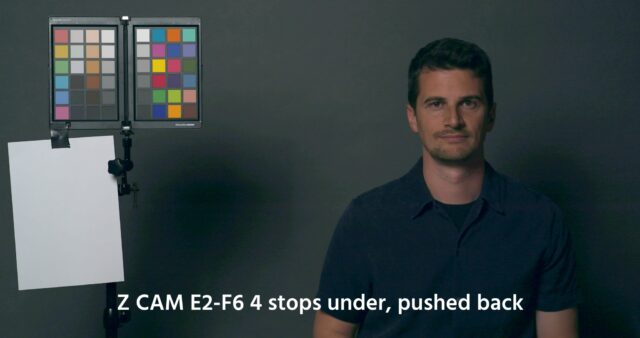
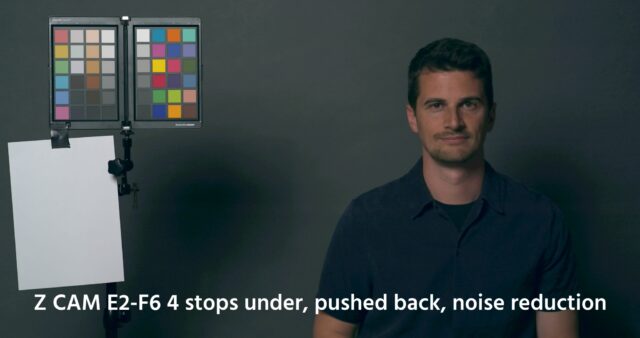
At 4 stops under, the posterization becomes even more pronounced obviously. The noise becomes excessive, to an extent that noise reduction cannot save the image – not really usable any longer:
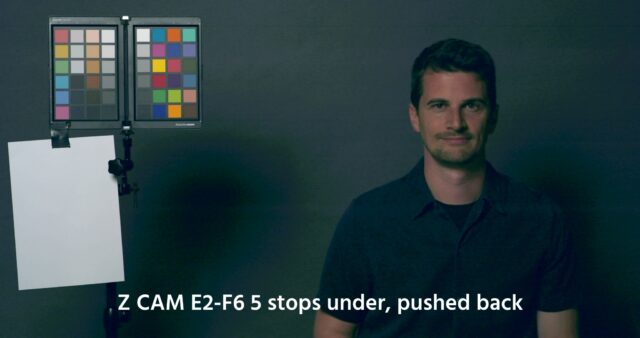
Just for reference, here is the same shot at 5 stops of underexposure, pushed back:
Underexposure Test comparing ProRes422, 6064×3196 Z-Log2 ISO400 to ZRAW
When I analysed the ProRes underexposure results at home in front of my computer, I wondered if using 12 bit ZRAW instead of 10bit ProRes would improve the banding / posterization as it would provide more code values between the stops.
So I set up the same scene a few days later and also used half stop increments to see if I could generate a usable image beyond 3 stops underexposure. I used the PremierePro Plugin from Z CAM to develop the ZRAW files, which works very well. Exposure is adjusted by changing the ISO value in the plugin.
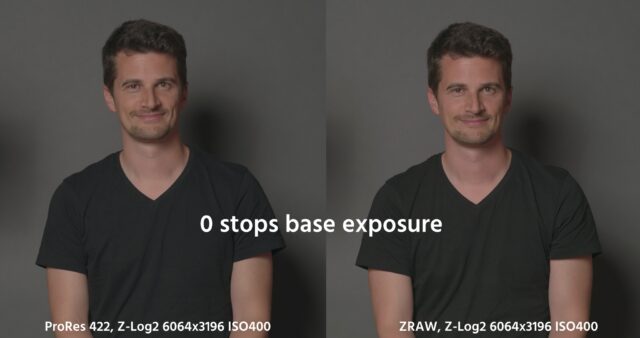
Fast forward to 3.5 stops underexposure, pushed back:
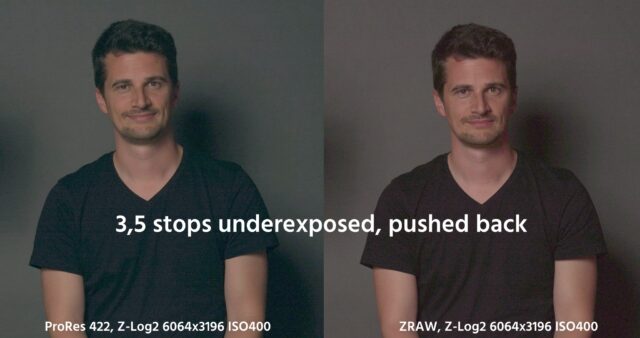
As can be seen above, ProRes422 becomes greenish again and shows the same posterization as before. ZRAW on the right hand side retains colors in a better way, but shows the same posterization as ProRes. Also, nasty speckles of chroma noise are visible which cannot be removed by noise reduction, have a look below:
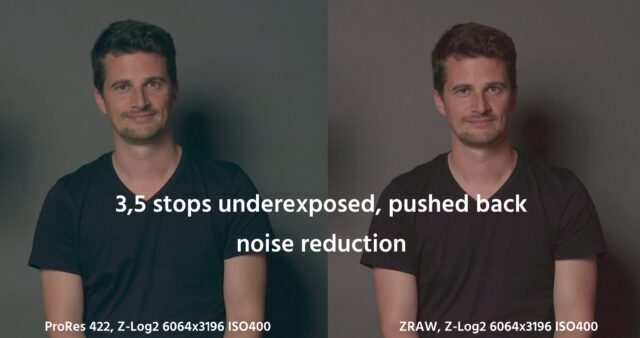
Have a look at the dark side of Nino’s face for example. The chroma noise of ZRAW helps to hide the banding, but it is there as well.
Just for reference lets have a look at 4.5 stops of underexposure:
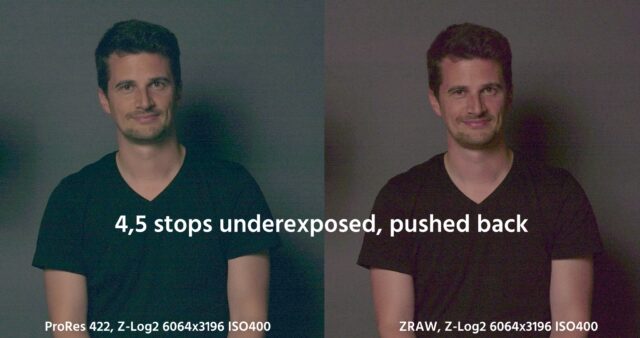
Again, ZRAW retains the colors in a better way but the chroma noise kills the image. I personally like the ProRes images more – they look better to my eye, despite the banding.
Summary
All in all, the Z CAM E2-F6 offers a very impressive set of features – internal ProRes recording, up to 6k resolution, fullframe, high framerates – combined with a beautiful color science. You can also download the Z CAM app on your smartphone which offers camera control and a live preview of your footage with little latency. Also, there is a really helpful Z CAM community on facebook in case you have questions – the CEO of Z CAM, Kinson Loo often answers questions himself.
Z CAM constantly releases new firmware updates, with the most recent one (0.96) allowing ProRes RAW recording via HDMI and the Atomos Ninja V.
The lab test showed rather average results for dynamic range and underexposure, but revealed one very important issue: due to the fact how the lower stops are distributed, banding / posterisation can occur quickly in underexposed areas of your shot. So this is definitely not a camera to shoot a moody low key scene (instead, always try to ETTR – expose to the right of your histogram).
All in all, for the price of 4000USD you get a very capable cinema camera – although naked, without battery, or monitor and anything else, so choose carefully what you need and how you shoot. For the same price you get a Panasonic S1H or the recently announced Canon EOS R5 which both are ready to shoot out of the box and offer in body image stabilization of the sensor on top. The Canon R5 even offers a fullframe 4k 120 frames per second mode (as well as other goodies like 8k internal RAW recording).
But then you don’t have that beautiful internally recorded ProRes image which makes the Z CAM E2-F6 so special!
Have you shot with the Z CAM E2-F6? What are your experiences? Let us know in the comments below!
